Navigation: v1.3 Build 9825 |
Release Notes |
Install |
Upgrade |
Administration |
Reference |
API |
Glossary |
Archive
The Nodes tab holds information about the local node and all other nodes to which it is currently connected. You need to connect to a node before you're able to add it to a replication group. Use the Nodes tab to connect your different sites together.
Before you begin, check through the Access Control deployment checklist. Once you're confident that your system meets all the requirements, run through the following section to get SVN Access Control installed.
 Tip
Tip
1. Download the Access Control installation file "svnsec.tar.gz" from the WANdisco File Distribution website.
2. Create a home directory for the installation, e.g. /wandisco.
3. Extract the "svnsec.tar.gz" file to the wandisco folder.
4. The installation files are now in place, they are arranged in the following directory structure:
drwxr-xr-x 2 root root  4096 Feb 12 10:30 audit
drwxr-xr-x 2 root root  4096 Feb 12 10:53 backups
drwxr-xr-x 2 root root  4096 Feb 12 10:20 bin
drwxr-xr-x 7 root root  4096 Feb 12 10:37 config
drwxr-xr-x 8 root root  4096 Feb 12 10:20 lib
drwxr-xr-x 2 root root  4096 Feb 12 10:20 license
-rw-r--r-- 1 root root 26727 Feb  4 14:06 license.txt
drwxr-xr-x 4 root root  4096 Feb 12 11:01 logs
drwxr-xr-x 4 root root  4096 Feb 12 10:53 systemdb
drwxr-xr-x 4 root root  4096 Feb 12 10:20 utils
-rw-r--r-- 1 root root    24 Feb  7 12:37 version.txt
drwxr-xr-x 8 root root  4096 Feb 12 10:20 webapp
5. Copy your SVN Access Control license.key file into the config directory.
-rw-r--r-- 1 root root   267 Feb 12 13:53 deletionqueue.ser
-rw-r--r-- 1 root root   512 Feb 12 10:28 license.key
-rw-r--r-- 1 root root  3399 Feb  4 14:06 log.properties
-rw-r--r-- 1 root root   771 Feb 12 10:53 logrotation.ser
-rw-r--r-- 1 root root   579 Feb  4 14:06 mailconfig.properties
drwxr-xr-x 5 root root  4096 Feb 12 10:30 membership
drwxr-xr-x 3 root root  4096 Feb 12 10:30 prefs
-rw-r--r-- 1 root root  2727 Feb  4 14:06 prefs-template.xml
-rw-r--r-- 1 root root  1353 Feb 12 10:37 prefs.xml
-rw-r--r-- 1 root root 92160 Feb  7 12:37 reports.tar
drwxr-xr-x 3 root root  4096 Feb 12 10:30 scm
drwxr-xr-x 5 root root  4096 Feb 12 10:30 security
drwxr-xr-x 2 root root  4096 Feb 12 10:53 sessions
6. Enter the bin directory and run the setup, using the command:
./setup -msp.deployment
=======================================================================
WANdisco java processes will start with the following memory settings:

         -Xms128m -Xmx2048m -ea -server -Djava.net.preferIPv4Stack=true

Change the environment variable WD_JVMARGS if you wish to start java differently
WARNING: if the host does not meet these specified memory requirements, you will
encounter problems starting the WANdisco processes.
Continue,  Y or N ? [Y] : Y
Feb 12, 2014 10:30:06 AM org.nirala.trace.Logger info
INFO: Invoked from WANdisco installation at: /opt/wandisco/svn-security
[I] using specified port: 6445
[I] Starting SVN web installer

Point a web browser to http://10.2.5.124:6445/ to configure the product.
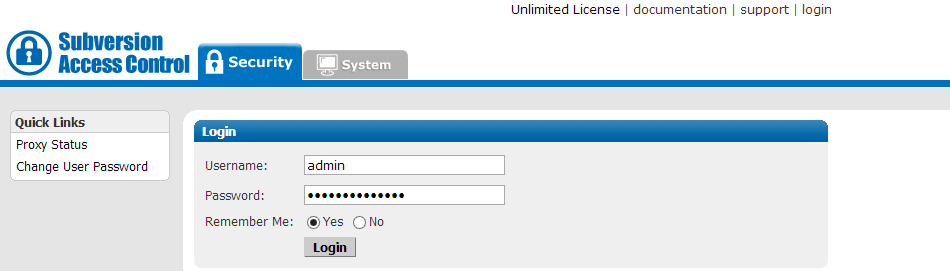
7. From a browser, enter the setup URL (http://<Server IP>:<port>). From the welcome screen, click Continue.

8. Read the WANdisco End User License Agreement, then click I Agree.

9. The next screen asks for a password to associate with the admin account username (which is "admin"). Enter the password again (to verify your entry) then click Next.

10. Next, you'll see a message about SSL being disabled by default (it's a good idea ot get up and running before enabling SSL or you'll have a harder time troubleshooting problems. If you can, leave the setup of SSL until after the installation has completed, in this case, click Next. If you need to setup SSL right away, tick the checkbox. You'll get a chance to enter the SSL details before you proceed to the screen in the next step.

11. On the SVN Security Agent Proxy Settings screen, enter the following details
Node Name: A name you will use for the Access Control server.
Node IP: The server's IP address
Bind Host: By default, this uses the wildcard 0.0.0.0 IP that binds to all network interfaces on the node. Read our Knowledgebase article about the benefits of using the wildcard IP
Admin Console Port By default this is 6445, allowing SVN users to continue without making change to their client setup.
Important:
(Linux/Unix) In order to use port 80, Access Control must be run as root.
Admin Console Port 6445 by default.
Reserved Ports A block of 10 ports are reserved for use by SVN Access Control. By default these are sequential, starting with the Admin Console Port, however you can specify out of sequence ports if required.

Click Next.
12. The next step automatically checks the MultiSite Plus Settings. First Apache is checked. If the httpd.conf file isn't found, enter its path into the Configuration File entry box, then click Reload Configuration.

If a problem is highlighted, you'll need to manually edit the httpd.conf file, then click on Reload Configuration to have setup check your changes.
SVN Executable: the fully qualified path to the SVN executable. Setup will try to fill this in automatically, otherwise enter it manually.
SVN Password FileThe full path to the SVN password file - this will also be referenced in the Apache config file.
Authorization File: Enter the path to the Authz file.
Restrictive AC mode: Access Control can now toggle between either a restrictive or additive mode for handling conflicting access rule:
MultiSite Plus replicator Node Name: Name of the node.
MultiSite Plus replicator Replicator Host: The IP/hostname of the node's server.
MultiSite Plus replicator API port :The port used to commincate with the MultiSite node.
MultiSite Plus replicator Admin Password :The password associated with the node.

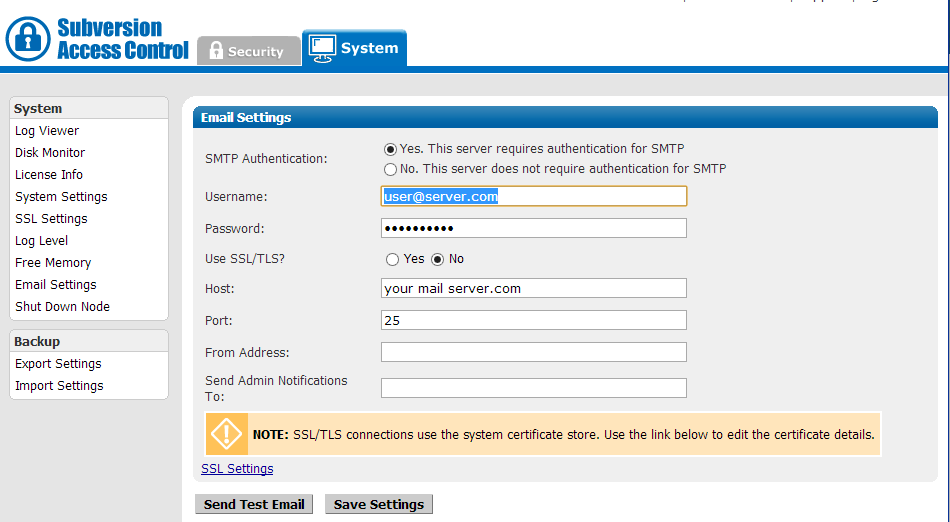
Click Next. Now enter your mail server details. these relate to your email relay server which SVN Access Control will use to send alert messages should there be any problems. You can choose to enter these settings later, in which case you can click Skip. If you enter your mail details you can verify they're correct by triggering a test email.
13. The setup is now ready to complete. Click Complete installation with these setting button to continue.

This section details with the running of SVN MultiSite Access Control.
When running SVN Access Control in MultiSite Plus Mode, a new screen appears which is used to control the settings that connect Access Control to your SVN MultiSite server(s).
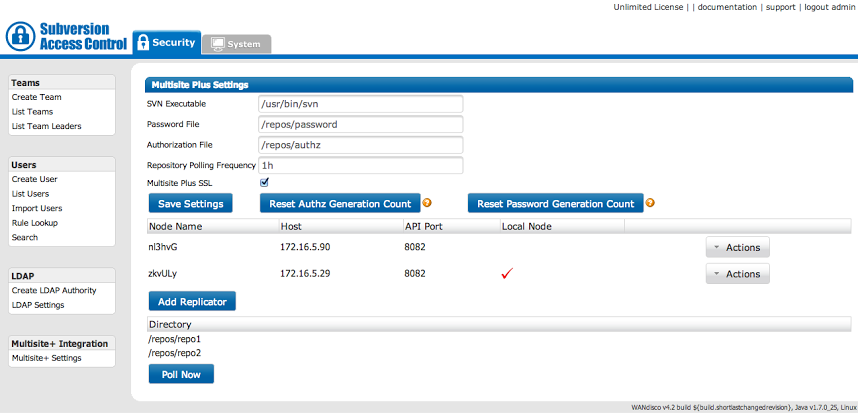
Access Control's screen for SVN MultiSite Plus integration
When Access Control has been configured for use in conjunction with SVN MultiSite Plus it features an extra settings screen, "Multisite+ Settings"
The Generic File Replication Script handles the final delivery for AuthZ and Password data for WANdisco SVN MultiSite Plus. Customers modifying this code assume all responsibility for the execution thereof. Please contact WANdisco support for more information.
 Running with both LDAP and locally managed users (mixed-mode)
In this configuration, be aware that the file replication of the local password file will stop, once LDAP is enabled. The "mixed mode" allows Access Control to run with both "locally defined accounts" and "LDAP defined accounts", at the same time. The Generic File Replication based password file delivery enables the "locally defined accounts" to authenticate so if it is not delivered (updated) then any new "locally defined accounts" will not be able to Authenticate via Apache. When LDAP is turned off the Local password file will once again update automatically.
/opt/wandisco/svn-multisite-plus/replicator/gfr
            bin
               postDeliveryAZPQ
            lib
            log
            var
The script handles the following duties:
The only argument allowed by the script is the file to be processed.
BD: review exit() for those that should be 42 (notification via replicator).While a failure of the Generic File Replication script is pushed to SVN MultiSite Plus, email notifications are not set up by default. You should use the Email Notifications tool to setup emails to your specific requirements. When setting up rules, select the Generic File Replication Error occurred event from the dropdown list.
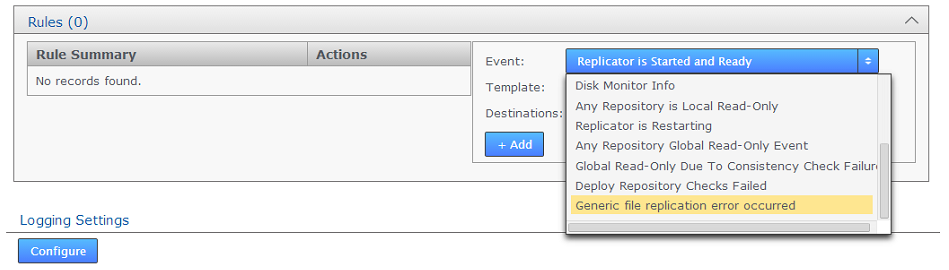
The specific notification information for GFR notifications:
The following section runs through the Access Control admin console, explaining the purpose and function of each part.
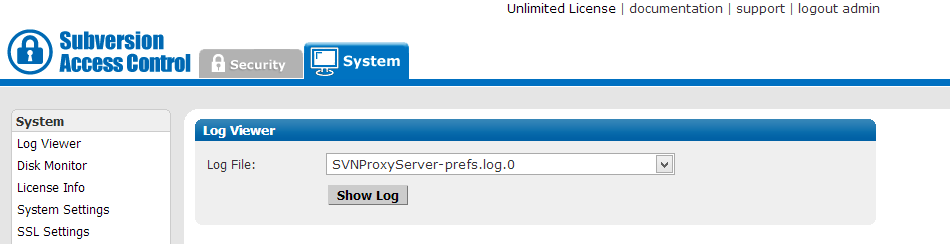
Proxy Status - Proxy Status Displays the node's status in the tab's main panel.
Change User Password - Follow this link to change the password of a User, it's not used for changing the Admin password.
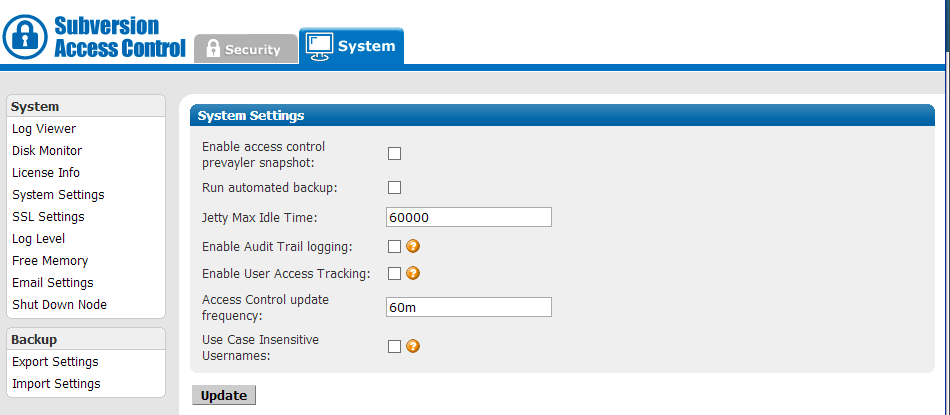
Access Control's functionality is mostly controlled through the settings found under the Security tab. This includes all user, team and rules management.
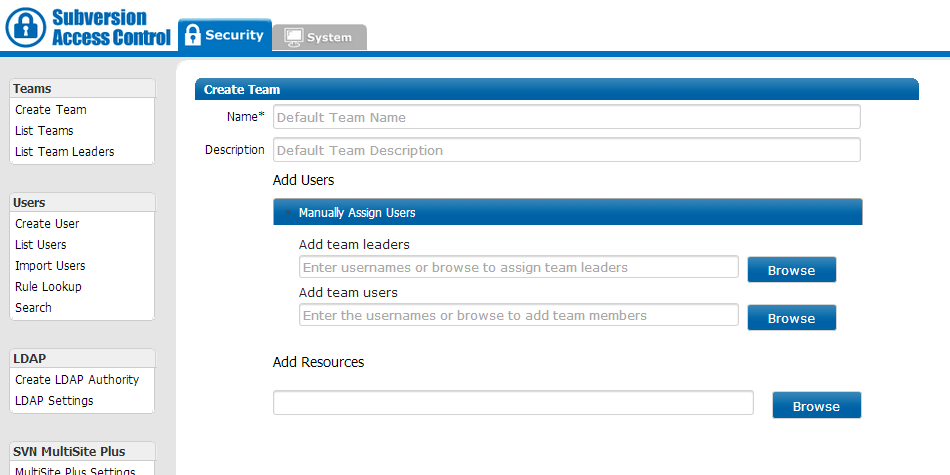
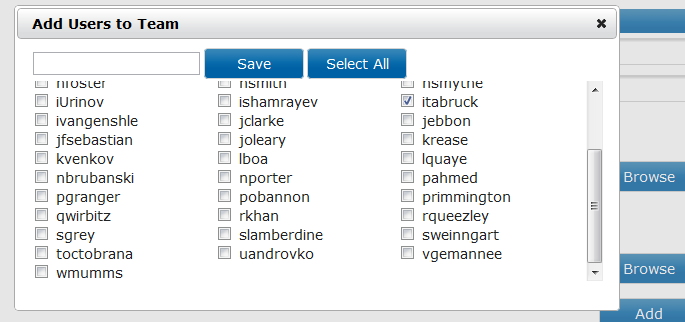
The teams section lets you create and list teams. Teams are used to organise Subversion users in order that you can apply access rules to users without the need to have a separate rule for every single users -- although you can work this way if required.
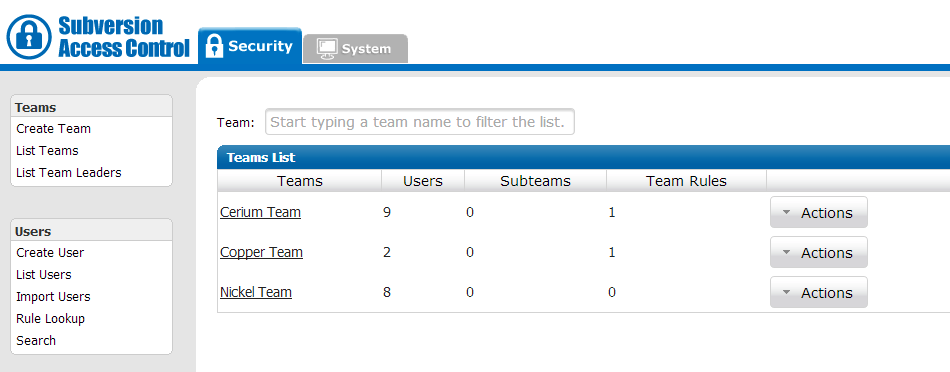
In Access Control a Team is a group of users who are associated with a resource or collection of resources. Teams underpin how user authorization is managed in Access Control.
Team Names Must Be Globally Unique
All teams must have a unique name within Access Control. It's currently not possible to have two teams with the same name, even if they are located within different directories.


The List Teams screen provides a list of all teams as well as action buttons for editing, deleting or creating rules or subteams.
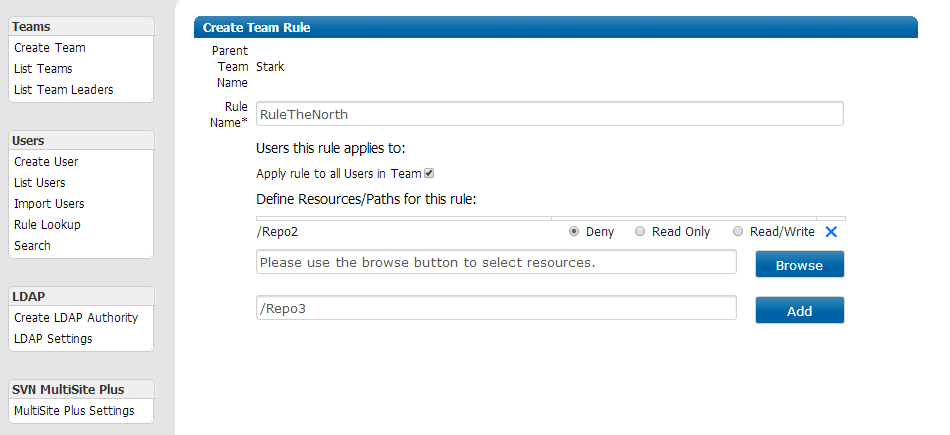
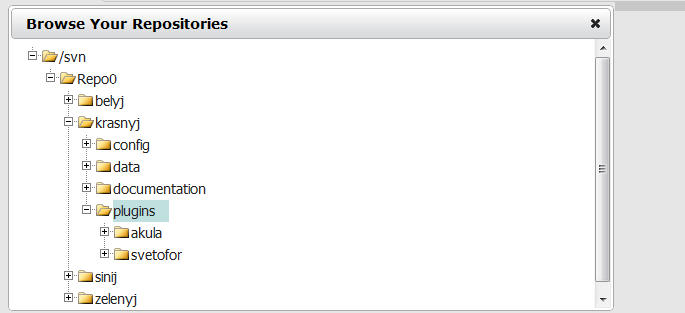
The Create Team Rule is used to set the access permission rules that will control which users and teams can access specific repository resources and what level of access they will have.
Access Control supports the creation of subteams which allow team leaders to delegate management of a subset of their team members and resources without having to give subordinates access to anything above what the parent team can access.

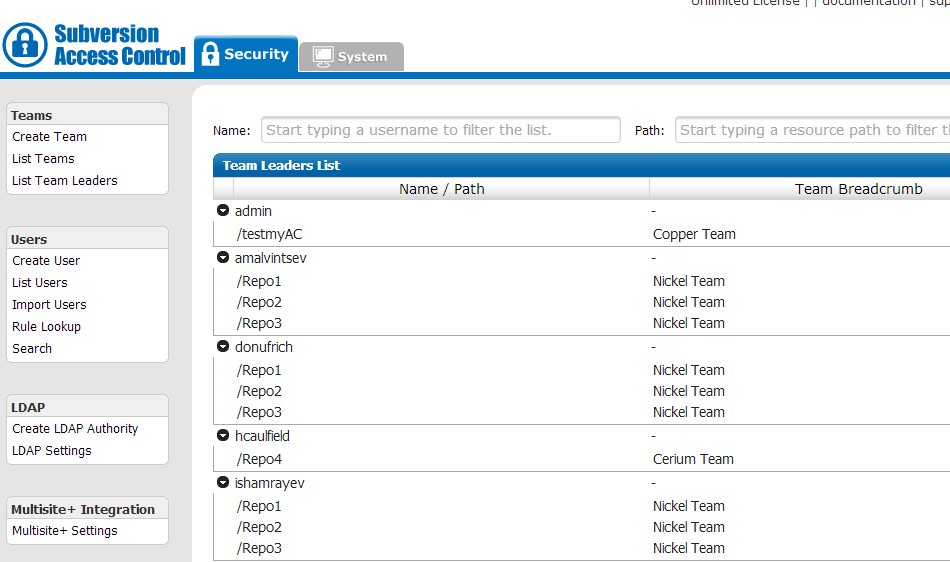
From the List Team Leaders screen it is possible to see which users are team leaders, the teams they lead adn the resources that their teams can access.
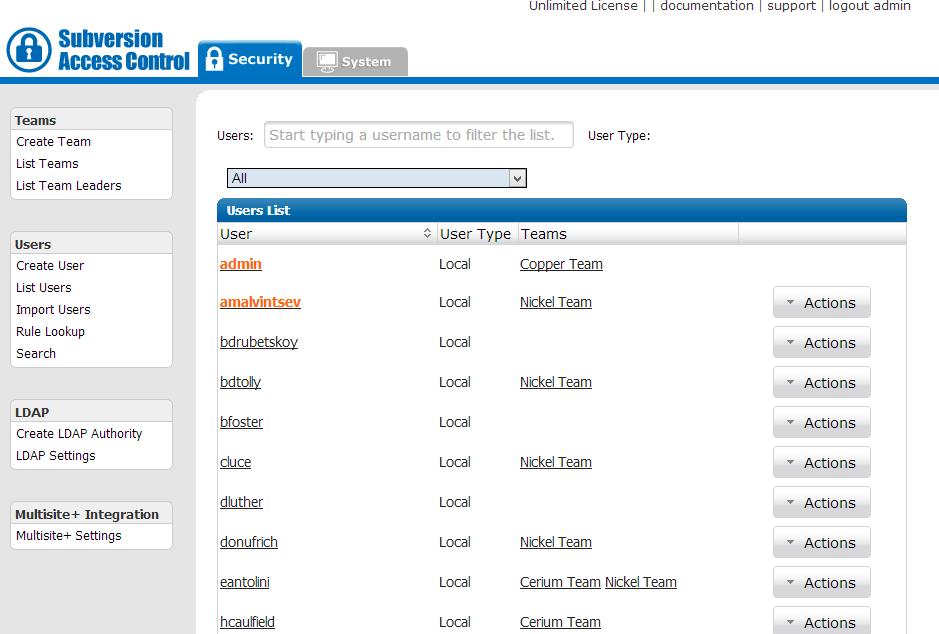
the List Users screen gives you to all the users who have been entered into Access Control.
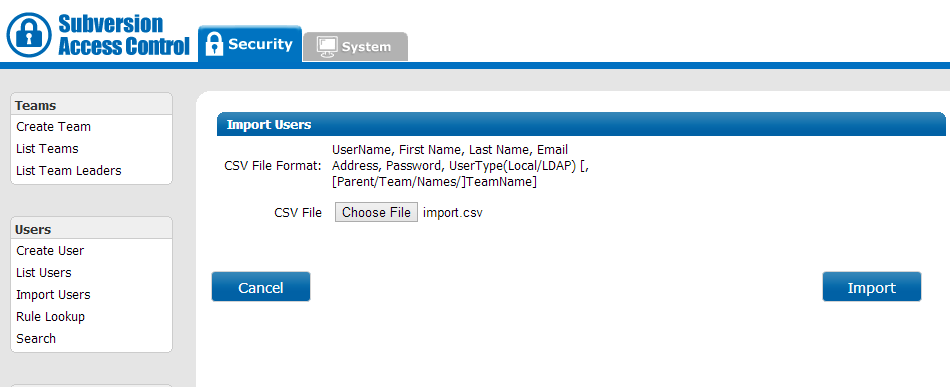
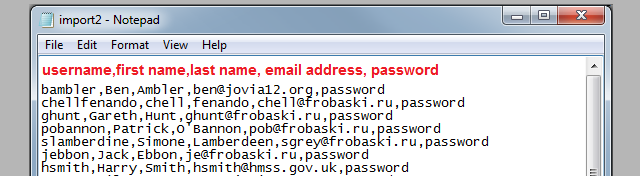
It's possible to import users instead of entering them manually through the Create User screen. Use a comma delimited (CSV) format for the import, with the following fields:
<username>,<first name>,<last name>,<email address>,<password>,<UserType>[,[Parent/Team/Names/]<team name>]
Click on Choose File and navigate to your import file. When selected click the Import button. A message window will appear, indicating whether the import was successful.
Caution importing users to subteams
You can import users straight into teams by including an optional team name field (see the format, below). This will allow you to import to either top level teams or subteams if the subteam has a unique name.
Unique team names are only enforced at the top level and within each parent team. It's therefore possible to have two teams called "QA", so long as they are subteams for different parent teams. Importing a user to "QA" team when there is more than one "QA" team will result in the user being placed unpredictably into one of the teams.
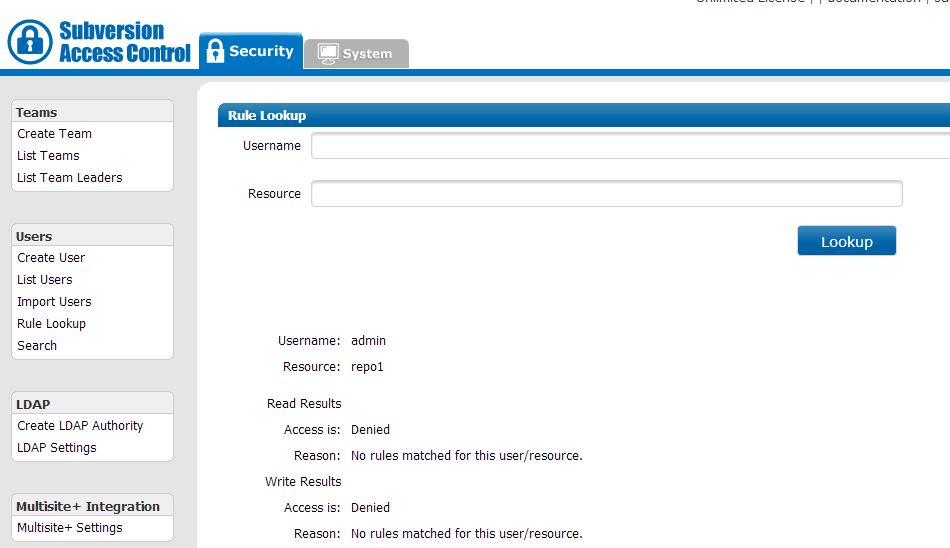
The Lookup/Search tool lets you test a user's access permissions for a specfied repository resource. For users who are members of multiple teams and to whom numerous team rules are applied, the Lookup/Search greatly simplifies the verification of their access permissions.
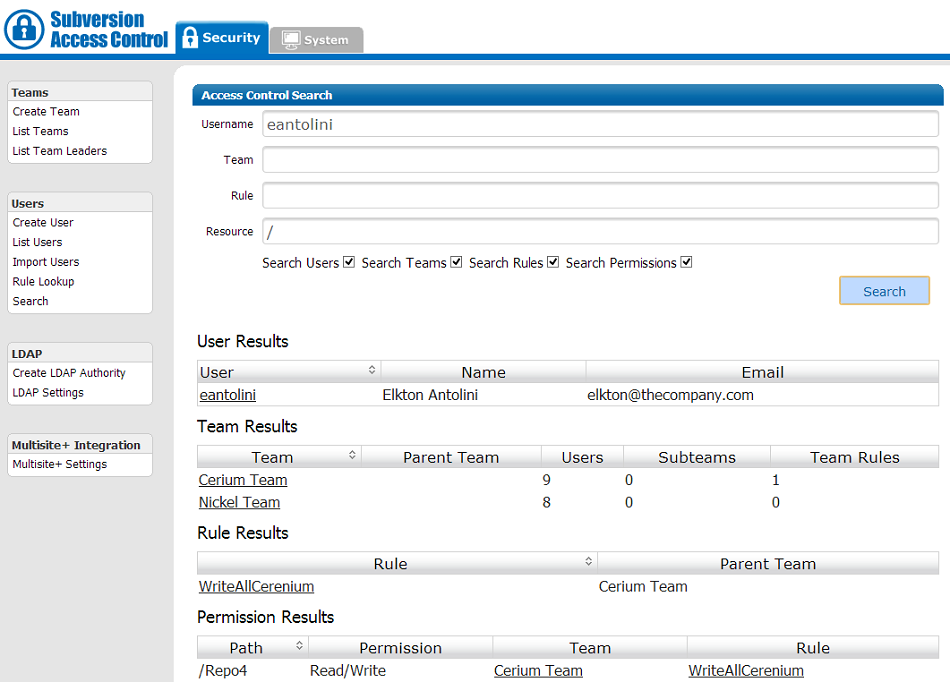
The Acccess Control Search tool lets you find information about users, teams rules or resources through a search form. It's possible to filter searches by user, teams, rules or even permissions.
When Access Control is installed in SVN MultiSite Plus mode an extra screen is revealed which stores those settings that control how Access Control interacts with SVN MultiSite Plus. See more about MultiSite+ Settings