Integration Guide
This section describes how to integrate an existing Gerrit installation, 2.9.1 onwards, with WANdisco's Git MultiSite.
Integration includes:
- Prerequisites: Check that your deployment meets all the requirements for running Git MultiSite with Gerrit.
- Install Git MultiSite on each of your nodes.
- Induct your nodes so that they can talk to each other.
- Create a replication group for your Gerrit projects.
- Add Gerrit-controlled repositories to Git MultiSite.
- Configure for Gerrit event stream.
- Run sync_repo.sh script on Node 1 to add Gerrit's repositories to Git MultiSite.
- Test the integration: Run through your Gerrit workflow project and confirm that everything is replicated to all your nodes.
1. Prerequisites
Assumption: You're already using Gerrit
We assume that you have an established Gerrit installation, along with the required database and authentication mechanism.
To avoid any problems it is advised that all servers should be in the same timezone. Do not alter the Percona Database config files (my.cnf) to a different timezone from that of the system.
Installing Gerrit
If you need to install Gerrit see Gerrit's own documentation.
system user: Gerrit installation instructions set the system user as gerrit2 by default. We recommend that, instead, you create an account called gitms. Ensure that, whatever account you set up for running Gerrit, this user works through the following procedures and is used for both Gerrit and Git MultiSite.
Note: If you don't use the same user, then you will probably have permission problems that will stop the integration from working properly.
Avoid port conflict
Git MultiSite will try to use the same port, 8080, that Gerrit uses, by default, for web access. You MUST configure Git MultiSite to use a different port, e.g. 7070.
Database/clients
We've tested Gerrit integration using Percona XtraDB. You must install and configure a this database solution on all nodes. Follow the instructions in Install and configure Percona XtraDB.
Auto-start
Gerrit automatically starts when installation is complete. Either:
- Run the WAR file with the
--no-auto-startswitch. - Shut down Gerrit before installing Git MultiSite for Gerrit. E.g:
  gerrit2@host:~$ ~/gerrit/bin/gerrit.sh stop
    Stopping Gerrit Code Review: OK
    gerrit2@host:~$
Note: Check that your deployment meets the requirements described in the Gerrit section of Git MultiSite's installation checklist.
2. Install Git MultiSite
You need to install Git MultiSite. This is a detailed procedure so this document refers to relevant sections of the Git MultiSite documentation.
- Remembering the Prerequisites, follow the Installation procedure.
- Complete the installation on each of your nodes.
- Return to these instructions before you create the first replication group.
3. Induct your nodes
Git MultiSite is now installed on all your nodes but they're not yet connected or able to sync changes. You must follow the instructions in the Git MultiSite User Guide. See Node Induction.
4. Create a replication group
Follow this procedure to create a replication group. These instructions are carried out on Git MultiSite's admin UI.
Current limitations
Note the following limitations that apply to this version of Gerrit MultiSite:
- Gerrit can only integrate with a single Replication Group
You can have more than one replication group in your Git MultiSite deployment but each node can only integrate with a single replication group. See Selective Replication. - All nodes in your Gerrit replication group must be Active or Active-Voters
Any Gerrit node can also be a Tiebreaker. Passive and Voter-only nodes are not supported.
- When you have created and inducted all nodes, log in to the admin console and click the Replication Groups tab. Then click the Create Replication Group button.

Create Replication Group
- Enter a name for your Replication Group in the Replication Group Name field. If you're using multiple groups you may want to indicate that this one is for Gerrit repositories, e.g. name it Gerrit-Repositories. Then click on the drop-down button and select each of your other Gerrit/Git MultiSite nodes.
You can select any number of available nodes, providing they have been added as part of this Gerrit deployment. The nodes that you select will appear as clickable buttons in the Add Node field.
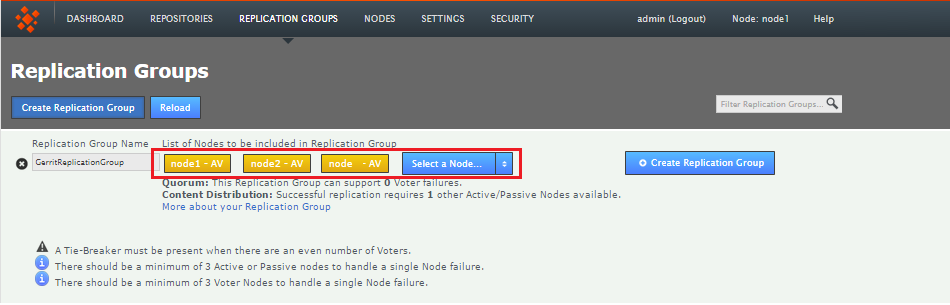
Enter a name and add some nodes
- New nodes are added as Active Voters, denoted by "AV". You should leave this node type in most cases. When used with Gerrit, Git MultiSite only supports Active or Active-Voter node types. For more information, see the Git MultiSite Reference Guide, Node Types section.
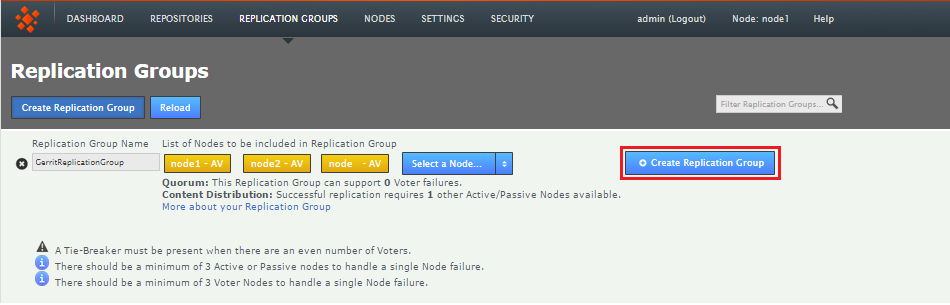
Don't change node type
When you have added all nodes and confirmed their type, click Create Replication Group to see a confirmation of the replication group's details. - Replication Groups that you create will be listed on the Replication Groups tab.
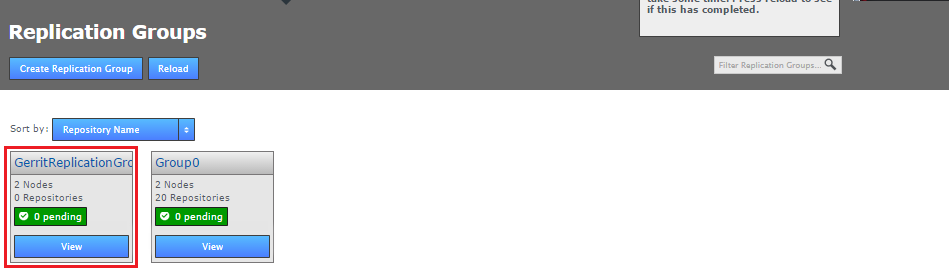
Groups boxes, click VIEW view your options