Test drive LiveData Migrator for Azure
The Test Drive service contains a sample Hadoop environment and all the components necessary to experience LiveData Migrator. Test Drive allows you to sign in to an Azure Test Drive subscription without the need for your own.
The Test Drive subscription comes with the following preconfigured components:
- Resource group
- Storage account
- Container
This Test Drive experience allows you to do the following:
- Deploy and use LiveData Migrator for Azure to demonstrate how you can migrate actively-changing data from a Hadoop cluster to an ADLS Gen2 account.
- Familiarize yourself with LiveData Migrator’s features and native integration into Azure Portal.
- Interact with data from the Hadoop environment and show how easy it is to use the system to effectively migrate your data.
Get started with your Test Drive
Go to Azure Marketplace and select Test Drive.
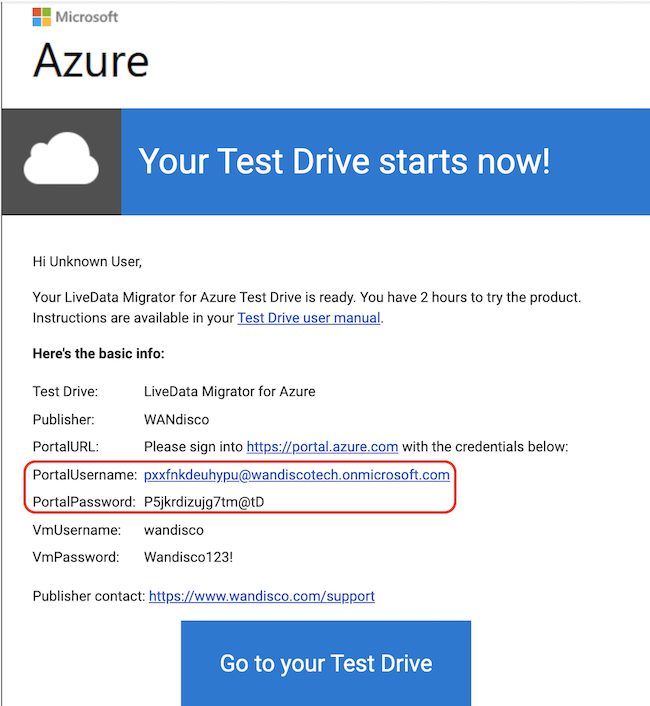
You'll receive an email in approximately 10 minutes with sign-in credentials.
 note
noteTest Drive is available for two hours from the time you receive the email with your sign-in credentials. A timer is displayed at the top of your screen.
Sign out of your Azure Portal account or open a private or incognito browser window.
Go to Azure Portal.
Sign in with the Test Drive user name and password provided in the email.
Select Yes to stay signed in.
Skip the tour of Microsoft Azure by selecting Maybe Later.
Connect to the virtual machine to view data in the Hadoop test cluster
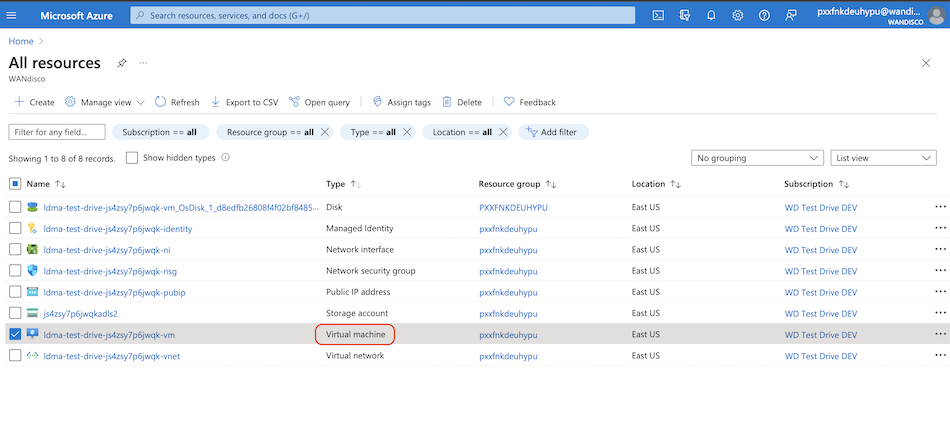
In Azure Portal, go to All resources.
 note
noteIf you weren't prompted to use the sign-in credentials and you see a Recent resources section, you're in your own subscription. Sign out or use private browsing.
To form a Secure Shell (SSH) connection, select the Virtual Machine (VM).
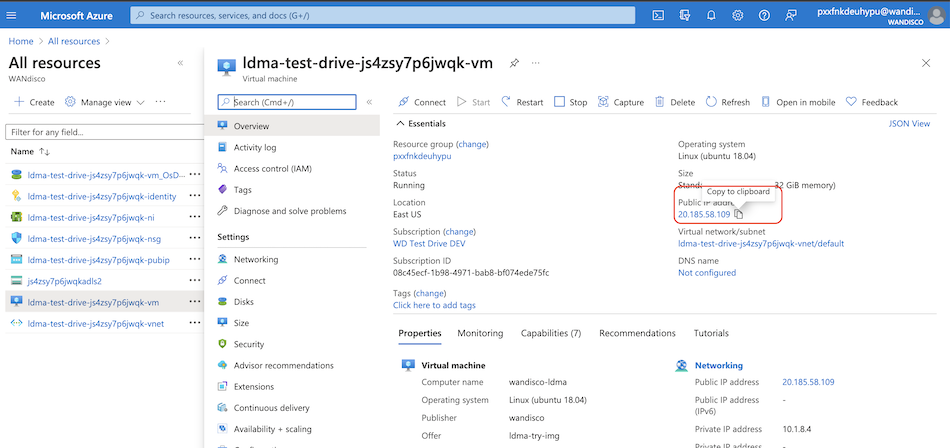
Locate and take note of the public IP address.
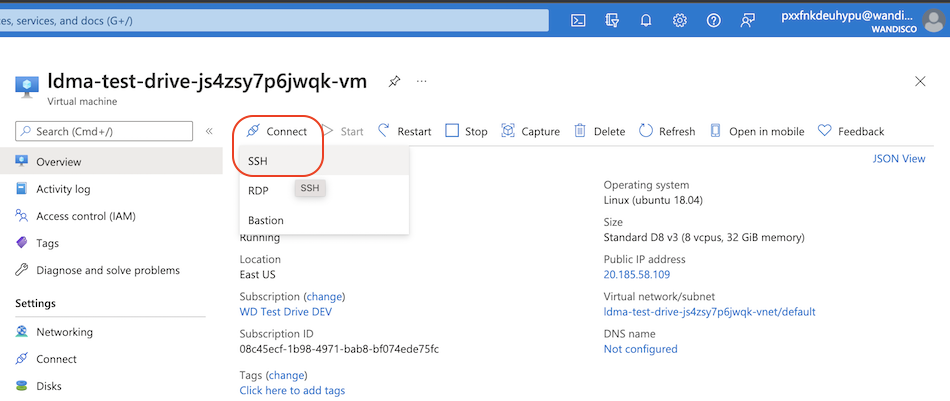
Connect to the VM by selecting Connect > SSH.
Open your terminal, and type and run the following command:
Examplessh -L 8092:localhost:8888 wandisco@<public_ip_address>Enter the password
Wandisco123!.noteIf you are using Windows, paste text by right-clicking the icon in the top left. Then select Edit, Paste.
The
wandisco@wandisco-ldmaprompt appears.
Leave this window open.
Check LiveData Migrator is installed
Go to Azure Portal.
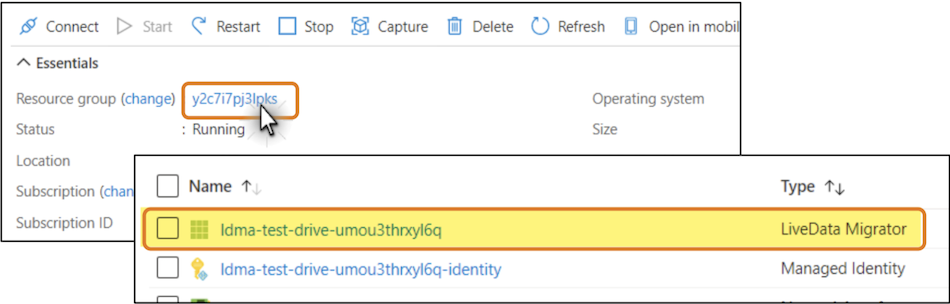
Select the resource group name, and then select your LiveData Migrator.
Check the Install State and Meta Install State are both InstalledAndOperational.
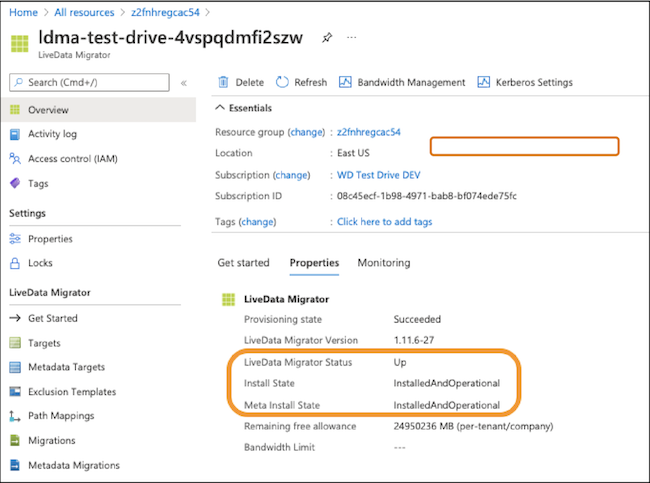 note
noteIf the install state is not InstalledAndOperational, check back in a few minutes. Starting up the cluster and installing LiveData Migrator can take a little over 10 minutes depending on Azure resources.
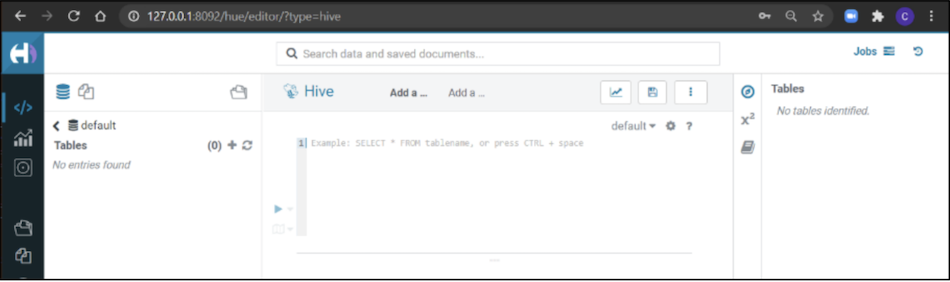
Connect to Hue to view files in Hadoop
Open a new browser tab and go to http://127.0.0.1:8092.
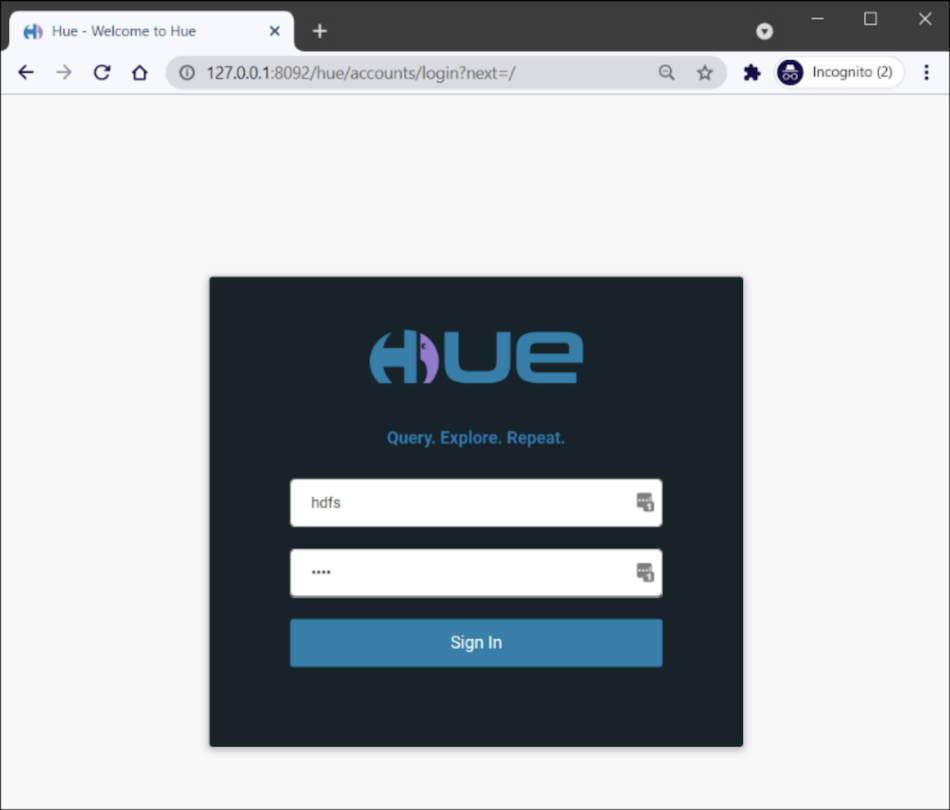
Enter the following credentials:
- Username:
hdfs - Password:
hdfs
 The connection is made.info
In Hue, if you get an error that you're no longer connected to the VM through SSH, please SSH in again using your CLI.
- Username:
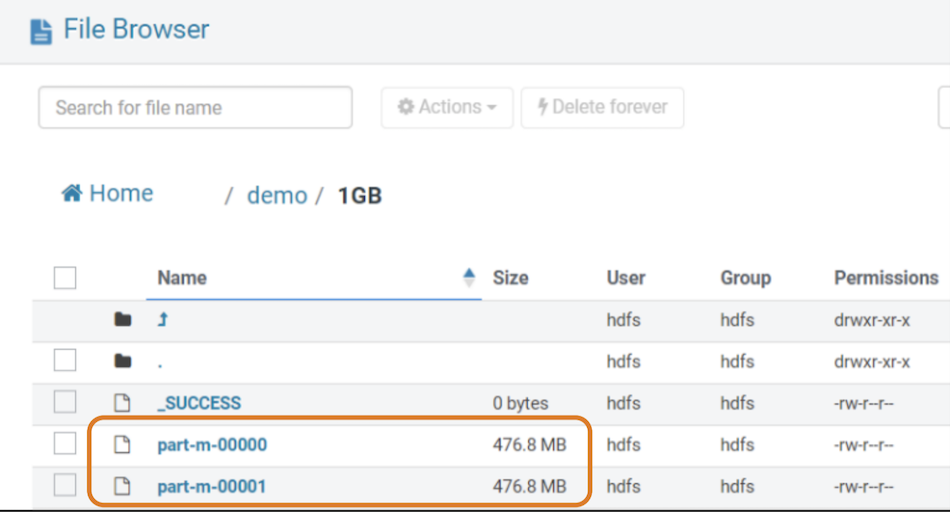
Select Files from the left pane, and then go up two levels to the root level.
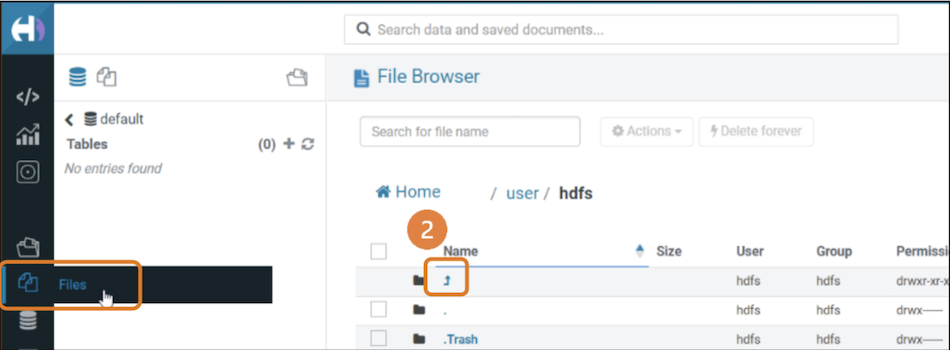
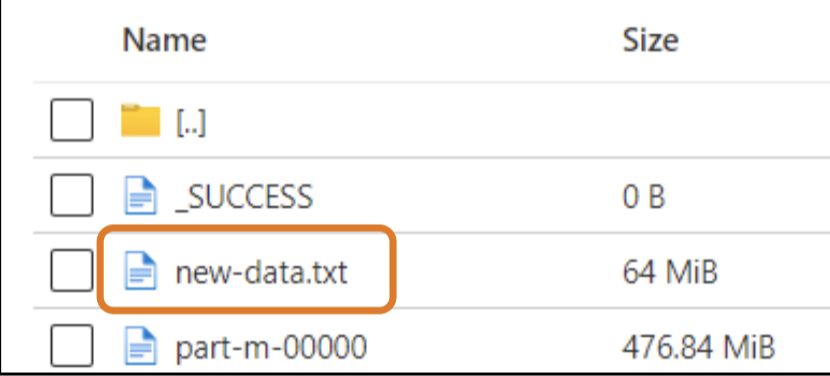
Drill down into the Demo/1GB folder.
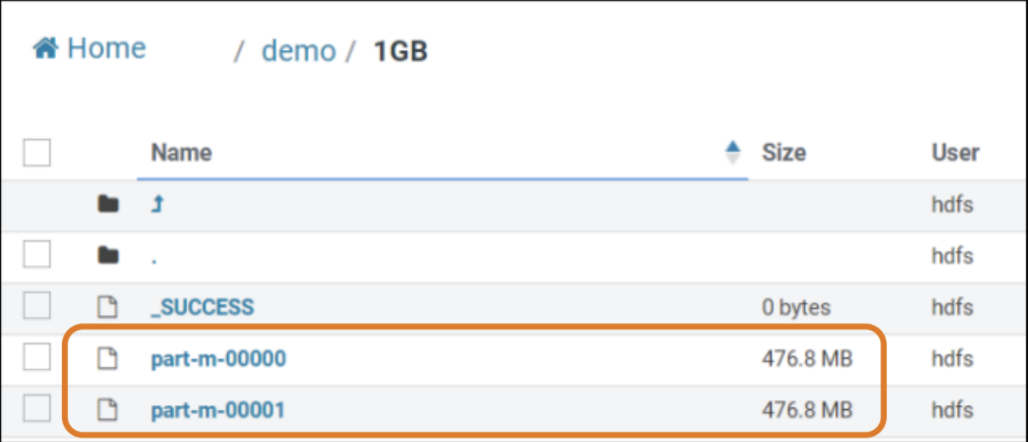
Take a note of the two data files in Demo/1GB.
Specify the migration target
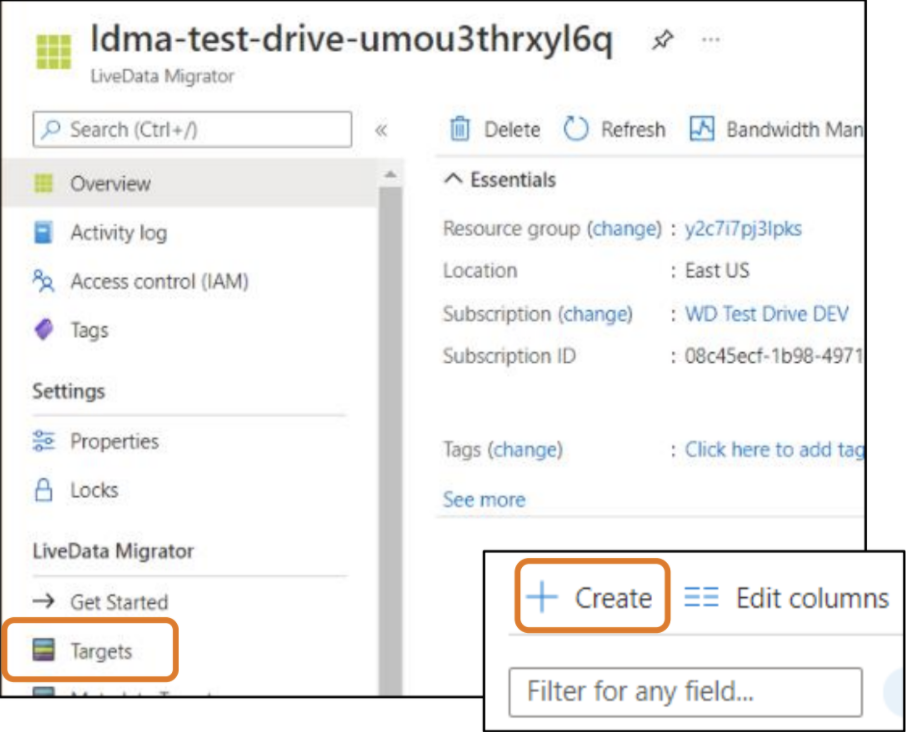
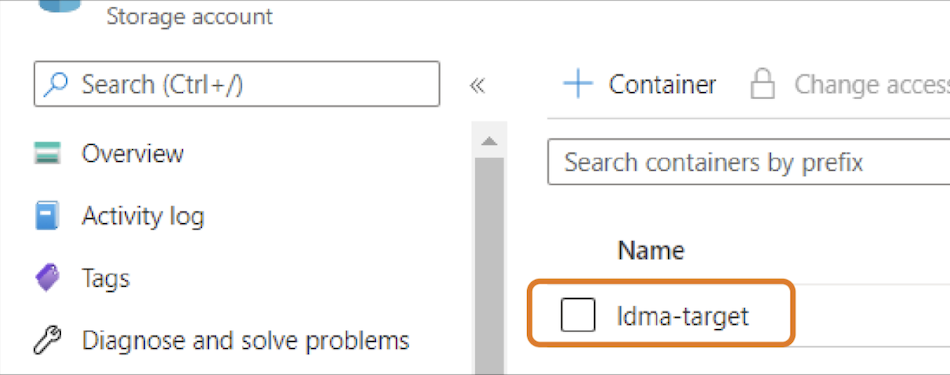
To create the target for your data migration, select Targets.
Select Create.
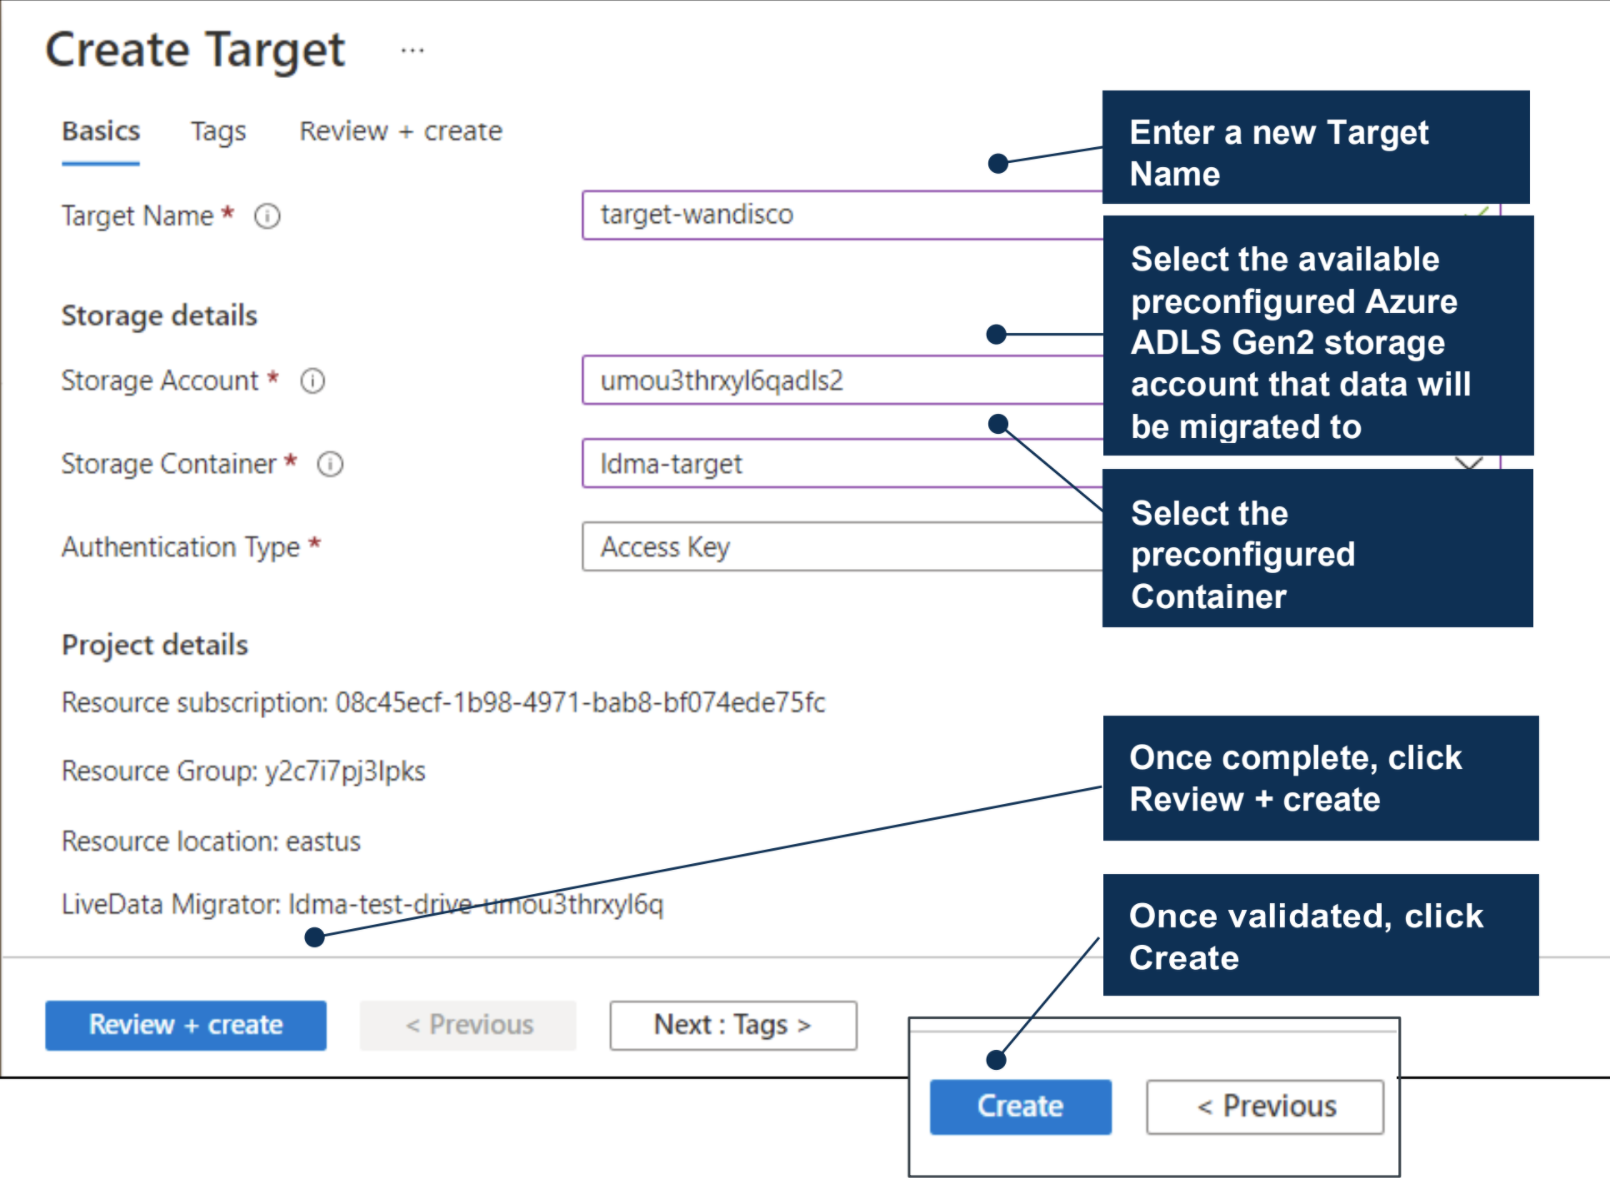
Enter the following details:
- Target name
- Storage account
- Storage container
Select Review + create, and then on the next page, select Create.
Once completed, select Go to resource to check your target for data migration has been created.
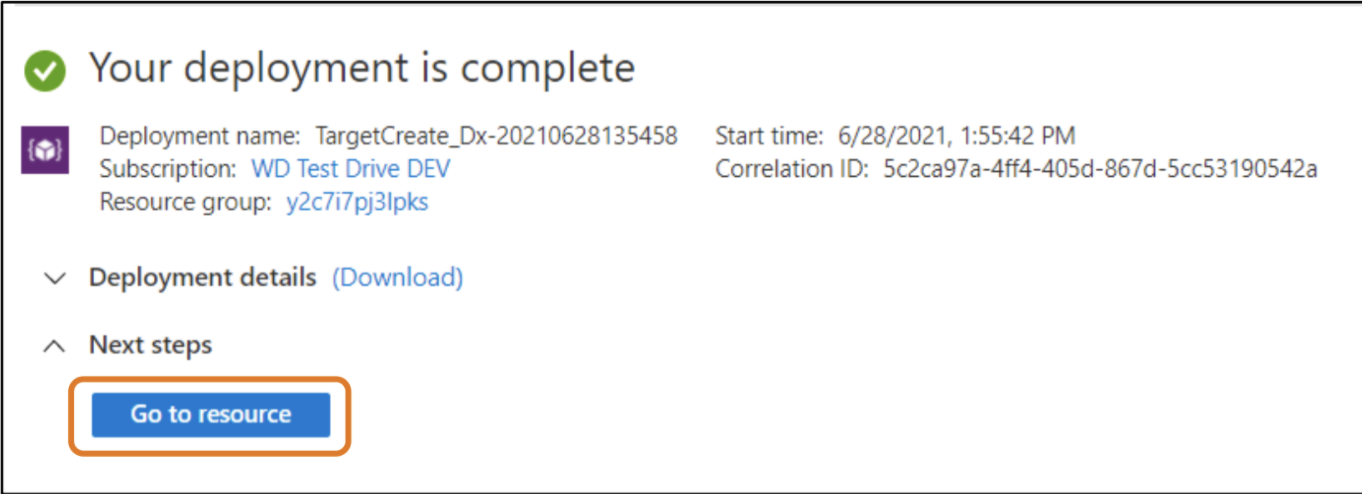
Check the provisioning state is Succeeded.
Note the entry for the Storage account/container specifies where your target data will be migrated to.

Create the migration
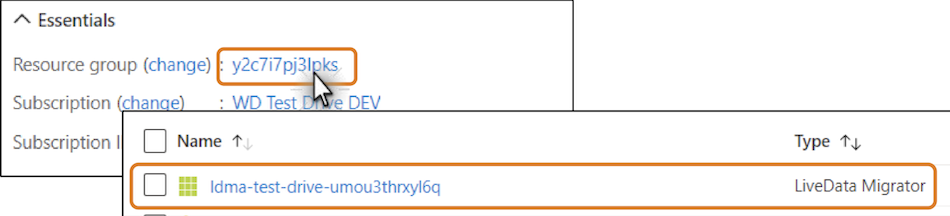
Select the resource group.
Select the LiveData Migrator resource.
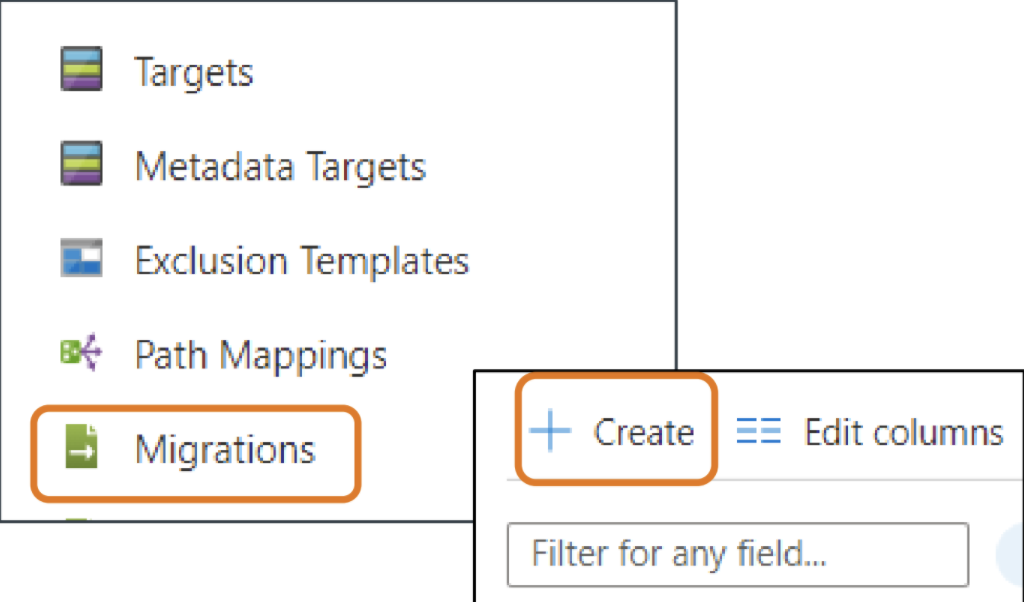
Select Migrations > Create.
Enter the following migration details:
- Enter a migration name.
- Select the preconfigured target storage.
- Select the preconfigured path.
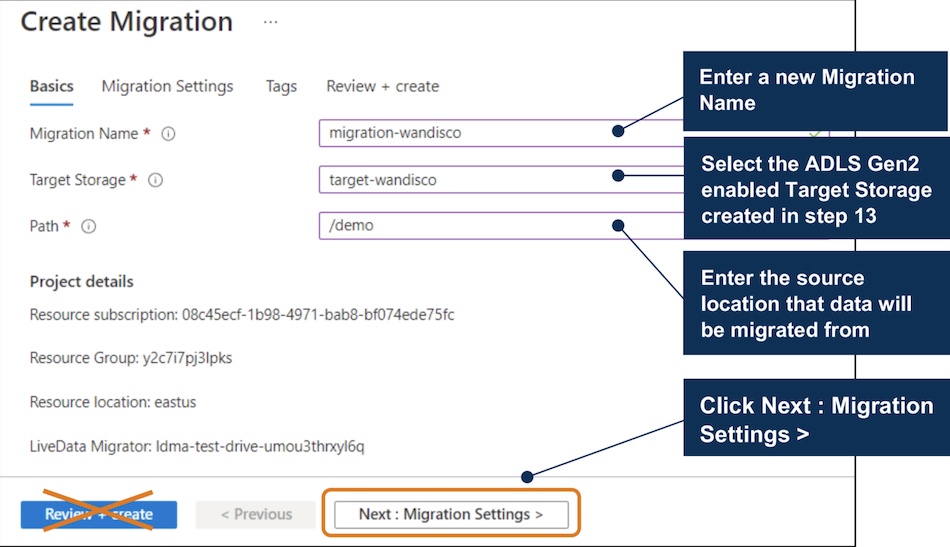
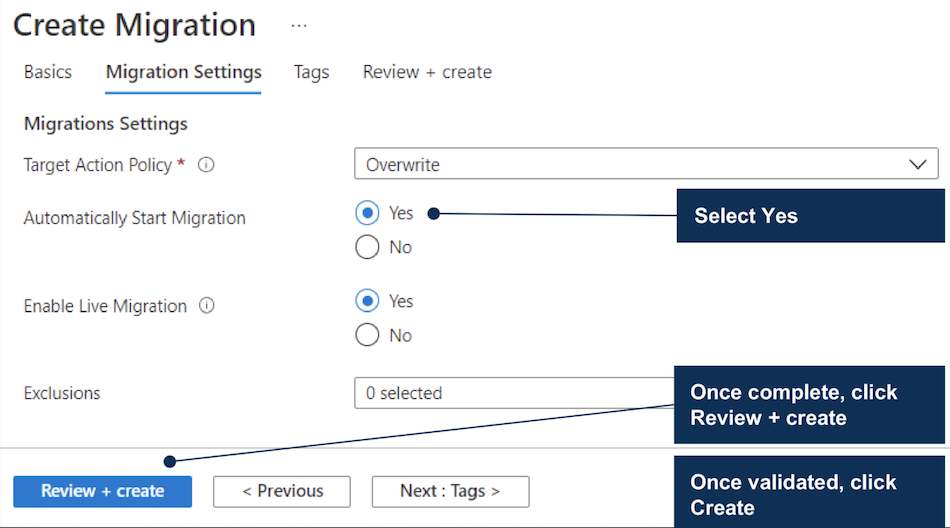
Select Next: Migration Settings.
For Automatically Start Migration, select Yes.
Select Review + create > Create.
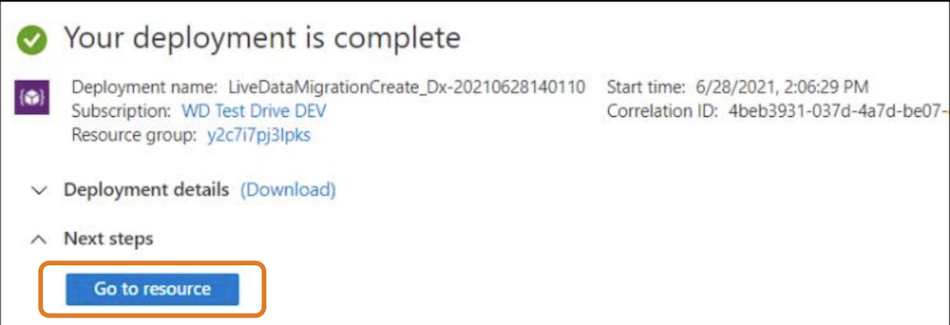
Now your migration is running.
Check the migration has been created and is running by selecting Go to resource.
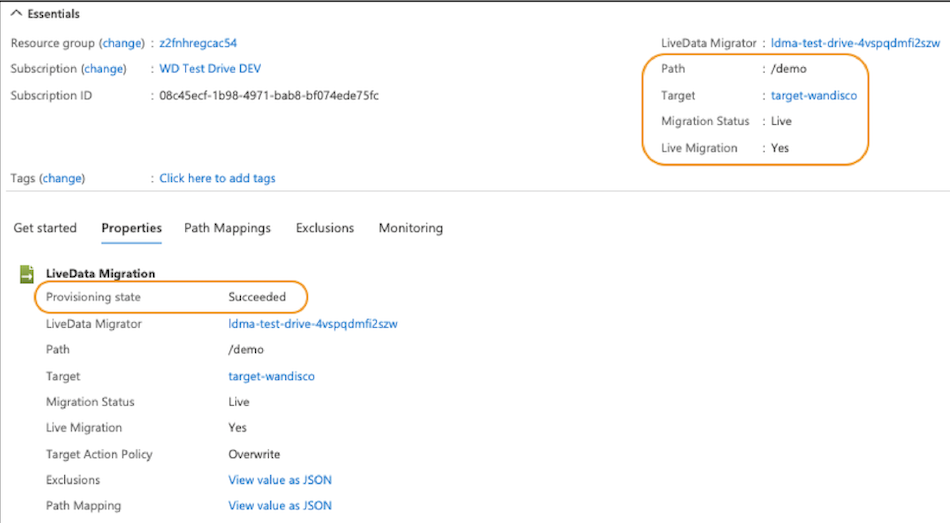
Check the following details:
- Provisioning state is Succeeded.
- Migration status is Live, which means migrations have started.
- The path is the /demo source folder.
Check the initial data migration to ADLS Gen2 storage
In the top search bar, search for storage accounts.
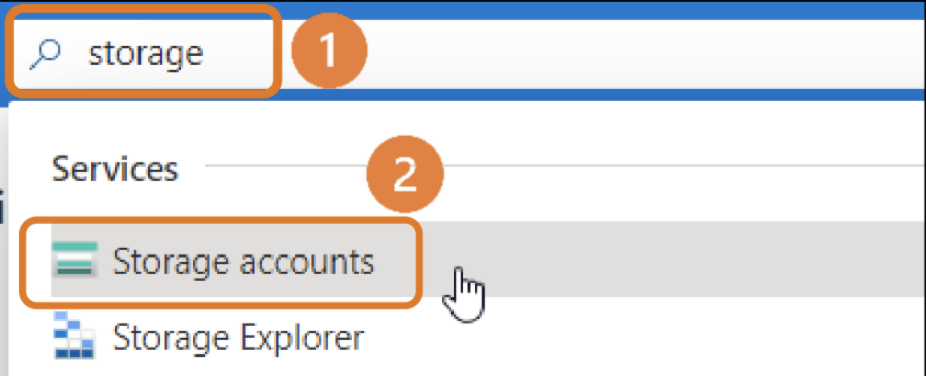
Select your storage account.
Select Containers in the left menu.

Select your container.
Drill down to /Demo/1GB to check the data migrated.
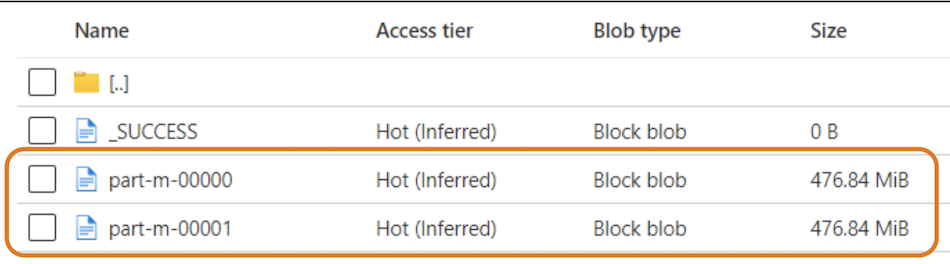
Compare with the files in Hue.
Check updates to source data are reflected in the target
To check live changes made to source files in Hue are added to the container, complete the following steps:
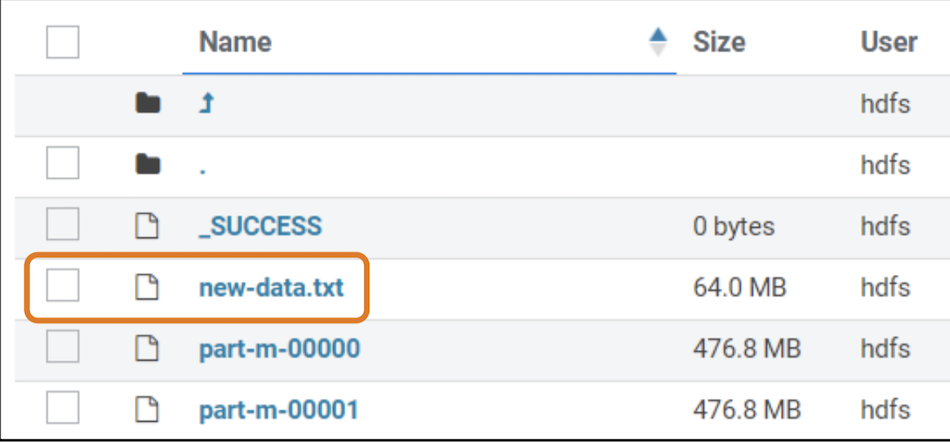
Add a file to the source location in Hue by opening Hue and selecting Upload.

Follow prompts to add a file from your computer.
Check the file is added.
Go to your container in Azure Portal and select Refresh.
 The file has been added.
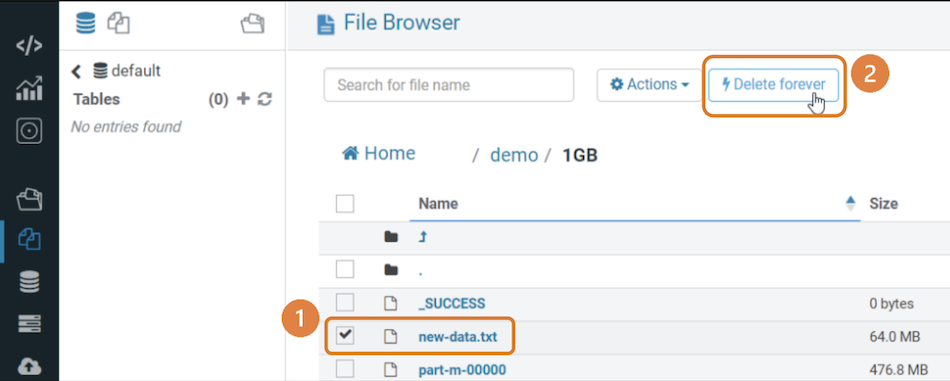
Delete a file from the source location in Hue by opening Hue and selecting a file to delete.
Select Delete forever and confirm.
Go to your container in Azure Portal and select Refresh.
 The file has been deleted.
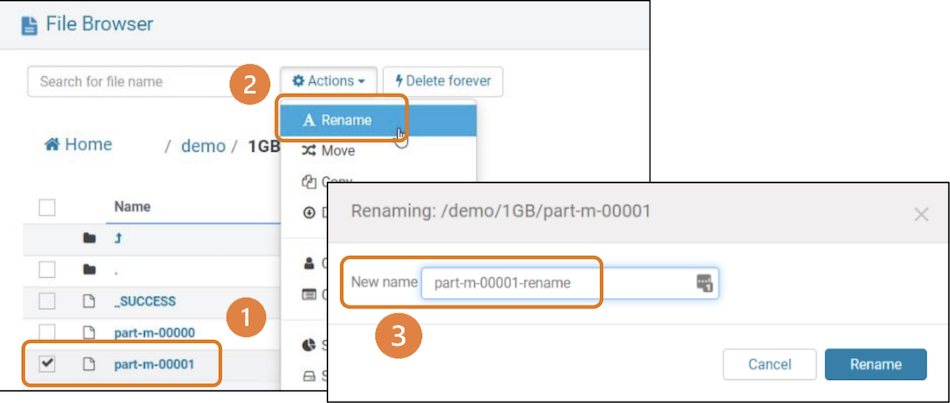
Rename a file in the source location by opening Hue and selecting a file to rename.
Select Actions > Rename.

Enter a new name and confirm.
Check the file is renamed in Azure Portal.
You completed the Test Drive exercises. Your environment will be deleted at the end of the two-hour Test Drive.