This section will run through the installation of WD Fusion from the initial steps where we make sure that your existing environment is compatible, through the procedure for installing the necessary components and then finally configuration.
We'll start with a quick overview of this installation guide so that you can seen what's coming or quickly find the part that you want:
From version 2.2, WD Fusion comes with an installer package
WD Fusion now has a unified installation package that installs all of WD Fusion's components (WD Fusion server, IHC servers and WD Fusion UI). The installer greatly simplifies installation as it handles all the components you need and does a lot of configuration in the background.
This section describes hardware requirements for deploying Hadoop using WD Fusion. These are guidelines that provide a starting point for setting up data replication between your Hadoop clusters.
Glossary
We'll be using terms that relate to the Hadoop ecosystem, WD Fusion and WANdisco's DconE replication technology. If you encounter any unfamiliar terms checkout the Glossary.
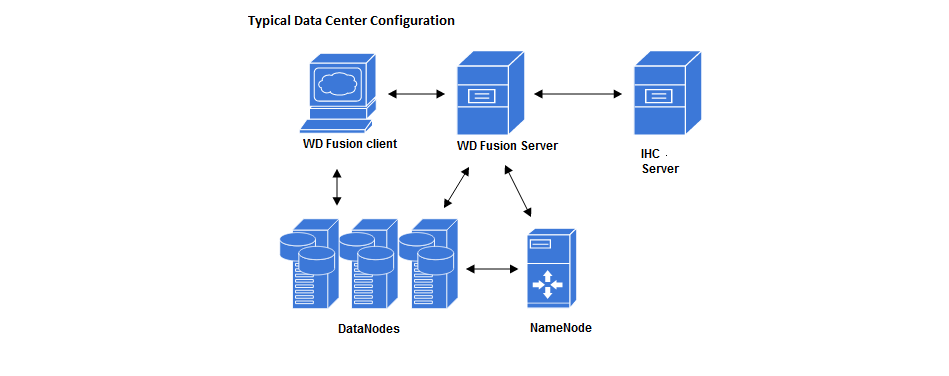
Example WD Fusion Data Center Deployment.
WD Fusion servers don't need to be collocated with IHC servers
If you deploy using the installer, both the WD Fusion and IHC servers are installed into the same system by default.
This configuration is made for convenience, but they can be installed on separate systems. This would be recommended if your servers don't have the recommended amount of system memory.
WD Fusion must not be collocated with HDFS servers (DataNodes, etc)
HDFS's default block placement policy dictates that if a client is collocated on a DataNode, then that collocated DataNode will receive 1 block of whatever file is being put into HDFS from that client. This means that if the WD Fusion Server (where all transfers go through) is collocated on a DataNode, then all incoming transfers will place 1 block onto that DataNode. In which case the DataNode is likely to consumes lots of disk space in a transfer-heavy cluster, potentially forcing the WD Fusion Server to shut down in order to keep the Prevaylers from getting corrupted.
The following guidelines apply to both the WD Fusion server and for separate IHC servers. We recommend that you deploy on physical hardware rather than on a virtual platform, however, there are no reasons why you can't deploy on a virtual environment.
Scaling a deployment
How much WD Fusion you need to deploy is not proportionate to the amount of data stored in your clusters, or the number of nodes in your clusters. You deploy WD Fusion/IHC server nodes in proportion to the data traffic between clusters; the more data traffic you need to handle, the more resources you need to put into the WD Fusion server software.
If you plan to locate both the WD Fusion and IHC servers on the same machine then check the Collocated Server requirements:
| CPUs: | Small WD Fusion server deployment : 8 cores Large WD Fusion server deployment: : 16 cores Architecture: 64-bit only. |
| System memory: | There are no special memory requirements, except for the need to support a high throughput of data:
Type: Use ECC RAM Size: Recommended 64 GB recommended (minimum of 16 GB) Small WD Fusion server Deployment: 32 GB Large WD Fusion server deployment: 128 GB System memory requirements are matched to the expected cluster size and should take into account the number of files and block size. The more RAM you have, the bigger the supported file system, or the smaller the block size. Collocation of WD Fusion/IHC servers |
| Storage space: | Type: Hadoop operations are storage-heavy and disk-intensive so we strongly recommend that you use enterprise-class Solid State Drives (SSDs). Size: Recommended: 1 TiB Minimum: You need at least 250 GiB of disk space for a production environment. |
| Network | Connectivity: Minimum 1Gb Ethernet between local nodes. Small WANdisco Fusion server: 2Gbps Large WANdisco Fusion server: 4x10 Gbps (cross-rack) TCP Port Allocation: The following default TCP ports need to be reserved for WD Fusion installations: 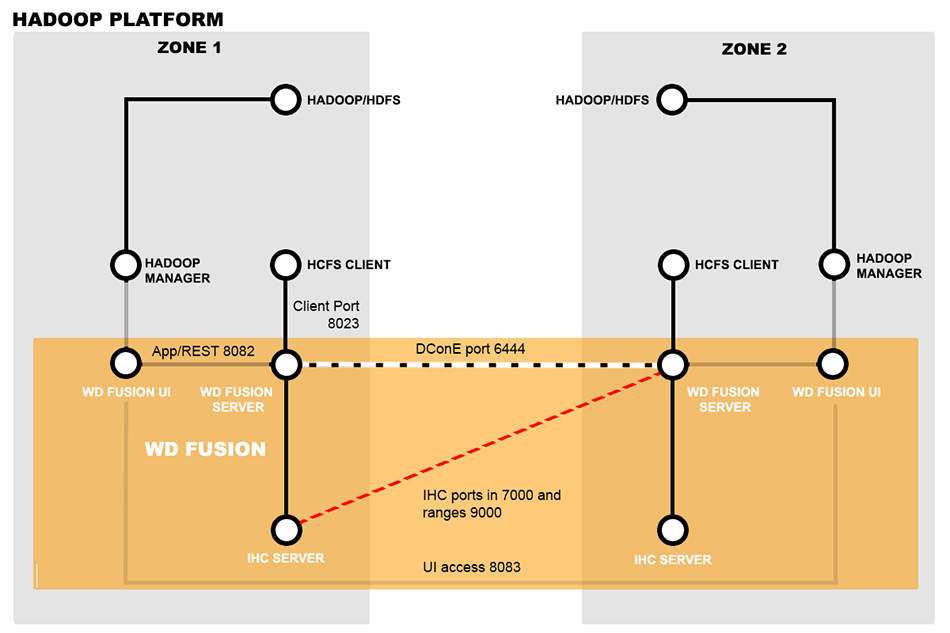
Network diagram illustrating basic connections/port arrangement. WD Fusion ServerDConE replication port: 6444 - DCone port handles all co-ordination traffic that manages replication. It needs to be open between all WD Fusion nodes. Nodes that are situated in zones that are external to the data center's network will require unidirectional access through the firewall. Application/REST API: 8082 - REST port is used by the WD Fusion application for configuration and reporting, both internally and via REST API. The port needs to be open between all WD Fusion nodes and any systems or scripts that interface with WD Fusion through the REST API. WD Fusion Client port: 8023 - Port used by WD Fusion server to communicate with HCFS/HDFS clients. The port is generally only open to the local WD Fusion server, however you must make sure that it is open to edge nodes. IHC ports: 7000-8000 (server port) / 9001-10001 (HTTP server port) 7000 range, (exact port is determined at installation time based on what ports are available in the above ranges), used for data transfer between Fusion Server and IHC servers. Must be accessible from all WD Fusion nodes in the replicated system. 9000 range, exact port is determined at installation time based on available ports), used for an HTTP Server that exposes JMX metrics from the IHC server. WD Fusion UI Web UI interface: 8083 Used to access the WD Fusion Administration UI by end users (requires authentication), also used for inter-UI communication. This port should be accessible from all Fusion servers in the replicated system as well as visible to any part of the network where administrators require UI access. |
| Operating systems: |
|
| Web browsers: |
|
| Java: | Java JRE 1.7 / 1.8 See Supported versions Hadoop requires Java JRE 1.7. as a minimum. It is built and tested on Oracle's version of Java Runtime Environment. We have now added support for Open JDK 7, which is used in Amazon Cloud deployments. For other types of deployment we recommend running with Oracle's Java as it has undergone more testing. Architecture: 64-bit only Heap size: Set Java Heap Size of to a minimum of 1Gigabytes, or the maximum available memory on your server. Use a fixed heap size. Give -Xminf and -Xmaxf the same value. Make this as large as your server can support. Avoid Java defaults. Ensure that garbage collection will run in an orderly manner. Configure NewSize and MaxNewSize Use 1/10 to 1/5 of Max Heap size for JVMs larger than 4GB. Stay deterministic! Where's Java? Ensure that you set the JAVA_HOME environment variable for the root user on all nodes. Remember that, on some systems, invoking sudo strips environmental variables, so you may need to add the JAVA_HOME to Sudo's list of preserved variables.
Due to a bug in JRE 7, you should not run FINER level logging for
javax.security.sasl if you are running on JDK 7. Doing so may result in an NPE. You can guard against the problem by locking down logging with the addition of the following line in WD Fusion's logger.properties file (in /etc/fusion/server)
javax.security.sasl.level=INFOThe problem has been fixed for JDK 8. FUS-1946
Due to a bug in JDK 8 prior to 8u60, replication throughput with SSL enabled can be extremely slow (less than 4MB/sec). This is down to an inefficient GCM implementation.
Workaround Upgrade to Java 8u60 or greater, or ensure WD Fusion is able to make use of OpenSSL libraries instead of JDK. Requirements for this can be found at http://netty.io/wiki/requirements-for-4.x.html FUS-3041 |
| File descriptor/Maximum number of processes limit: | Maximum User Processes and Open Files limits are low by default on some systems. It is possible to check their value with the ulimit or limit command:
ulimit -u && ulimit -n
-u The maximum number of processes available to a single user. For optimal performance, we recommend both hard and soft limits values to be set to 64000 or more: RHEL6 and later: A file /etc/security/limits.d/90-nproc.conf explicitly overrides the settings in security.conf, i.e.:
      # Default limit for number of user's processes to prevent
      # accidental fork bombs.
      # See rhbz #432903 for reasoning.
      * soft nproc 1024 <- Increase this limit or ulimit -u will be reset to 1024
Ambari/Pivotal HD and Cloudera manager will set various ulimit entries, you must ensure hard and soft limits are set to 64000 or higher. Check with the ulimit or limit command. If the limit is exceeded the JVM will throw an error: java.lang.OutOfMemoryError: unable to create new native thread.
|
| Additional requirements: |
iptables Use the following procedure to temporarily disable iptables, during installation:
Comment out requiretty in /etc/sudoersThe installer's use of sudo won't work with some linux distributions (CentOS where /etc/sudoer sets enables requiretty, where sudo can only be invoked from a logged in terminal session, not through cron or a bash script. When enabled the installer will fail with an error:
execution refused with "sorry, you must have a tty to run sudo" messageEnsure that requiretty is commented out: # Defaults requiretty |
| SSL encryption: | Basics WD Fusion supports SSL for any or all of the three channels of communication: Fusion Server - Fusion Server, Fusion Server - Fusion Client, and Fusion Server - IHC Server. keystore A keystore (containing a private key / certificate chain) is used by an SSL server to encrypt the communication and create digital signatures. truststore A truststore is used by an SSL client for validating certificates sent by other servers. It simply contains certificates that are considered "trusted". For convenience you can use the same file as both the keystore and the truststore, you can also use the same file for multiple processes. Enabling SSLYou can enable SSL during installation (Step 4 Server) or through the SSL Settings screen, selecting a suitable Fusion HTTP Policy Type. It is also possible to enable SSL through a manual edit of the application.properties file. We don't recommend using the manual method, although it is available if needed: Enable HTTPS
Due to a bug in JDK 8 prior to 8u60, replication throughput with SSL enabled can be extremely slow (less than 4MB/sec). This is down to an inefficient GCM implementation.
Workaround Upgrade to Java 8u60 or greater, or ensure WD Fusion is able to make use of OpenSSL libraries instead of JDK. Requirements for this can be found at http://netty.io/wiki/requirements-for-4.x.html FUS-3041 |
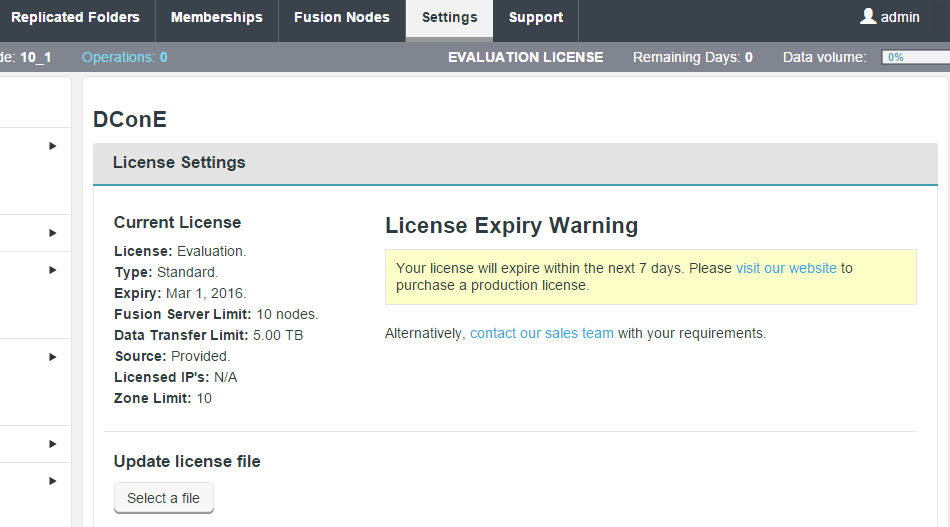
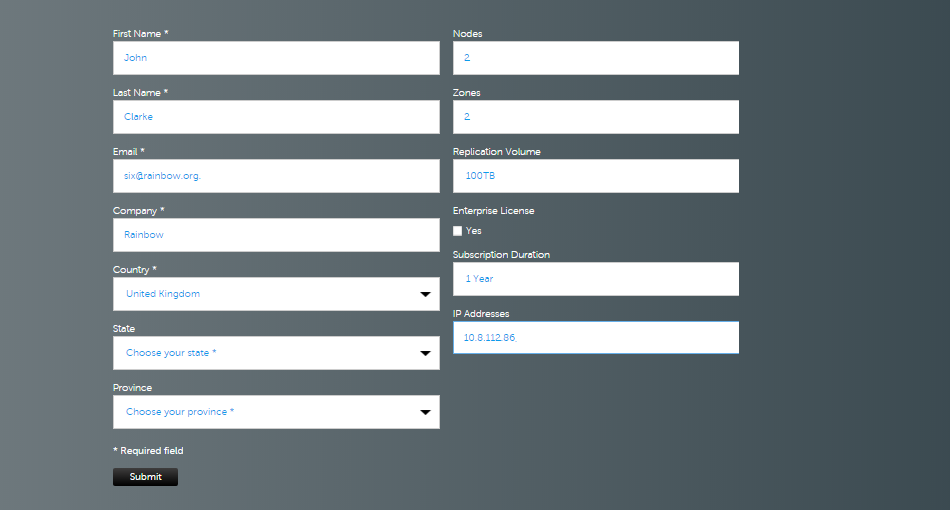
WD Fusion is supplied through a licensing model based on the number of nodes and data transfer volumes. WANdisco generates a license file matched to your agreed usage model. If your usage pattern changes or if your license period ends then you need to renew your license. See License renewals
| Source | Time limit | No. fusion servers | No. of Zones | Replicated Data | Plugins | Specified IPs |
| Website | 14 days | 1-2 | 1-2 | 5TB | No | No |
| Source | Time limit | No. fusion servers | No. of Zones | Replicated Data | Plugins | Specified IPs |
| FD | variable (default: 1 year) | variable (default: 20) | variable (default: 10) | variable (default: 20TB) | Yes | Yes, machine IPs are embedded within the license |
For large deployments, Unlimited licenses are available, for which there are no usage limits.
Zone information.
Zone information.
Zone information.
This table shows the versions of Hadoop and Java that we currently support:
| Distribution: | Console: | JRE: |
| Apache Hadoop 2.5.0 | Oracle JDK 1.7 / 1.8 or OpenJDK 7 | |
| HDP 2.1 / 2.2 / 2.3 / 2.4 | Ambari 1.6.1 / 1.7 / 2.1 Support for EMC Isilon 7.2.0.1 and 7.2.0.2 |
Oracle JDK 1.7 / 1.8 or OpenJDK 7 |
| CDH 5.2.0 / 5.3.0 / 5.4 / 5.5 / 5.6 / 5.7 / 5.8 | Cloudera Manager 5.3.x, 5.4.x, 5.5.x, 5.6.x, 5.7.x and 5.8.x Support for EMC Isilon 7.2.0.1 and 7.2.0.2 |
Oracle JDK 1.7 / 1.8 or OpenJDK 7 |
| Pivotal HD 3.0, 3.4 | Ambari 1.6.1 / 1.7 |
Oracle JDK 1.7 / 1.8 or OpenJDK 7 |
| MapR 4.0.x, 4.1.0, 5.0.0 | Ambari 1.6.1 / 1.7 |
Oracle JDK 1.7 / 1.8 or OpenJDK 7 |
| Amazon S3 | Oracle JDK 1.7 / 1.8 or OpenJDK 7 | |
| IOP (BigInsights) 4.0 / 4.1 / 4.2 | Ambari 1.7 / 2.1 / 2.2 |
Oracle JDK 1.7 / 1.8 or OpenJDK 7 |
Supported Big Data applications my be noted here, as we complete testing:
| Application: | Version Supported: | Tested with: |
| Syncsort DMX-h: | 8.2.4. | See Knowledge base |
We'll now look at what you should know and do as you begin the installation.
The time required to complete a deployment of WD Fusion will in part be based on its size, larger deployments with more nodes and more complex replication rules will take correspondingly more time to set up. Use the guide below to help you plan for for deployments.
Of course, this is a guideline to help you plan your deployment. You should think ahead and determine if there are additional steps or requirements introduced by your organization's specific needs.
See the deployment checklist for a list of the TCP ports that need to be open for WD Fusion.
The following guide runs through what you need to do to correctly configure a WD Fusion deployment if the nodes are running with multiple network interfaces.
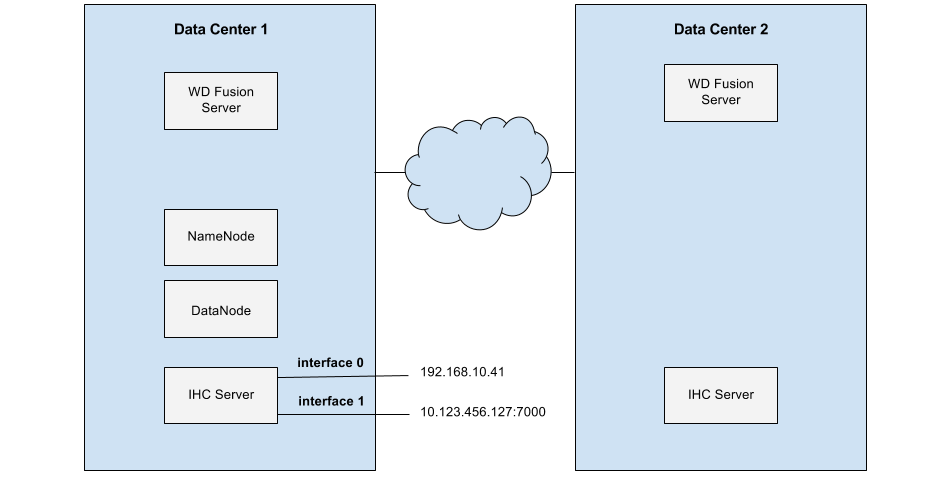
Servers running on multiple networks.
Example:
10.123.456.127 is the public IP Address of the IHC for DC1 and 192.168.10.41 is the private IP address.
The public IP address is configured in two places, both in DC1:
If you are running Kerberos on your cluster you should consider the following requirements:
Before running the installer on a platform that is secured by Kerberos, you'll need to run through the following steps: Setting up Kerberos.
In deployments that mix kerberized and non-kerberized zones it's possible that permission errors will occur because the different zones don't share the same underlying system superusers. In this scenario you would need to ensure that the superuser for each zone is created on the other zones.
For example, if you connect a Zone that runs CDH, which has superuser 'hdfs" with a zone running MapR, which has superuser 'mapr', you would need to create the user 'hdfs' on the MapR zone and 'mapr' on the CDH zone.
Kerberos Relogin Failure with Hadoop 2.6.0 and JDK7u80 or later
Hadoop Kerberos relogin fails silently due to HADOOP-10786. This impacts Hadoop 2.6.0 when JDK7u80 or later is used (including JDK8).
Users should downgrade to JDK7u79 or earlier, or upgrade to Hadoop 2.6.1 or later.
See the Knowledge Base for instructions on setting up manual Kerberos settings. You only need these in special cases as the steps have been handled by the installer. See Manual Updates for WD Fusion UI Configuration.
See the Knowledge Base for instructions on setting up auth-to-local permissions, mapping a Kerberos principal onto a local system user. See Setting up Auth-to-local.
Before you start the installation you must ensure that there are no existing WD Fusion installations or WD Fusion components installed on your elected machines. If you are about to upgrade to a new version of WD Fusion you must first make sure that you run through the removal instructions provided in the Appendix - Cleanup WD Fusion.
HADOOP_HOME environment variable is set for the root user and the user WD fusion will run as, typically hdfs.HADOOP_HOME must be the parent of the bin directory into which the Hadoop scripts are installed.
/opt/hadoop-2.6.0-cdh5.4.0/bin/hadoopHADOOP_HOME must be set to /opt/hadoop-2.6.0-cdh5.4.0/.
You need to match WANdisco's WD Fusion installer file to each data center's version of Hadoop. Installing the wrong version of WD Fusion will result in the IHC servers being misconfigured.
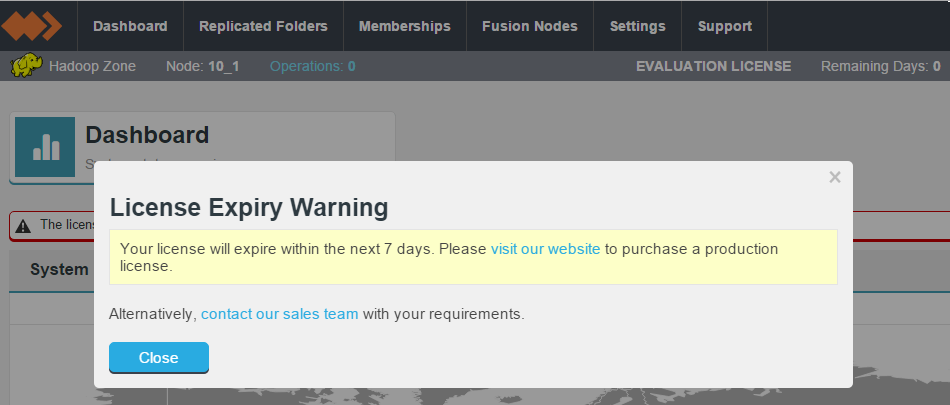
After completing an evaluation deployment, you will need to contact WANdisco about getting a license file for moving your deployment into production.
Below is the procedure for getting set up with the installer. Running the installer only takes a few minutes while you enter the neccessary settings, however, if you wish to handle installations without the need for a user having to manually enter the settings you can use the use the Silent Installer.
Use the following steps to complete an installation using the installer file. This requires an administrator to enter details throughout the procedure. Once the initial settings are entered through the terminal session, the installation is then completed through a browser or alternatively, using a Silent Installation option to handle configuration programatically.
chmod +x fusion-ui-server-<version>_rpm_installer.sh
sudo ./fusion-ui-server-<version>_rpm_installer.shVerifying archive integrity... All good.
Uncompressing WANdisco Fusion..............................
:: :: :: # # ## #### ###### # ##### ##### #####
:::: :::: ::: # # # # ## ## # # # # # # # # #
::::::::::: ::: # # # # # # # # # # # # # #
::::::::::::: ::: # # # # # # # # # # # ##### # # #
::::::::::: ::: # # # # # # # # # # # # # # #
:::: :::: ::: ## ## # ## # # # # # # # # # # #
:: :: :: # # ## # # # ###### # ##### ##### #####
Welcome to the WANdisco Fusion installation
You are about to install WANdisco Fusion version 2.4-206
Do you want to continue with the installation? (Y/n) y
Checking prerequisites:

Checking for perl: OK
Checking for java: OK

INFO: Using the following Memory settings:

INFO: -Xms128m -Xmx512m

Do you want to use these settings for the installation? (Y/n) y
Which port should the UI Server listen on? [8083]:
Please specify the appropriate backend from the list below:

[0] cdh-5.2.0
[1] cdh-5.3.0
[2] cdh-5.4.0
[3] cdh-5.5.0
[4] hdp-2.1.0
[5] hdp-2.2.0
[6] hdp-2.3.0

Which fusion backend do you wish to use? 3
You chose hdp-2.2.0:2.6.0.2.2.0.0-2041
MapR/Pivotal availability
The MapR/PHD versions of Hadoop have been removed from the trial version of WD Fusion in order to reduce the size of the installer for most prospective customers. These versions are run by a small minority of customers, while their presence nearly doubled the size of the installer package. Contact WANdisco if you need to evaluate WD Fusion running with MapR or PHD.
Additional available packages
[1] mapr-4.0.1
[2] mapr-4.0.2
[3] mapr-4.1.0
[4] mapr-5.0.0
[5] phd-3.0.0
MapR requirements
URI
MapR needs to use WD Fusion's native "fusion:///" URI, instead of the default hdfs:///. Ensure that during installation you select the Use WD Fusion URI with HCFS file system URI option.
Superuser
If you install into a MapR cluster then you need to assign the MapR superuser system account/group "mapr" if you need to run WD Fusion using the fusion:/// URI.
See the requirement for MapR Client Configuration.
See the requirement for MapR impersonation.
When using MapR and doing a TeraSort run, if one runs without the simple partitioner configuration, then the YARN containers will fail with a Fusion Client ClassNotFoundException. The remedy is to set "yarn.application.classpath" on each node's yarn-site.xml. FUI-1853
We strongly advise against running Fusion as the root user.
For default HDFS setups, the set to 'hdfs'. However, you should choose a user appropriate for running HDFS commands on your system.

Which user should Fusion run as? [hdfs]
Checking 'hdfs' ...
... 'hdfs' found.

Please choose an appropriate group for your system. By default HDP uses the 'hadoop' group.
Which group should Fusion run as? [hadoop]
Checking 'hadoop' ...
... 'hadoop' found.Installing with the following settings:
User and Group: hdfs:hadoop
Hostname: node04-example.host.com
Fusion Admin UI Listening on: 0.0.0.0:8083
Fusion Admin UI Minimum Memory: 128
Fusion Admin UI Maximum memory: 512
Platform: hdp-2.3.0 (2.7.1.2.3.0.0-2557)
Manager Type AMBARI
Manager Host and Port: :
Fusion Server Hostname and Port: node04-example.host.com:8082
SSL Enabled: false
Do you want to continue with the installation? (Y/n) yInstalling hdp-2.1.0 packages:
fusion-hdp-2.1.0-server-2.4_SNAPSHOT-1130.noarch.rpm ...
Done
fusion-hdp-2.1.0-ihc-server-2.4_SNAPSHOT-1130.noarch.rpm ...
Done
Installing fusion-ui-server package
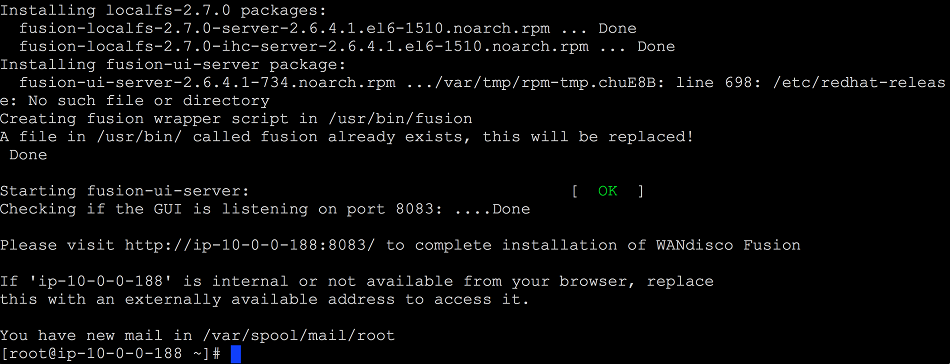
Starting fusion-ui-server:[ OK ]
Checking if the GUI is listening on port 8083: .....Done
Please visit http://<YOUR-SERVER-ADDRESS>.com:8083/ to access the WANdisco Fusion

		If 'http://<YOUR-SERVER-ADDRESS>.com' is internal or not available from your browser, replace this with an externally available address to access it.

Installation Complete
[root@node05 opt]#
Follow this section to complete the installation by configuring WD Fusion using a browser-based graphical user interface.
Silent Installation
For large deployments it may be worth using Silent Installation option.
http://<YOUR-SERVER-ADDRESS>.com:8083/It's possible to enable High Availability in your WD Fusion cluster by adding additional WD Fusion/IHC servers to a zone. These additional nodes ensure that in the event of a system outage, there will remain sufficient WD Fusion/IHC servers running to maintain replication.
Add HA nodes to the cluster using the installer and choosing to Add to an existing Zone, using a new node name.
Configuration for High Availability
When setting up the configuration for a High Availability cluster, ensure that fs.defaultFS, located in the core-site.xml is not duplicated between zones. This property is used to determine if an operation is being executed locally or remotely, if two separate zones have the same default file system address, then problems will occur. WD Fusion should never see the same URI (Scheme + authority) for two different clusters.
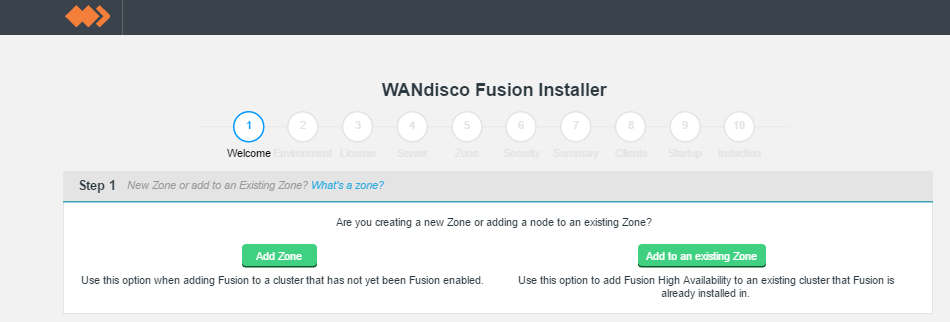
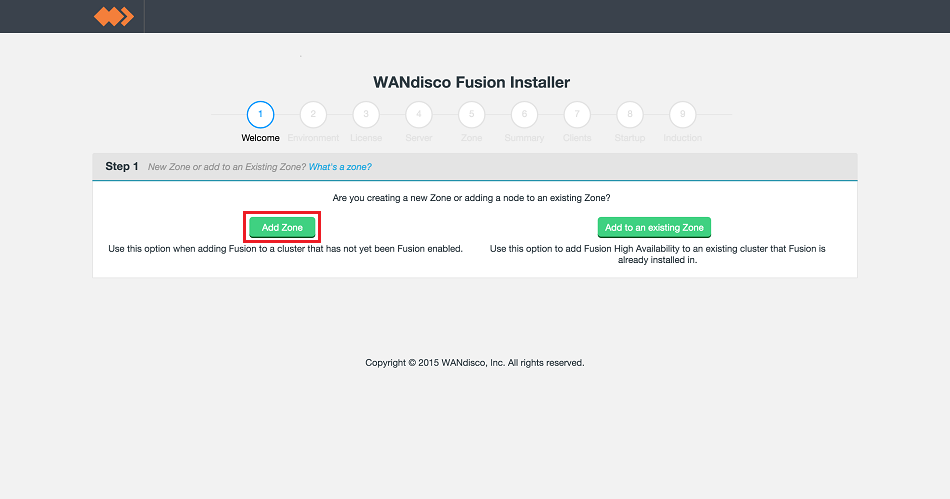
Welcome.
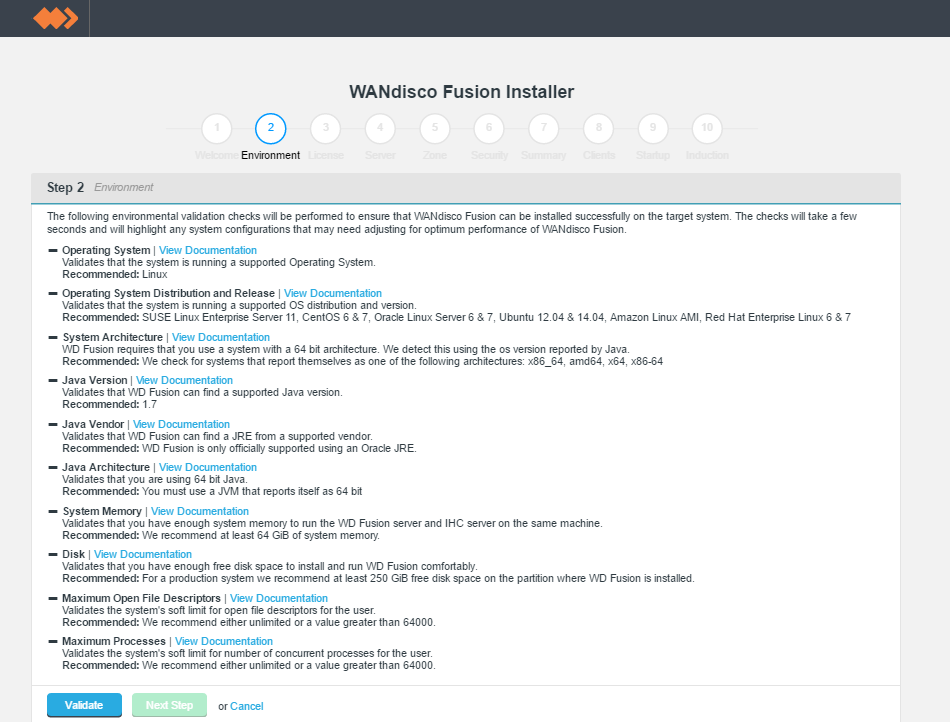
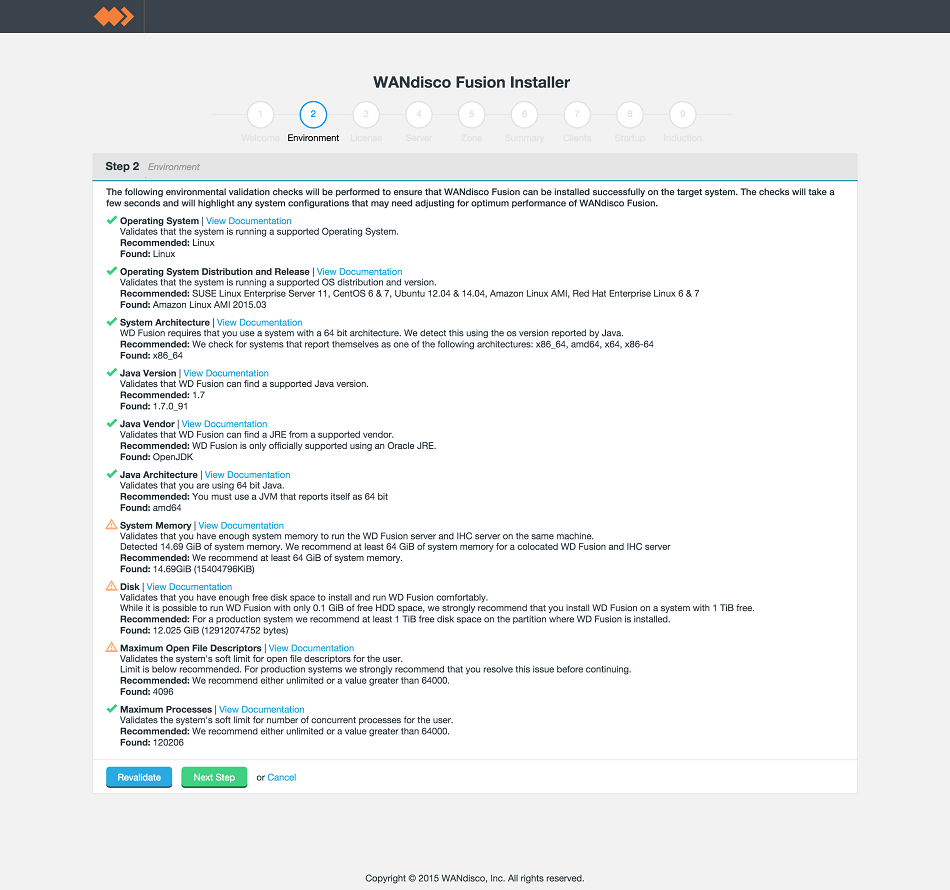
Environmental checks.
On clicking validate the installer will run through a series of checks of your system's hardware and software setup and warn you if any of WD Fusion's prerequisites are missing.

Example check results.
Any element that fails the check should be addressed before you continue the installation. Warnings may be ignored for the purposes of completing the installation, especially if the installation is only for evaluation purposes and not for production. However, when installing for production, you should also address all warnings, or at least take note of them and exercise due care if you continue the installation without resolving and revalidating.
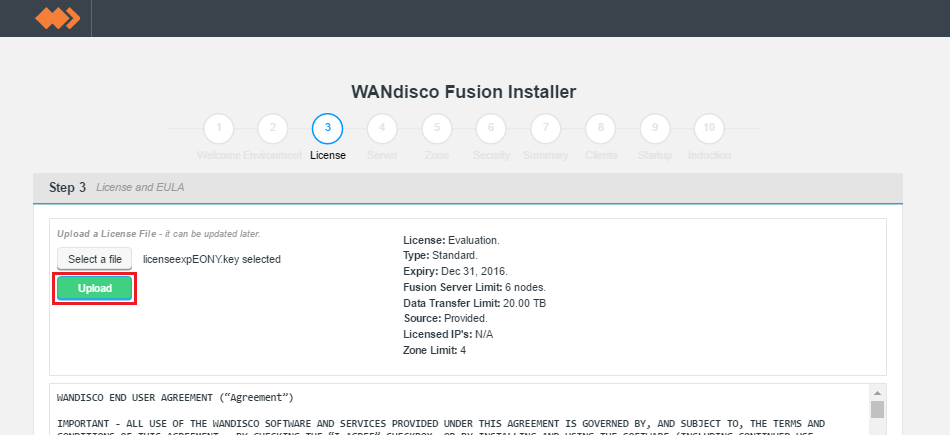
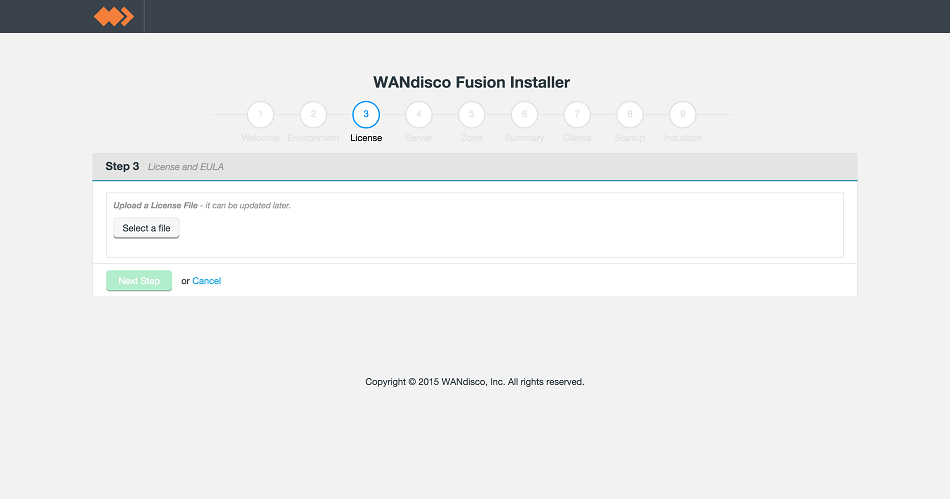
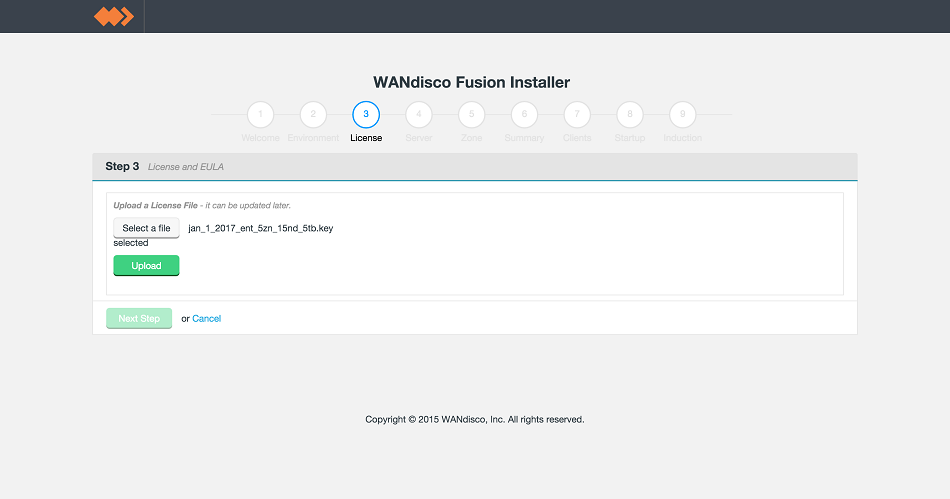
Upload your license file.
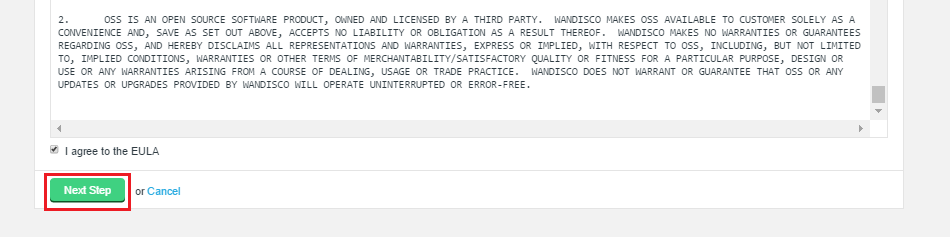
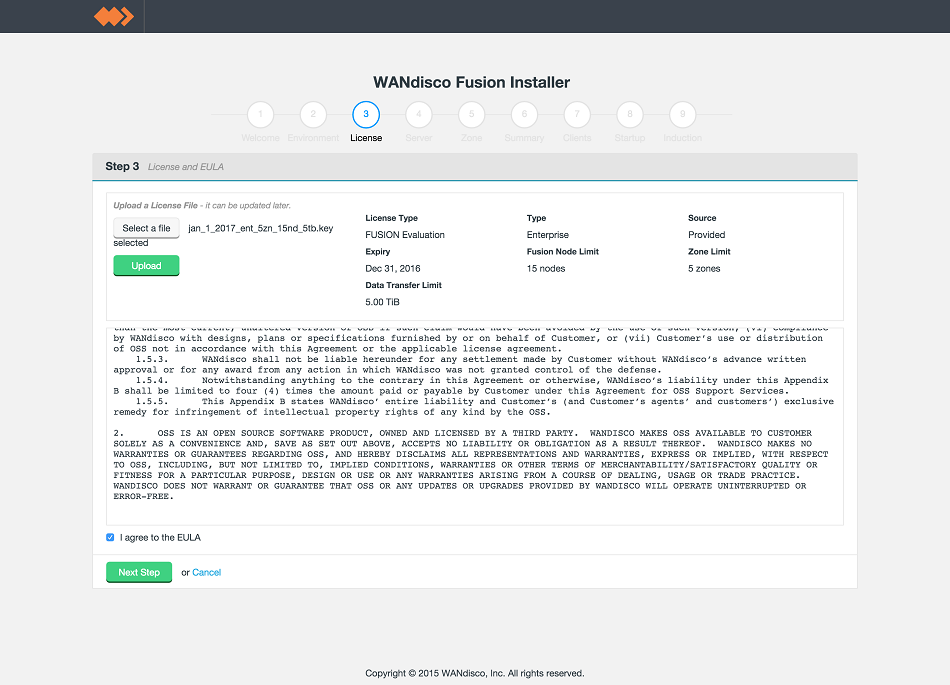
Verify license and agree to subscription agreement.
Click on the I agree to the EULA to continue, then click Next Step.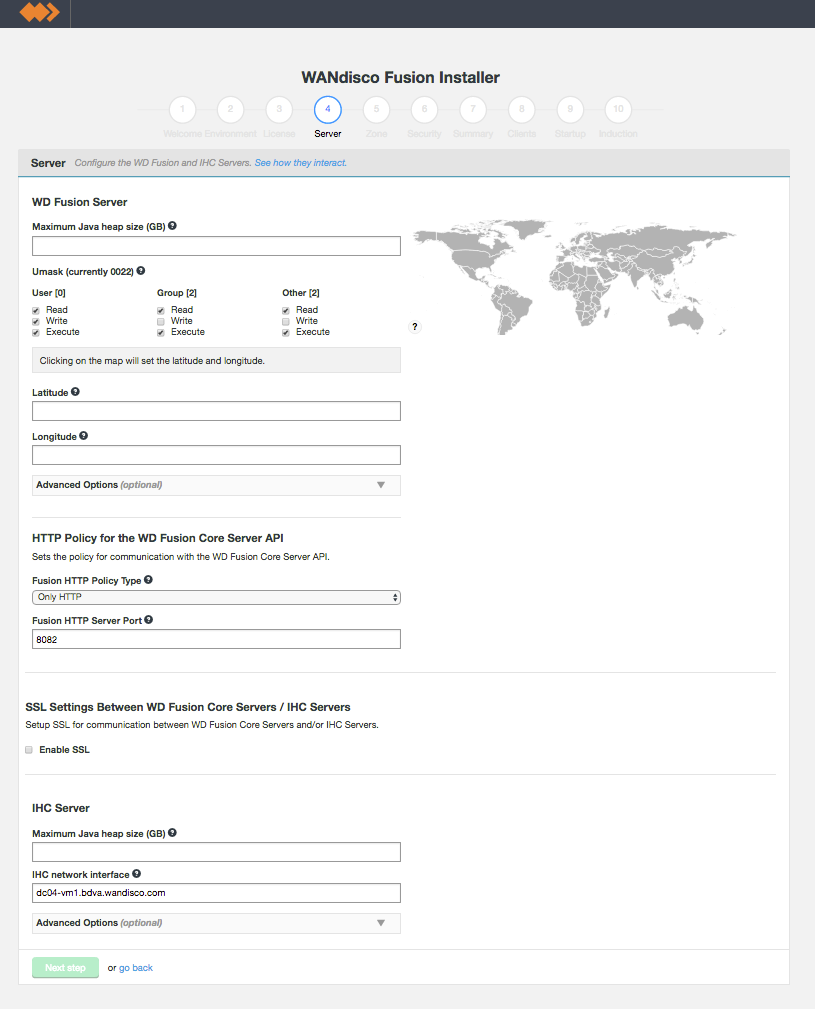
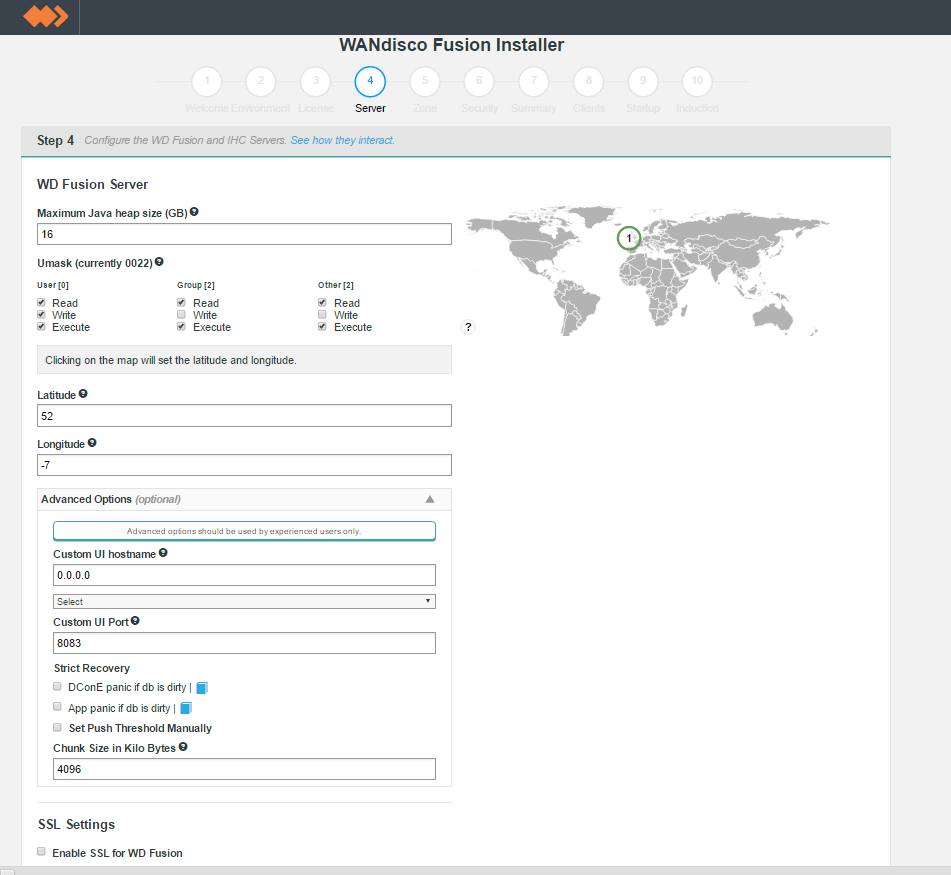
screen 4 - Server settings
Only apply these options if you fully understand what they do.
The following advanced options provide a number of low level configuration settings that may be required for installation into certain environments. The incorrect application of some of these settings could cause serious problems, so for this reason we strongly recommend that you discuss their use with WANdisco's support team before enabling them.
Sets the policy for communication with the WD Fusion Core Server API.
Known Issue:
Currently, the HTTP policy and SSL settings both independently alter how WD Fusion uses SSL, when they should be linked. You need to make sure that your HTTP policy selection and the use of SSL (enabled in the next section of the Installer) are in sync. If you choose either to the policies that use HTTPS, then you must enable SSL. If you stick with "Only HTTP" then you must ensure that you do not enable SSL. In a future release these two settings will be linked so it wont be possible to have contradictory settings.
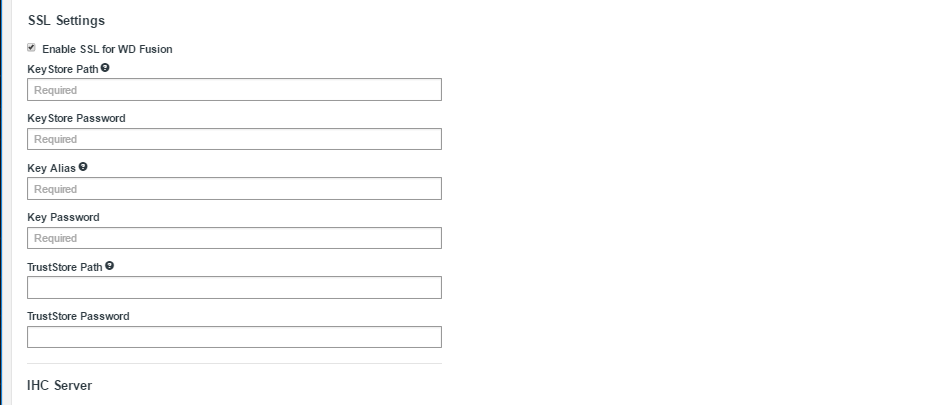
Tick the checkbox to Enable SSL
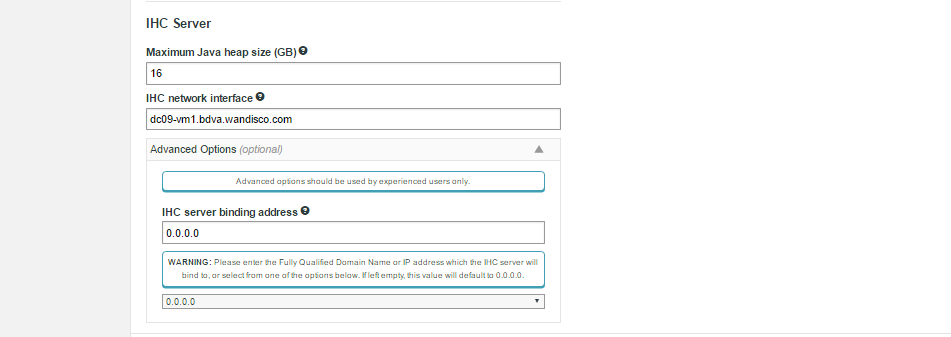
IHC Settings
ihc.server field. In all cases the port should be identical to the port used in the ihc.server address. i.e. /etc/wandisco/fusion/ihc/server/cdh-5.4.0/2.6.0-cdh5.4.0.ihc
or /etc/wandisco/fusion/ihc/server/localfs-2.7.0/2.7.0.ihc
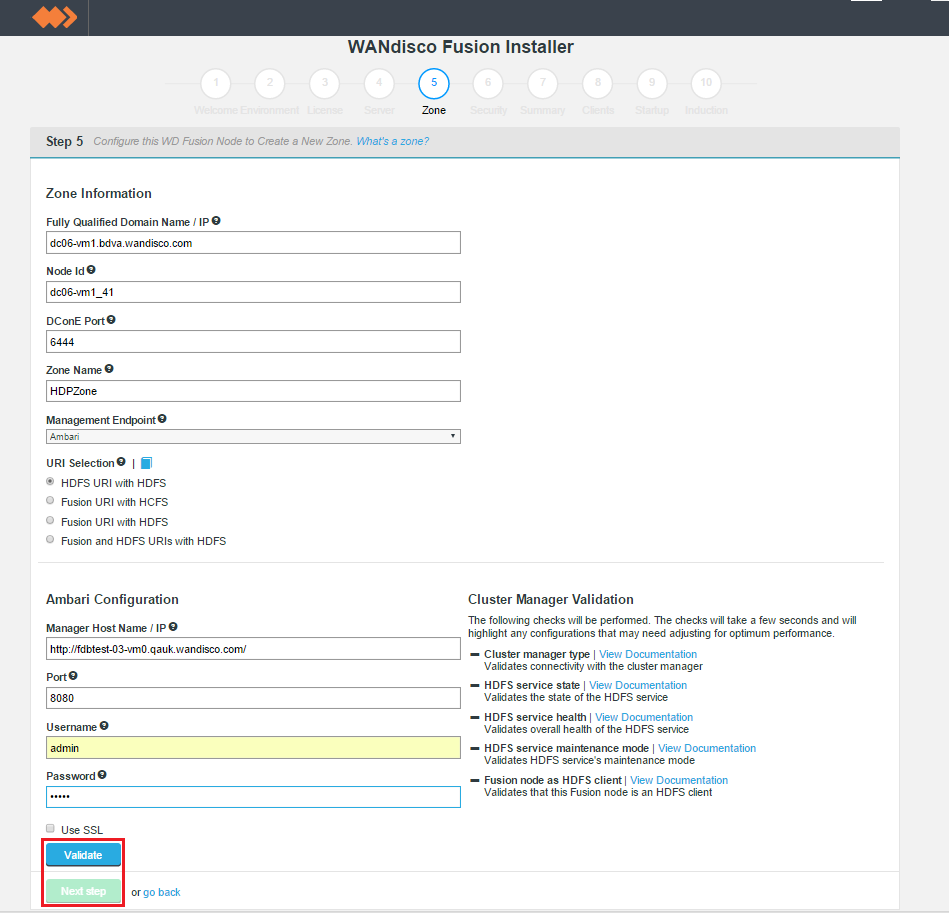
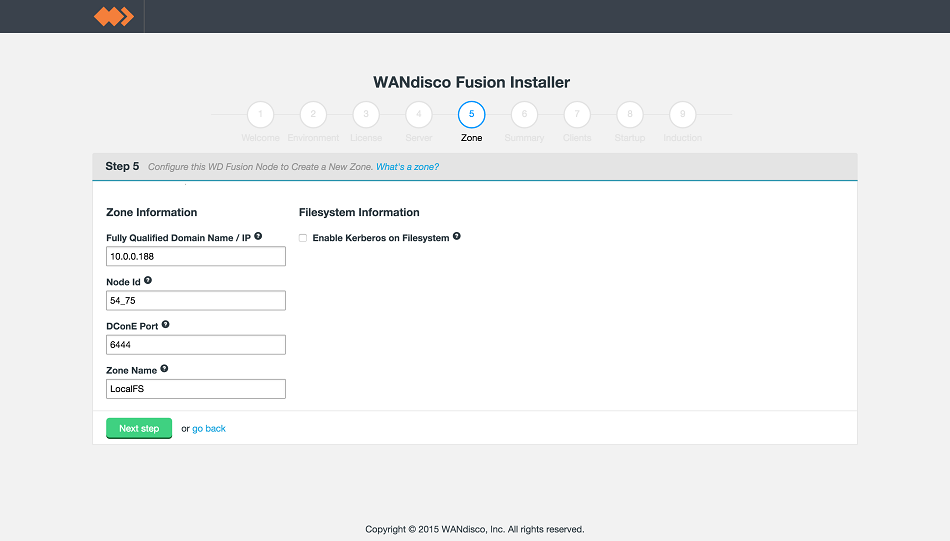
New Zone
Entry fields for zone properties
Induction failure
If induction fails, attempting a fresh installation may be the most straight forward cure, however, it is possible to push through an induction manually, using the REST API. See Handling Induction Failure.
Known issue with Location names
You must use different Location names /Node IDs for each zone. If you use the same name for multiple zones then you will not be able to complete the induction between those nodes.
Only apply these options if you fully understand what they do.
The following advanced options provide a number of low level configuration settings that may be required for installation into certain environments. The incorrect application of some of these settings could cause serious problems, so for this reason we strongly recommend that you discuss their use with WANdisco's support team before enabling them.
The default behavior for WD Fusion is to fix all replication to the Hadoop Distributed File System / hdfs:/// URI. Setting the hdfs-scheme provides the widest support for Hadoop client applications, since some applications can't support the available "fusion:///" URI they can only use the HDFS protocol. Each option is explained below:

fusion:// uri to be used; only paths starting with hdfs:// or no scheme that correspond to a mapped path will be replicated. The underlying file system will be an instance of the HDFS DistributedFileSystem, which will support applications that aren't written to the HCFS specification.
fusion:// for all data that must be replicated over an instance of the Hadoop Compatible File System. If your deployment includes Hadoop applications that are either unable to support the Fusion URI or are not written to the HCFS specfication, this option will not work.
MapR deployments
Use this URI selection if you are installing into a MapR cluster.


fusion://, hdfs:// and no scheme) and uses HDFS for the underlying file system, to support applications that aren't written to the HCFS specification.This option lets you select the TCP port that is used for WD Fusion's API.
Two advanced options are provided to change the way that WD Fusion responds to a system shutdown where WD Fusion was not shutdown cleanly. Currently the default setting is to not enforce a panic event in the logs, if during startup we detect that WD Fusion wasn't shutdown. This is suitable for using the product as part of an evaluation effort. However, when operating in a production environment, you may prefer to enforce the panic event which will stop any attempted restarts to prevent possible corruption to the database.
This section configures WD Fusion to interact with the management layer, which could be Ambari or Cloudera Manager, etc.
https in your Manager Host Name and Port. You may be prompted to update the port if you enable SSL but don't update from the default http port.Authentication without a management layer
WD Fusion normally uses the authentication built into your cluster's management layer, i.e. the Cloudera Manager username and password are required to login to WD Fusion. However, in Cloud-based deployments, such as Amazon's S3, there is no management layer. In this situation, WD Fusion adds a local user to WD Fusion's ui.properties file, either during the silent installation or through the command-line during an installation.
Should you forget these credentials, see Reset internally managed password
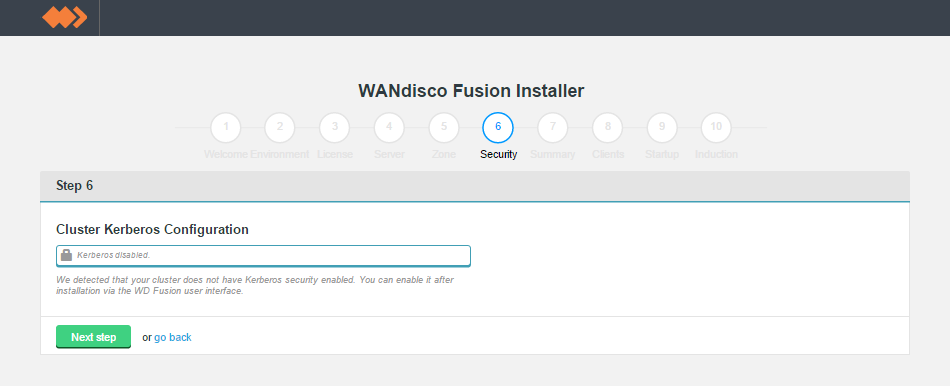
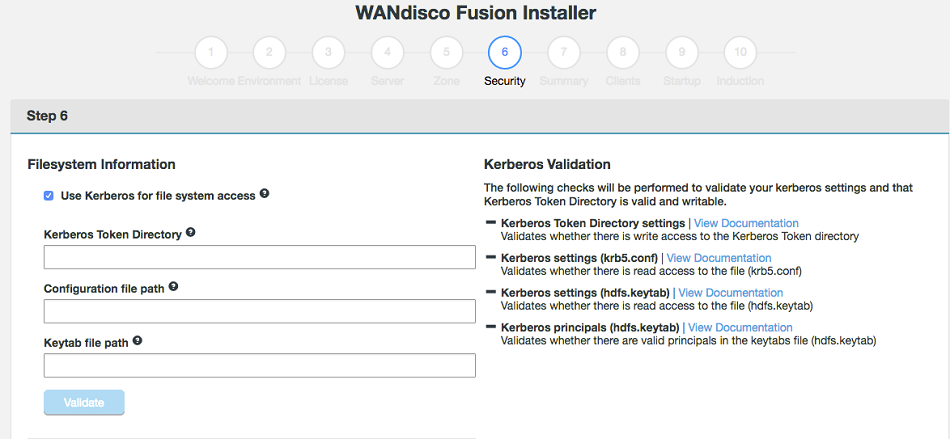
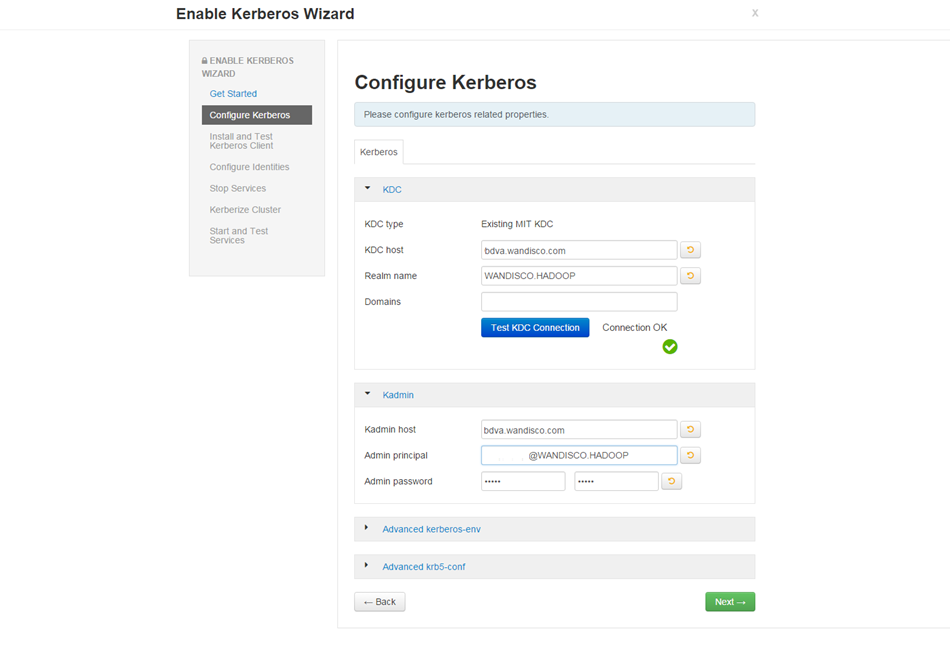
In this step you also set the configuration for an existing Kerberos setup. If you are installing into a Kerberized cluster, include the following configuration.
Enabling Kerberos authentication on WD Fusion's REST API
When a user has enabled Kerberos-authentication on their REST API, they must kinit before making REST calls, and enable GSS-Negotiate authentication. To do this with curl, the user must include the "-negotiate" and "-u:" options, like so:
curl --negotiate -u: -X GET "http://${HOSTNAME}:8082/fusion/fs/transfers"
See Setting up Kerberos for more information about Kerberos setup.
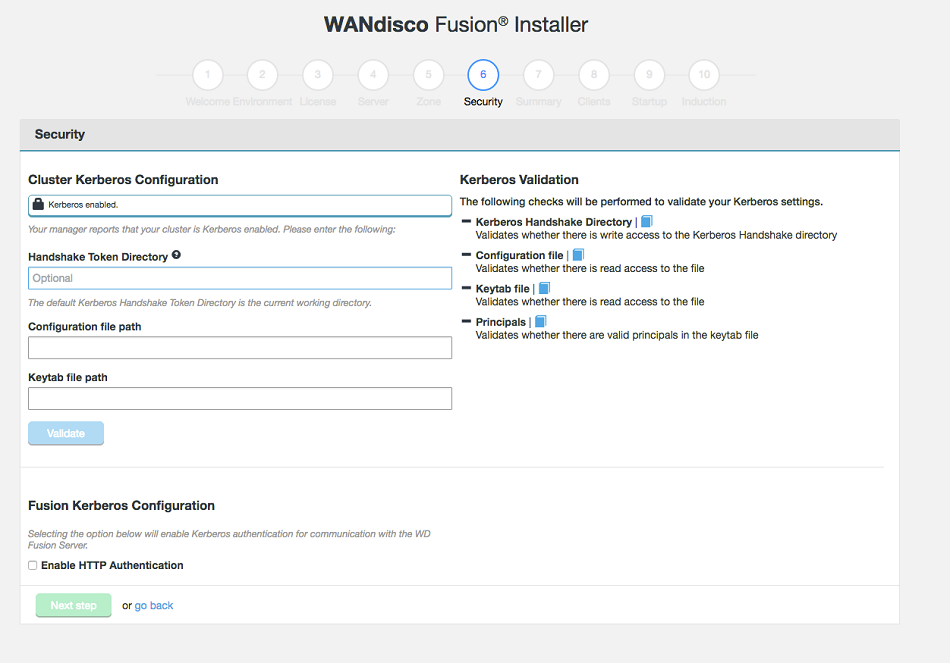
Security information.
Click the Validate button to have your entries checked by the installer.
/etc/krb5.conf/etc/krb5.keytabTick the Enable HTTP Authentication check-box to use Kerberos authentication for communication with the WD Fusion server.
Click Next step to continue or go back to return to the previous screen.

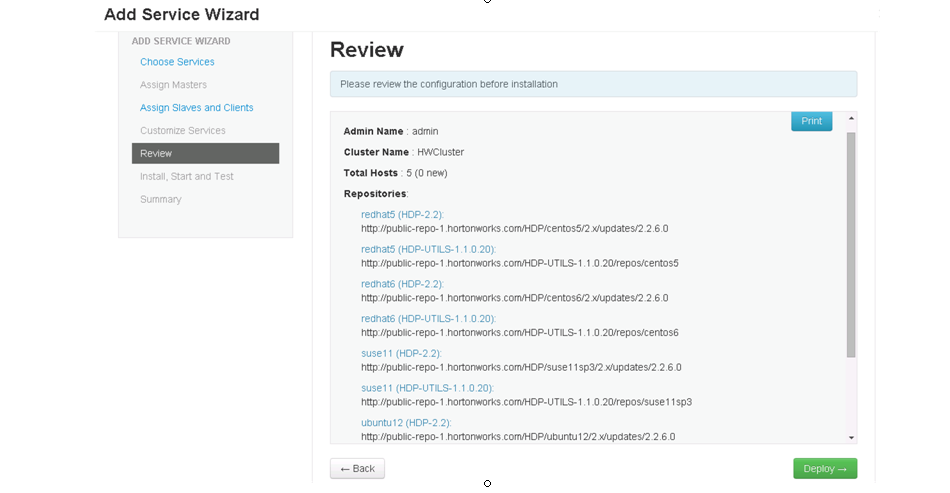
Summary
Once you are happy with the settings and all your WD Fusion clients are installed, click Deploy Fusion Server.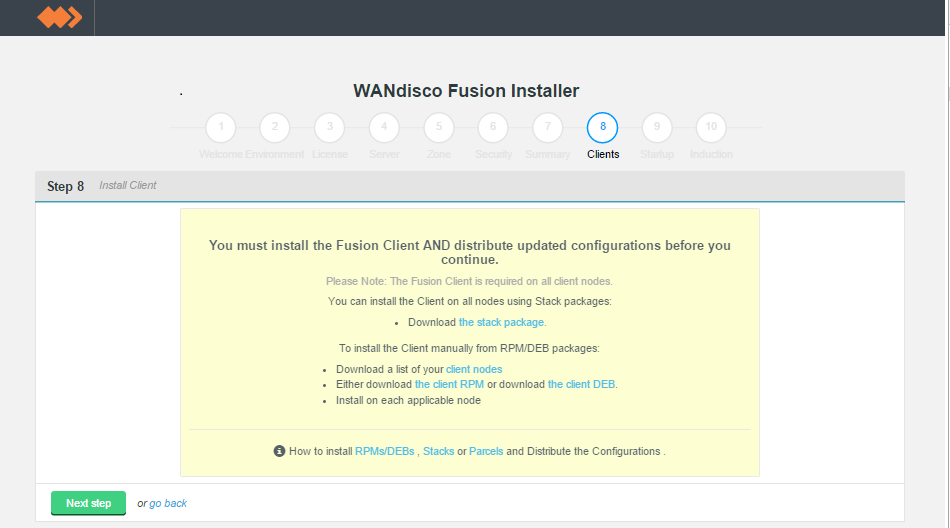
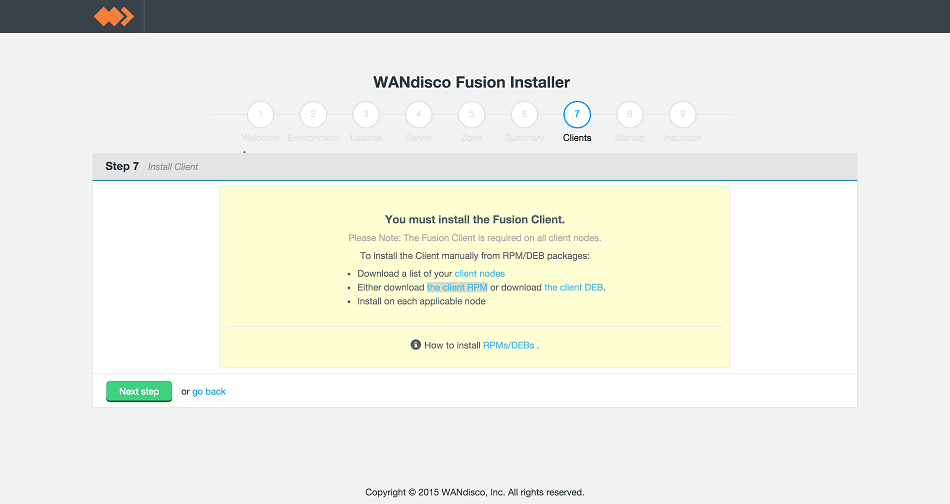
Client installations.
The installer supports three different packaging systems for installing Clients, regular RPMs, Parcels for Cloudera and HDP Stack for Hortonworks/Ambari.
Installing into MapR
If you are installing into a MapR cluster, use this default RPM, detailed below. Fusion client installation with RPMs.
client package location
You can find them in your installation directory, here:
/opt/wandisco/fusion-ui-server/ui/client_packages
/opt/wandisco/fusion-ui-server/ui/stack_packages
/opt/wandisco/fusion-ui-server/ui/parcel_packagesclient nodes
By client nodes we mean any machine that is interacting with HDFS that you need to form part of WD Fusion's replicated system. If a node is not going to form part of the replicated system then it won't need the WD Fusion client installed. If you are hosting the WD Fusion UI package on a dedicated server, you don't need to install the WD Fusion client on it as the client is built into the WD Fusion UI package. Note that in this case the WD Fusion UI server would not be included in the list of participating client nodes.
Important! If you are installing on Ambari 1.7 or CHD 5.3.x
Additionally, due to a bug in Ambari 1.7, and an issue with the classpath in CDH 5.3.x, before you can continue you must log into Ambari/Cloudera Mananger and complete a restart of HDFS, in order to re-apply WD Fusion's client configuration.
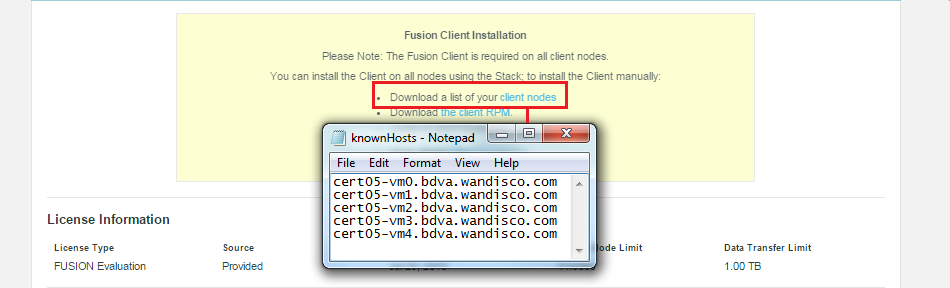
Example clients list
For more information about doing a manual installation, see Fusion Client installation for regular RPMs.
To install with the Cloudera parcel file, see: Fusion Client installation with Parcels.
For Hortonwork's own proprietary packaging format: Fusion Client installation with HDP Stack.
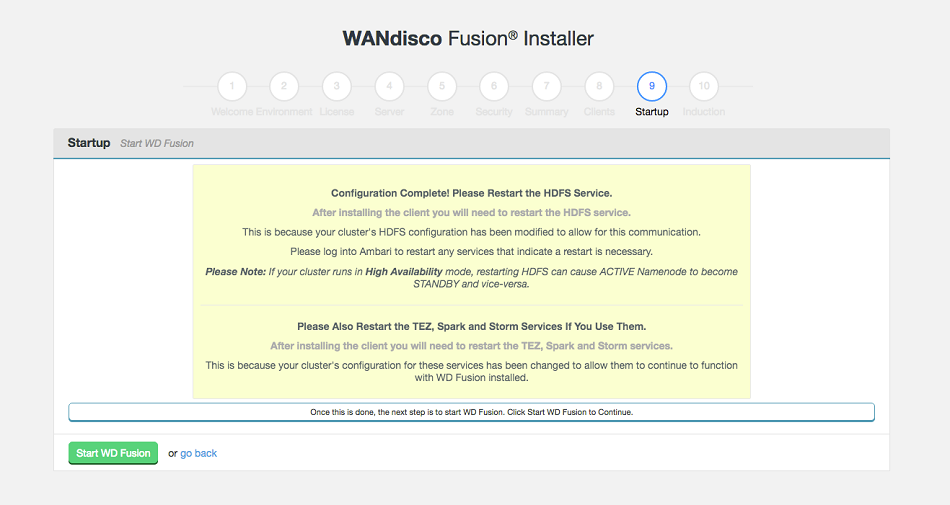
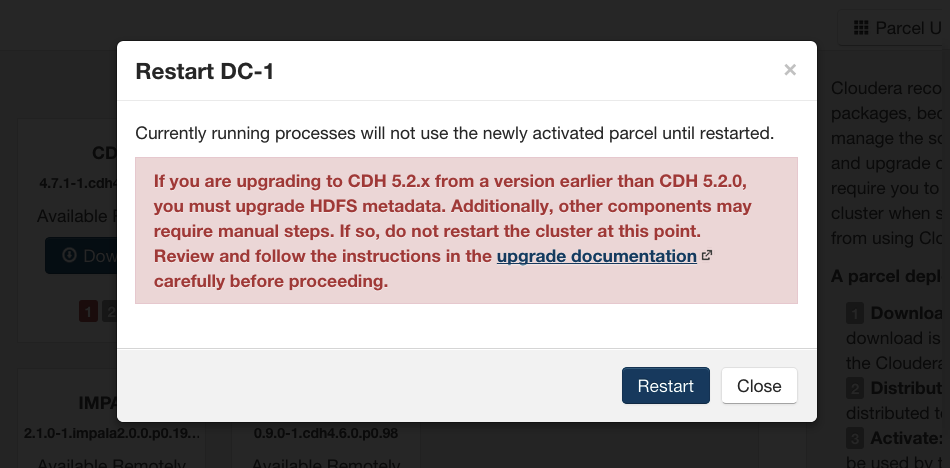
Start WD Fusion or go back
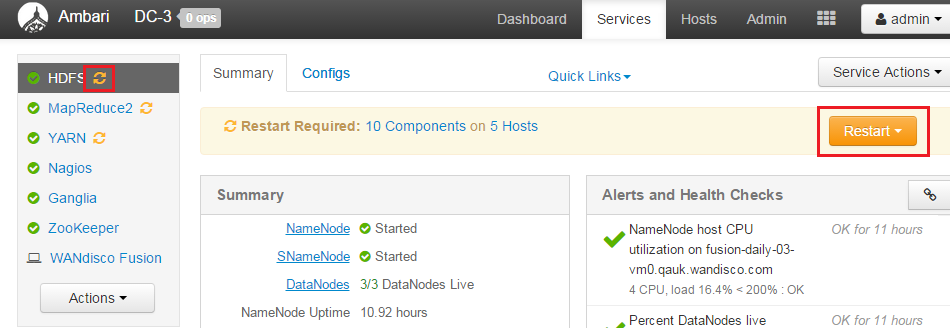
restart to refresh config
Potential failures on restart
In some deployments, particularly running HBase, you may find that you experience failures after restarting. In these situations if possible, leave the failed service down until you have completed the next step where you will restart WD Fusion.

Confirm that you have completed the restarts
Important! If you are installing on Ambari 1.7 or CHD 5.3.x
Additionally, due to a bug in Ambari 1.7, and an issue with the classpath in CDH 5.3.x, before you can continue you must log into Ambari/Cloudera Mananger and complete a restart of HDFS, in order to re-apply WD Fusion's client configuration.
When installing WD Fusion for the first time, this step is skipped. Click Skip Induction.
When adding a node to an existing zone, users will be prompted for zone details at the start of the installer and induction will be handled automatically. Nodes added to a new zone will have the option of being inducted at the end of the install process where the user can add details of the remote node.
Induction failure due to HADOOP-11461
There's a known bug in Jersey 1.9, covered in HADOOP-11461 which can result in the failure of WD Fusion's induction.
Workaround:
/etc/wandisco/fusion/server/log4j.properties in an editor.log4j.logger.com.sun.jersey.server.wadl.generators.WadlGeneratorJAXBGrammarGenerator=OFF
Known issue with Location names
You must use different Location names /IDs for each zone. If you use the same name for multiple zones then you will not be able to complete the induction between those nodes.
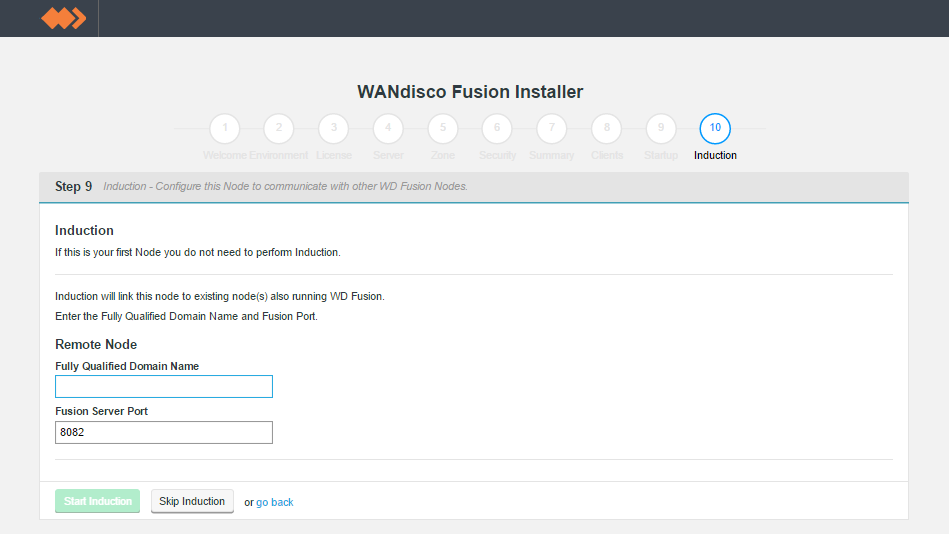
Induction.
WD Fusion UI
Known issue: ClassNotFoundException on Cloudera 5.7 file browser
When deploying WD Fusion into a Cloudera cluster, it is possible that you may encounter problems using the File Browser with the Cloudera Manager (it's a CDH Enterprise feature under HDFS > File Browser).
The problem is only seen when Cloudera Navigator is installed after WD Fusion. If you installed CN before you installed WD Fusion, you shouldn't see the problem.
The workaround depends on your installation method:
Once WD Fusion has been installed on all data centers you can proceed with setting up replication on your HDFS file system. You should plan your requirements ahead of the installation, matching up your replication with your cluster to maximise performance and resilience. The next section will take a brief look at a example configuration and run through the necessary steps for setting up data replication between two data centers.

Example WD Fusion deployment in a 3 data center deployment.
In this example, each one of three data centers ingests data from it's own datasets, "Weblogs", "phone support" and "Twitter feed". An administrator can choose to replicate any or all of these data sets so that the data is replicated across any of the data centers where it will be available for compute activities by the whole cluster. The only change required to your Hadoop applications will be the addition of a replication specific URI, and this will only be a requirement if you are using HCFS rather than the native HDFS protocal.
The following steps are used to start replicating hdfs data. The detail of each step will depend on your cluster setup and your specific replication requirements, although the basic steps remain the same.
<property>
  <name>dfs.client.block.write.replace-datanode-on-failure.best-effort</name>
  <value>true</value>
</property>
dfs.client.block.write.replace-datanode-on-failure.best-effort to true, allowing the append to continue despite the inability to create the 3 block replicas. Note that this is not a recommended setting for clusters with more than 3 datanodes, as it may result in under replicated blocks. In this case the root cause of the errors should be identified and addressed - potentially a disk space issue could result in there not being sufficient datanodes having enough space to create the 3 replicas, resulting in the same symptoms.
You can't move files between replicated directories
Currently you can't perform a straight move operation between two separate replicated directories.
The Installer lets you configure WD Fusion to use your platform's Kerberos implementation. You can find supporting information about how WD Fusion handles Kerberos in the Admin Guide, see Setting up Kerberos.
The deployment section covers the final step in setting up a WD Fusion cluster, where supported Hadoop applications are plugged into WD Fusion's synchronized distributed namespace. It won't be possible to cover all the requirements for all the third-party software covered here, we strongly recommend that you get hold of the corresponding documenation for each Hadoop application before you work through these procedures.
This guide integrates WD Fusion with Apache Hive, it aims to accomplish the following goals:
The following requirements come into play if you have deployed WD Fusion using with its native fusion:/// URI. In order to store a Hive table in WD Fusion you specify a WD Fusion URI when creating a table. E.g. consider creating a table called log that will be stored in a replicated directory.
CREATE TABLE log(requestline string) stored as textfile location 'fusion:///repl1/hive/log';
Hive from CDH 5.3/5.4 does not work with WD Fusion, (because of HIVE-9991). To get it working with CDH 5.3 and 5.4. you need to modify the default Hive file system setting. In Cloudera Manager, add the following property to hive-site.xml:
<property>
    <name>fs.defaultFS</name>
    <value>fusion:///</value>
</property>
This property should be added in 3 areas:
It's possible to configure Hive to use WD Fusion URIs as output paths for storing data, to do this you must specify a Fusion URI when writing data back to the underlying Hadoop-compatible file system (HCFS). For example, consider writing data out from a table called log to a file stored in a replicated directory:
INSERT OVERWRITE DIRECTORY 'fusion:///repl1/hive-out.csv' SELECT*FROMlog;
In this section we'll describe how to configure Hive to use fusion URIs as input paths for loading data.
It is not common to load data into a Hive table from a file using the fusion URI. When loading data into Hive from files the core-site.xml setting fs.default.name must also be set to fusion, which may not be desirable. It is much more common to load data from a local file using the LOCAL keyword:
LOAD DATA LOCAL INPATH '/tmp/log.csv' INTO TABLE log;If you do wish to use a fusion URI as a load path, you must change the
fs.defaultFS setting to use WD Fusion, as noted in a previous section. Then you may run:
LOAD DATA INPATH 'fusion:///repl1/log.csv' INTO TABLE log;
Advanced configuration - please contact WANdisco before attempting
In this section we'll describe how to share the Hive metastore between two clusters. Since WANdisco Fusion can replicate the file system that contains the Hive data storage, sharing the metadata presents a single logical view of Hive to users on both clusters.
When sharing the Hive metastore, note that Hive users on all clusters will know about all tables. If a table is not actually replicated, Hive users on other clusters will experience errors if they try to access that table.
There are two options available.
In this configuration, the Hive metastore is configured normally on one cluster. On other clusters, the metastore process points to a read-only copy of the metastore database. MySQL can be used in master-slave replication mode to provide the metastore.
In this configuration, the Hive metastore is writable on all clusters.
There are three strategies for replicating Hive metastore data with WD Fusion:
For Cloudera CDH: See Hive Metastore High Availability.
For Hortonworks/Ambari: High Availability for Hive Metastore.
In order to manually replicate metastore data ensure that the DDLs are placed on two clusters, and perform a partitions rescan.
Also provided in a parcel format is the WANdisco compatible version of Cloudera's Impala tool:
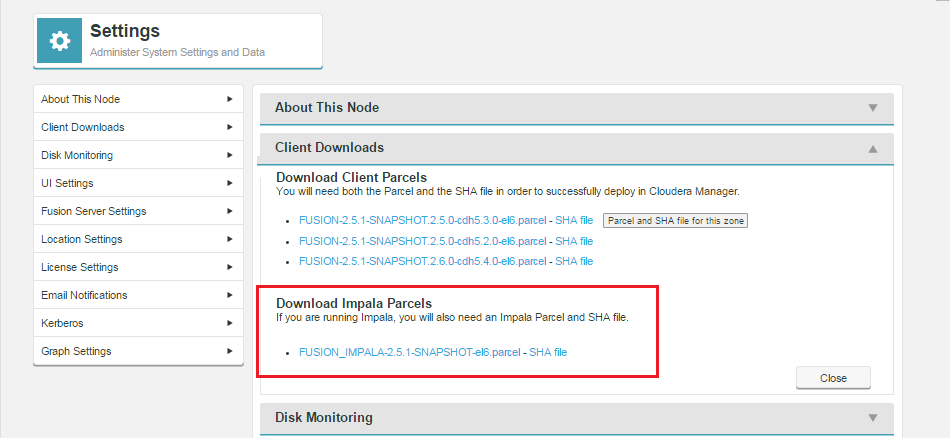
Ready to distribute.
Follow the same steps described for installing the WD Fusion client, downloading the parcel and SHA file, i.e.:
FUSION_IMPALA parcel and SHA into the local parcels repository, on the same node where Cloudera Manager Services is installed, this need not be the same location where the Cloudera Manager Server is installed. The default location is at: /opt/cloudera/parcel-repo, but is configurable. In Cloudera Manager, you can go to the Parcels Management Page -> Edit Settings to find the Local Parcel Repository Path. See Parcel Locations.
By default local parcels are stored on the Cloudera Manager Server:/opt/cloudera/parcel-repo. To change this location, follow the instructions in Configuring Server Parcel Settings.
The location can be changed by setting the parcel_dir property in /etc/cloudera-scm-agent/config.ini file of the Cloudera Manager Agent and restart the Cloudera Manager Agent or by following the instructions in Configuring the Host Parcel Directory.
Don't link to /usr/lib/
The path to the CDH libraries is /opt/cloudera/parcels/CDH/lib instead of the usual /usr/lib. We strongly recommend that you don't link /usr/lib/ elements to parcel deployed paths, as some scripts distinguish between the two paths.
In order to get Impala compatible with the Fusion HDFS proxy, the user needs to include a small configuration change in their Impala service through Cloudera Manager. In Cloudera Manager, the user needs to add an environment variable in the section Impala Service Environment Advanced Configuration Snippet (Safety Valve),
AUX_CLASSPATH='colon-delimited list of all the Fusion client jars'
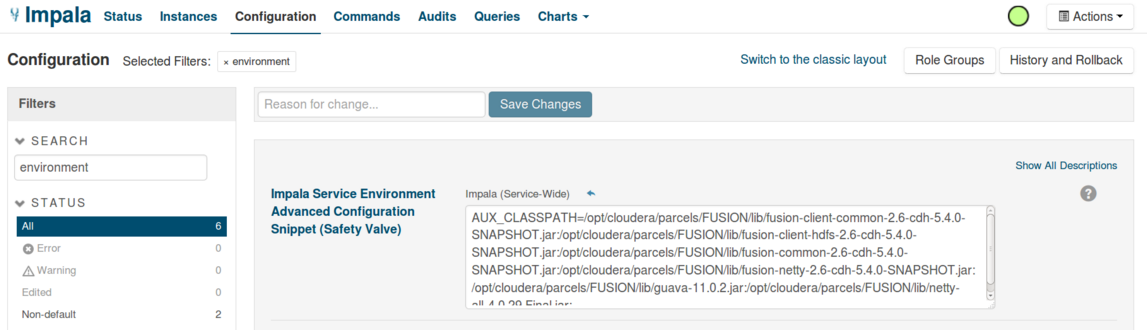
Classpath configuration for WD Fusion.
The Oozie service can function with Fusion, running without problem with Cloudera CDH. Under Hortonworks HDP you need to apply the following procedure, after completing the WD Fusion installation:
cd /usr/hdp/current/oozie-server/oozie-server/webapps/oozie/WEB-INF/libln -s /opt/wandisco/fusion/client/lib/* /usr/hdp/{hdp_version}/oozie/libext$ /usr/hdp/current/oozie/bin/oozie-setup.sh prepare-war oozie admin -oozie http://<node-ip>:11000/oozie -shareliblistEach node in an Oracle:BDA deployment has multiple network interfaces, with at least one used for intra-rack communications and one used for external communications. WD Fusion requires external communications so configuration using the public IP address is required instead of using host names.
Oracle:BDA is built on top of Cloudera's Hadoop and requires some extra steps to support multi-homed network environment.
There's a known issue concerning configuration and the Cloudera Navigator Metadata Server classpath.
Error message:2016-04-19 08:50:31,434 ERROR com.cloudera.nav.hdfs.extractor.HdfsExtractorShim [CDHExecutor-0-CDHUrlClassLoader@3bd4729d]: Internal Error while extracting
java.lang.RuntimeException: java.lang.ClassNotFoundException: Class com.wandisco.fs.client.FusionHdfs not found
at org.apache.hadoop.conf.Configuration.getClass(Configuration.java:2199)
...There's no clear way to override the fs.hdfs.impl setting just for the Navigator Metadata server, as is required for running with WD Fusion.
Use the following fix script to overcome the problem:
CLIENT_JARS=$(for i in $(ls -1 /opt/cloudera/parcels/CDH/lib/hadoop/client/*.jar  | grep -v jsr305 | awk '{print $NF}' ) ; do echo -n $i: ; done)
NAVIGATOR_EXTRA_CLASSPATH=/opt/wandisco/fusion/client/lib/*:/opt/cloudera/parcels/CDH/lib/hadoop/lib/jetty-*.jar:$CLIENT_JARS
echo "NAVIGATOR_EXTRA_CLASSPATH=$NAVIGATOR_EXTRA_CLASSPATH" > ~/navigator_env.txt
The environment variables are provided here - navigator_env.txt
You need to put this in the configuration for the Cloudera Management Service under "Navigator Metadata Server Environment Advanced Configuration Snippet (Safety Valve)". This modification currently needs to be applied whenever you upgrade or downgrade WD Fusion.
Apache Tez is a YARN application framework that supports high performance data processing through DAGs. When set up, Tez uses its own tez.tar.gz containing the dependencies and libraries that it needs to run DAGs. For a DAG to access WD Fusion's fusion:/// URI it needs our client jars:
Configure the tez.lib.uris property with the path to the WD Fusion client jar files.
...
<property>
  <name>tez.lib.uris</name>
# Location of the Tez jars and their dependencies.
# Tez applications download required jar files from this location, so it should be public accessible.
  <value>${fs.default.name}/apps/tez/,${fs.default.name}/apps/tez/lib/</value>
</property>
...
In order to make Hive with Tez work, you need to append the Fusion jar files in tez.cluster.additional.classpath.prefix under the Advanced tez-site section:
tez.cluster.additional.classpath.prefix = /opt/wandisco/fusion/client/lib/*

Tez configuration.
Running Hortonworks Data Platform, the tez.lib.uris parameter defaults to /hdp/apps/${hdp.version}/tez/tez.tar.gz.
So, to add Fusion libs, there are two choices:
Option 1: Delete the above value, and instead have a list including the path where the above gz unpacks to, and the path where Fusion libs are.
or
Option 2: Unpack the above gz, repack with WD Fusion libs and re-upload to HDFS.
Note that both changes are vulnerable to a platform (HDP) upgrade.
Apache Ranger is another centralized security console for Hadoop clusters, a preferred solution for Hortonworks HDP (whereas Cloudera prefers Apache Sentry). While Apache Sentry stores its policy file in HDFS, Ranger uses its own local MySQL database, which introduces concerns over non-replicated security policies. Ranger also applies its policies to the ecosystem via java plugins into the ecosystem components - the namenode, hiveserver etc. In testing, the WD Fusion client has not experienced any problems communicating with Apache Ranger-enabled platforms (Ranger+HDFS).
Ensure that the hadoop system user, typically hdfs, has permission to impersonate other users.
...
<property>
<name>hadoop.proxyuser.hdfs.users</name>
<value>*</value>
</property>
<property>
<name>hadoop.proxyuser.hdfs.groups</name>
<value>*</value>
</property>
...Apache Solr is a scalable search engine that can be used with HDFS.
In this section we cover what you need to do for Solr to work with a WD Fusion deployment.
Getting set up with the default URI is simple, Solr just needs to be able to find the fusion client jar files that contain the FusionHdfs class.
cp /opt/cloudera/parcels/FUSION/lib/fusion* /opt/cloudera/parcels/CDH/lib/solr/webapps/solr/WEB-INF/lib
cp /opt/cloudera/parcels/FUSION/lib/netty-all-*.Final.jar /opt/cloudera/parcels/CDH/lib/solr/webapps/solr/WEB-INF/libThis is a minimal working solution with Solr on top of fusion.
Requirements
Solr will use a shared replicated directory.
cd /opt/cloudera/parcels/CDH/lib/solr/webapps/solr/WEB-INF/lib
ln -s /opt/cloudera/parcels/FUSION/lib/fusion* .
ln -s /opt/cloudera/parcels/FUSION/lib/netty-all-4* .
ln -s /opt/cloudera/parcels/FUSION/lib/bcprov-jdk15on-1.52 .
$ solrctl instancedir --generate conf1$ sudo -u hdfs hdfs dfs -mkdir fusion:///repl1/solr
$ sudo -u hdfs hdfs dfs -chown solr:solr fusion:///repl1/solrvvvvvvv$ solrctl instancedir --create conf1 conf1$ solrctl collection --create col1 -c conf1 -s 3This set of instructions will set up Flume to ingest data via the fusion:/// URI.
agent.sources.flumeSource.command" to the path of the source data.agent.sinks.flumeHDFS.hdfs.path" to the replicated directory of one of the DCs. Make sure it begins with fusion:/// to push the files to Fusion and not hdfs.useradd -G hadoop <username>'hadoop fs -mkdir /user/<username>'hadoop fs -mkdir /fus-repl'hadoop fs -chown username:hadoop /fus-repl'If you want to set up Flume through Cloudera Manager follow these steps:
/opt/cloudera/parcel-repo on the Cloudera Managed node.hdfs user, e.g. su hdfs, and run
hadoop fs -ls /repl1/flume_out"It's possible to deploy WD Fusion with Apache's high-speed data processing engine. Note that prior to version 2.9.1 you needed to manually add the SPARK_CLASSPATH.
There is a known issue where Spark is not picking up Hive-Site.xml, See Hadoop configuration is not localised when submitting job in yarn-cluster mode (Fixed in version 1.4).
You need to manually add it in by either:
/etc/hive/conf/hive-site.xml into /etc/spark/conf.HADOOP_CONF_DIR to /etc/hive/conf/ (or the directory where hive-site.xml is located).Gateway Client Environment Advanced Configuration Snippet (Safety Valve) for hadoop-env.sh = HADOOP_CLASSPATH=/opt/cloudera/parcels/$FUSION-PARCEL/lib/*:$HADOOP_CLASSPATH:fusion:/// URI has a known issue where it complains about "Wrong fs". For now Spark is only verified with FusionHdfs going through the hdfs:/// URI.
It's possible to run HBase in a cold-back-up mode across multiple data centers using WD Fusion, so that in the event of the active HBase node going down, you can bring up the HBase cluster in another data centre, etc. However, there will be unavoidable and considerable inconsistency between the lost node and the awakened replica. The following procedure should make it possible to overcome corruption problems enough to start running HBase again, however, since the damage dealt to underlying filesystem might be arbitrary, it's impossible to account for all possible corruptions.
For HBase to run with WD Fusion, the following directories need to be created and permissioned, as shown below:
| platform | path | permission |
| CDH5.x | /user/hbase | hbase:hbase |
| HDP2.x | /hbase /user/hbase |
hbase:hbase hbase:hbase |
The steps below provide a method of handling a recovery using a cold back-up. Note that multiple HMaster/region servers restarts might be needed for certain steps, since hbck command generally requires master to be up, which may require fixing filesystem-level inconsistencies first.
recovered.edits folder artifacts from possible log splitting for each table/region. This might not be strictly necessary, but could reduce the numbers of errors observed during startup.
hdfs dfs -rm /apps/hbase/data/data/default/TestTable/8fdee4924ac36e3f3fa430a68b403889/recovered.editshbase:meta and hbase:namespace). Sideline option forces hbck to move corrupted HFiles to a special .corrupted folder, which could be examined/cleanup up by admins:
hbase hbck -checkCorruptHFiles -sidelineCorruptHFileshbase hbck -fixTableOrphanshbase hbck -repairhbase zkcli rmr /hbase-unsecurehbase hbck -metaonly
hbase hbck -fixMetaThe Phoenix Query Server provides an alternative means for interaction with Phoenix and HBase. When WD Fusion is installed, the Phoenix query server may fail to start. The following workaround will get it running with Fusion.
#phoenix_class_path = os.getenv('PHOENIX_LIB_DIR','')def setPath():
PHOENIX_CLIENT_JAR_PATTERN = "phoenix-*-client.jar"
PHOENIX_THIN_CLIENT_JAR_PATTERN = "phoenix-*-thin-client.jar"
PHOENIX_QUERYSERVER_JAR_PATTERN = "phoenix-server-*-runnable.jar"
PHOENIX_TESTS_JAR_PATTERN = "phoenix-core-*-tests*.jar"
# Backward support old env variable PHOENIX_LIB_DIR replaced by PHOENIX_CLASS_PATH
global phoenix_class_path
#phoenix_class_path = os.getenv('PHOENIX_LIB_DIR','')
phoenix_class_path = "/opt/wandisco/fusion/client/lib/fusion-client-hdfs-2.6.7-hdp-2.3.0.jar:/opt/wandisco/fusion/client/lib/fusion-client-common-2.6.7-hdp-2.3.0.jar:/opt/wandisco/fusion/client/lib/fusion-netty-2.6.7-hdp-2.3.0.jar:/opt/wandisco/fusion/client/lib/netty-all-4.0.23.Final.jar:/opt/wandisco/fusion/client/lib/guava-11.0.2.jar:/opt/wandisco/fusion/client/lib/fusion-common-2.6.7-hdp-2.3.0.jar"
if phoenix_class_path == "":
phoenix_class_path = os.getenv('PHOENIX_CLASS_PATH','')if java_home:
java = os.path.join(java_home, 'bin', 'java')
else:
java = 'java'
# " -Xdebug -Xrunjdwp:transport=dt_socket,address=5005,server=y,suspend=n " + \
# " -XX:+UnlockCommercialFeatures -XX:+FlightRecorder -XX:FlightRecorderOptions=defaultrecording=true,dumponexit=true" + \
java_cmd = '%(java)s -cp ' + hbase_config_path + os.pathsep + phoenix_utils.phoenix_queryserver_jar + os.pathsep + phoenix_utils.phoenix_class_path + \
" -Dproc_phoenixserver" + \
" -Dlog4j.configuration=file:" + os.path.join(phoenix_utils.current_dir, "log4j.properties") + \
" -Dpsql.root.logger=%(root_logger)s" + \
" -Dpsql.log.dir=%(log_dir)s" + \
" -Dpsql.log.file=%(log_file)s" + \
" " + opts + \
The following procedure covers the installation and setup of WD Fusion deployed over the LocalFileSystem. This requires an administrator to enter details throughout the procedure. Once the initial settings are entered through the terminal session, the deployment to the LocalFileSystem is then completed through a browser.
chmod +x fusion-ui-server-<version>_rpm_installer.sh
sudo ./fusion-ui-server-<version>_rpm_installer.sh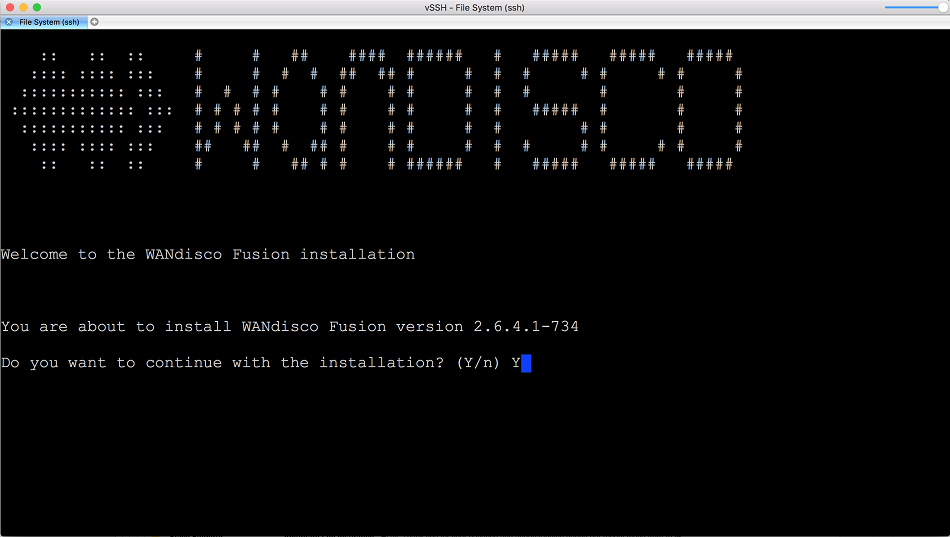
LocalFS figure 1.
INFO: Using the following Memory settings for the WANDISCO Fusion Admin UI process:

INFO: -Xms128m -Xmx512m

Do you want to use these settings for the installation? (Y/n) y
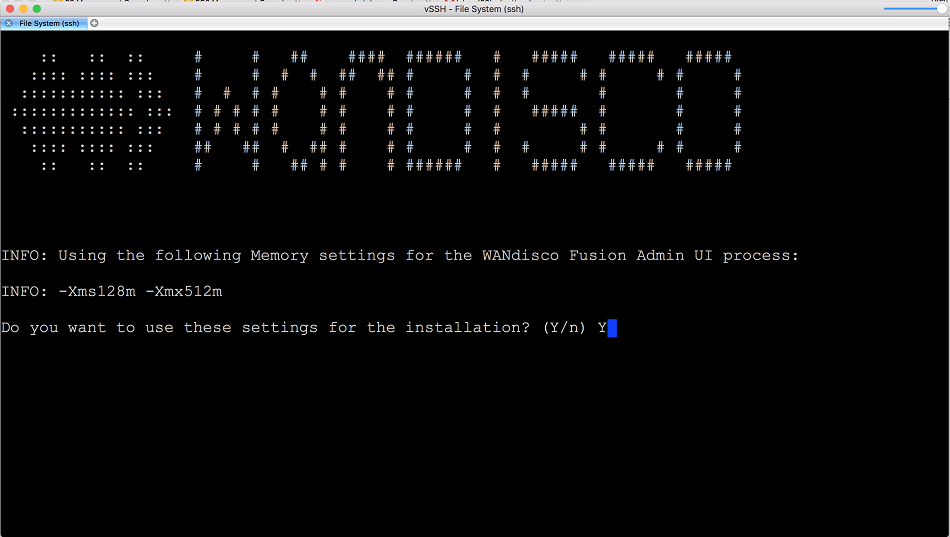
LocalFS figure 2.
Which port should the UI Server listen on [8083]:
 Please specify the appropriate platform from the list below:

 [0] localfs-2.7.0

 Which Fusion platform do you wish to use? 0
 You chose localfs-2.7.0:2.7.0
 Please provide an admin username for the Fusion web ui: admin
 Please provide an admin password for the Fusion web ui: ************
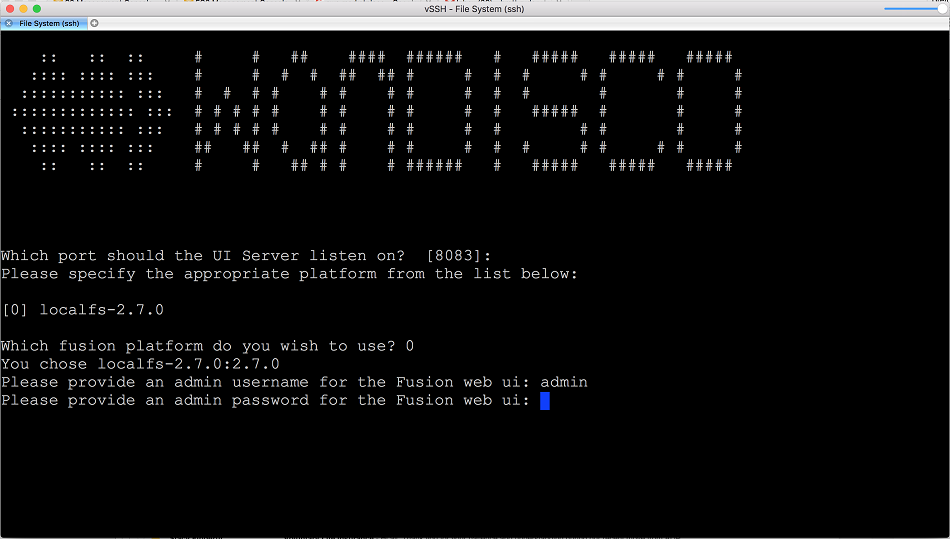
LocalFS figure 3.
We strongly advise against running Fusion as the root user.
 C
 For default LOCALFS setups, the user should be set to 'fusion'. However, you should choose a user appropriate for running HDFS commands on your system.

 Which user should fusion run as? [fusion] fusion
Please choose an appropriate group for your system. By default LOCALFS uses the 'fusion' group.

 Which group should Fusion run as? [fusion] fusion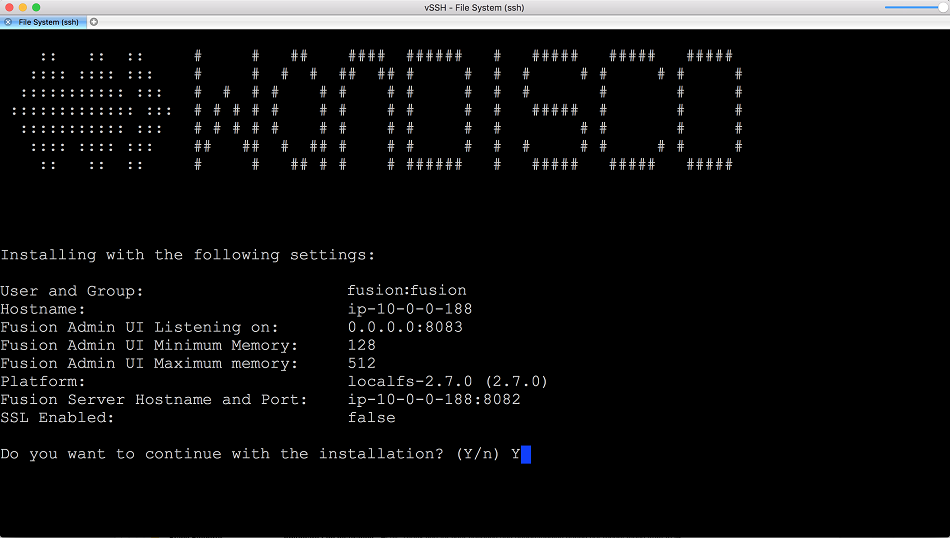
LocalFS figure 6.
LocalFS figure 7.
LocalFS figure 8.

LocalFS figure 9.
LocalFS figure 10.
Warnings may be ignored for the purposes of completing the installation, especially if the installation is only for evaluation purposes and not for production. However, when installing for production, you should also address all warnings, or at least take note of them and exercise due care if you continue the installation without resolving and revalidating. Click Next Step to continue.
LocalFS figure 11.
LocalFS figure 12.
LocalFS figure 13.
Click on the I agree to the EULA to continue, then click Next Step.
LocalFS figure 14 - Server settings
Only apply these options if you fully understand what they do.
The following advanced options provide a number of low level configuration settings that may be required for installation into certain environments. The incorrect application of some of these settings could cause serious problems, so for this reason we strongly recommend that you discuss their use with WANdisco's support team before enabling them.
Once all settings have been entered, click Next step.
LocalFS figure 15.
Entry fields for zone properties
/etc/hosts file of your LocalFS server node. If you don't do this then, currently you get an error when you start the node:
Could not resolve Kerberos principal name: java.net.UnknownHostException: ip-10-0-100-72: ip-10-0-100-72" exceptionConfiguration for the local file system:
/etc/krb5.conf/etc/krb5.keytab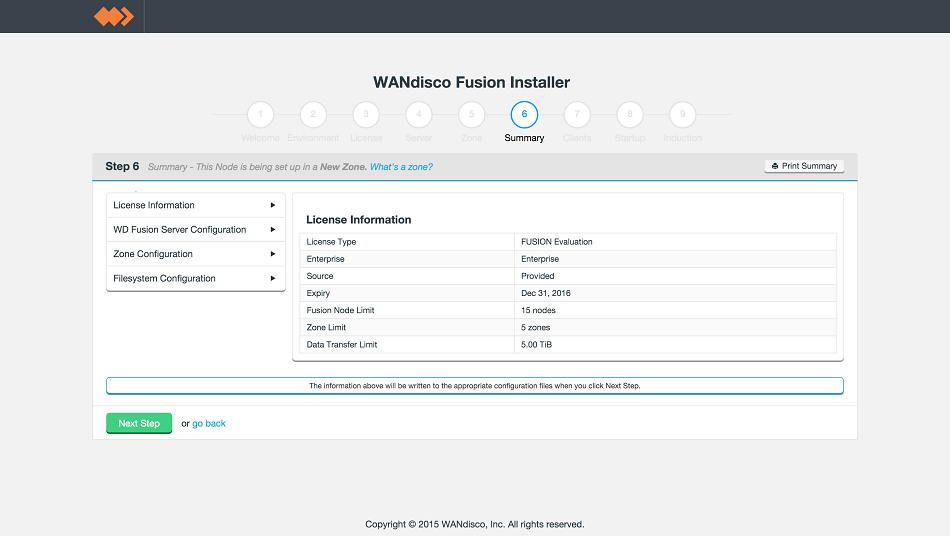
LocalFS figure 16.
LocalFS figure 17.
In this case, download the client RPM file. Leave your browser session running while you do this, we haven't finished yet.
wget to copy the file into place.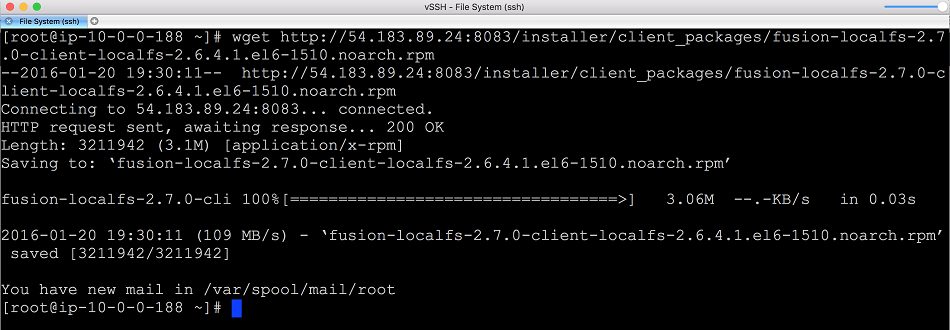
LocalFS figure 18.
yum install -y fusion-localfs-2.7.0-client-localfs-2.6.4.1.e16-1510.noarch.rpm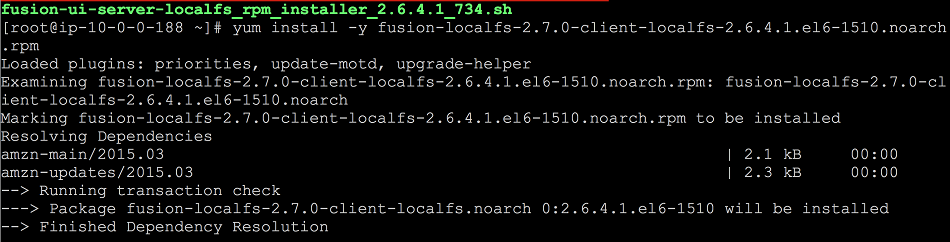
LocalFS figure 19.
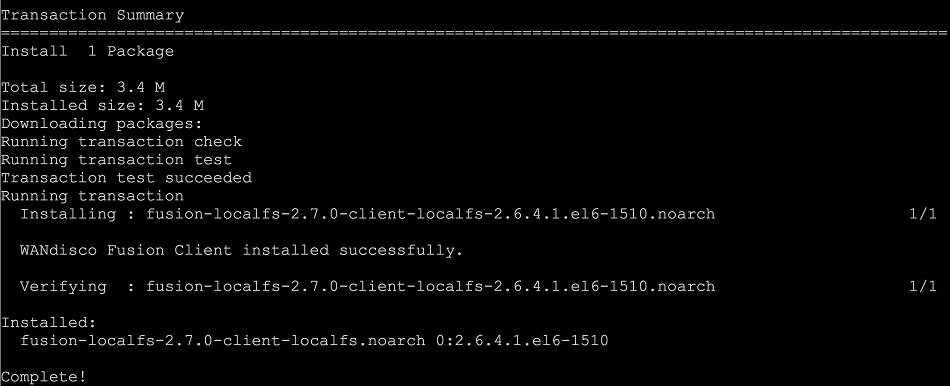
LocalFS figure 20.
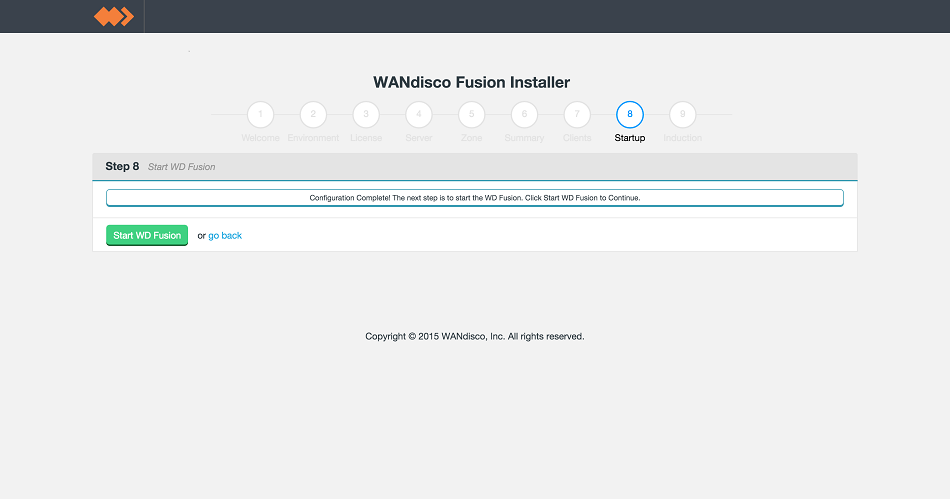
LocalFS figure 21.
LocalFS figure 22.
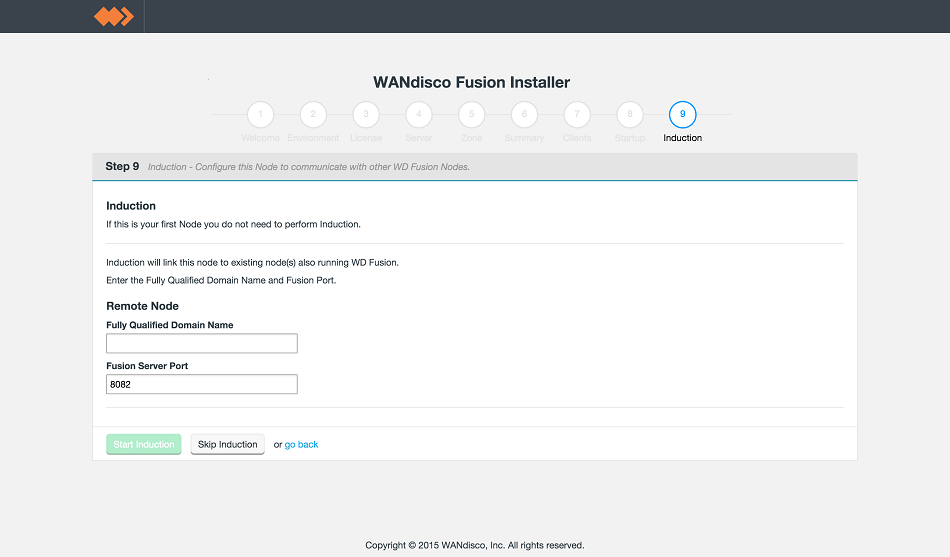
For the first node you will miss this step out. For all the following node installations you will provide the FQDN or IP address and port of this first node. (In fact you can complete induction by referring to any node that has itself completed induction.)
/etc/hosts file of your LocalFS server.
LocalFS figure 23.
LocalFS figure 24.
The following procedures covers the hands-on approach to installation and basic setup of a deployment that deploys over the LocalFileSystem. For the vast majority of cases you should use the previous Installer-based LocalFileSystem Deployment procedure.
$user:$group you should pick a master user account that will have complete access to the local directory that you plan to replicate. You can set this manually by modifying etc/wandisco/fusion-env.sh setting FUSION_SERVER_GROUP to $group and FUSION_SERVER_USER to $user.core-site.xml, typically in /etc/hadoop/conf/, and override "fs.file.impl" to "com.wandisco.fs.client.FusionLocalFs", "fs.defaultFS" to "file:///", and "fusion.underlyingFs" to "file:///". (Make sure to add the usual Fusion properties as well, such as "fusion.server").com.wandisco.fs.client.FusionLocalFs".fusion.handshakeToken.dir" to point to some directory that will exist within the local directory you plan to replicate to/from. You should also make sure to have "fs.fusion.keytab" and "fs.fusion.principal" defined as usual.$user:$group you should pick a master user account that will have complete access to the local directory that you plan to replicate. You can set this manually by modifying /etc/wandisco/fusion-env.sh setting FUSION_SERVER_GROUP to $group and FUSION_SERVER_USER to $user.fs.file.impl" to "com.wandisco.fs.client.FusionLocalFs", "fs.defaultFS" to "file:///", and "fusion.underlyingFs" to "file:///". (Make sure to add the usual Fusion properties as well, such as "fs.fusion.server").com.wandisco.fs.client.FusionLocalFs".fusion.handshakeToken.dir" to point to some directory that will exist within the local directory you plan to replicate to/from. You should also make sure to have "fs.fusion.keytab" and "fs.fusion.principal" defined as usual.When using LocalFileSystem, you can only support 1 single user. This means when you configure the WD Fusion Server's process owner, that process owner should also be the process owner of the IHC server, the Fusion UI server, and the client user that will be used to perform any puts.
hadoop fs -ls /
fusion fs -ls /
In order to get Hawq to work with fusion HDFS client libs there needs to be an update made to the pxf classpath. This can be done in Ambari through the "Advanced pxf-public-classpath" setting adding an entry to the client lib path:
/opt/wandisco/fusion/client/lib/*
The appendix section contains extra help and procedures that may be required when running through a WD Fusion deployment.
During the installation, your system's environment is checked to ensure that it will support WANdisco Fusion, the Environment checks are intended to catch basic compatibility issues, especially those that may appear during an early evaluation phase. The checks are not intended to replace carefully running through the Deployment Checklist.
The WD Fusion installer doesn't currently handle the installation of the client to the rest of the nodes in the cluster. You need to go through the following procedure:

RPM package location
If you need to find the packages after leaving the installer page with the link, you can find them in your installation directory, here:
/opt/wandisco/fusion-ui-server/ui/client_packagesrpm -i <package-name>hadoop classpath, in order to complete the installation.
hadoop classpath then we check for HADOOP_HOME and run the Hadoop classpath from that location.export HADOOP_HOME=/opt/hadoop/hadoop
export HIVE_HOME=/opt/hadoop/hive
export PATH=$HADOOP_HOME/bin:$HIVE_HOME/bin
HDP2.1/Ambari 1.6: Start services after installation
When installing clients via RPM into HDP2.1/Ambari 1.6., ensure that you restart services in Ambari before continuing to the next step.
Debian not supported
Although Ubuntu uses Debian's packaging system, currently Debian itself is not supported. Note: Hortonworks HDP does not support Debian.
If you are running with an Ubuntu Linux distribution, you need to go through the following procedure for installing the clients using Debian's DEB package:
DEB package location
If you need to find the packages after leaving the installer page with the link, you can find them in your installation directory, here:
/opt/wandisco/fusion-ui-server/ui/client_packagessudo dpkg -i /path/to/deb/filesudo apt-get install -f/var/cache/apt/archives/ and then run apt-get install <fusion-client-filename.deb>For deployments into Cloudera clusters, clients can be installed using Cloudera's own packaging format: Parcels.
wget "http://fusion.example.host.com:8083/ui/parcel_packages/FUSION-<version>-cdh5.<version>.parcel"
wget "http://node01-example.host.com:8083/ui/parcel_packages/FUSION-<version>-cdh5.<version>.parcel.sha"chown cloudera-scm:cloudera-scm FUSION-<version>-cdh5.<version>.parcel*mv FUSION-<version>-cdh5.<version>.parcel* /opt/cloudera/parcel-repo/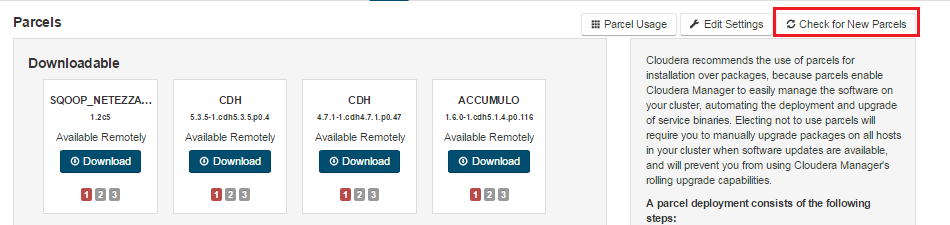
New Parcels check.

Ready to distribute.
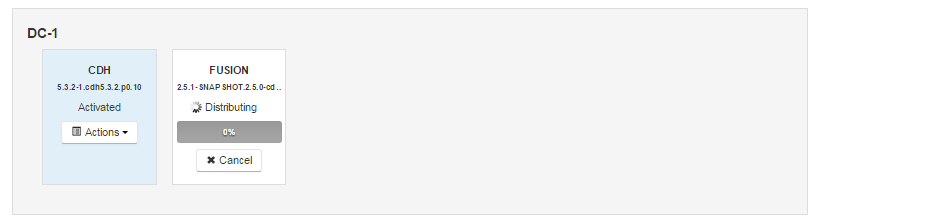
Distribute Parcels.

Distribute Parcels.
Important
To be clear, you must restart the services, it is not sufficient to run the "Deploy client configuration" action.
Restarts.
WD Fusion uses Hadoop configuration files associated with the Yarn Gateway service and not HDFS Gateway. WD Fusion uses config files under /etc/hadoop/conf and CDH deploys the Yarn Gateway files into this directory.If you are replacing an existing package that was installed using a parcel, once the new package is activated you should remove the old package through Cloudera Manager. Use the Remove From Host button.

Remove from the host.
HttpFS is a server that provides a REST HTTP gateway supporting all HDFS File System operations (read and write). And it is interoperable with the webhdfs REST HTTP API.
While HttpFS runs fine with WD Fusion, there is an issue where it may be installed without the correct class paths being put in place, which can result in errors when running Mammoth test scripts.
Running An HttpFS Server Test -- accessing hdfs directory info via curl requests
Start running httpfs test
HTTP/1.1 401 Unauthorized
Server: Apache-Coyote/1.1
WWW-Authenticate: Negotiate
Set-Cookie: hadoop.auth=; Path=/; Expires=Thu, 01-Jan-1970 00:00:00 GMT; HttpOnly
Content-Type: text/html;charset=utf-8
Content-Length: 997
Date: Thu, 04 Feb 2016 16:06:52 GMT

HTTP/1.1 500 Internal Server Error
Server: Apache-Coyote/1.1
Set-Cookie: hadoop.auth="u=oracle&p=oracle/bdatestuser@UATBDAKRB.COM&t=kerberos&e=1454638012050&s=7qupbmrZ5D0hhtBIuop2+pVrtmk="; Path=/; Expires=Fri, 05-Feb-2016 02:06:52 GMT; HttpOnly
Content-Type: application/json
Transfer-Encoding: chunked
Date: Thu, 04 Feb 2016 16:06:52 GMT
Connection: close

{"RemoteException":{"message":"java.lang.ClassNotFoundException: Class com.wandisco.fs.client.FusionHdfs not found","exception":"RuntimeException","javaClassName":"java.lang.RuntimeException"}}Once the parcel has been installed and HDFS has been restarted, the HttpFS service must also be restarted. Without this follow-on restart you will get missing class errors. This impacts only the HttpFS service, rather than the whole HDFS subsystem.
For deployments into Hortonworks HDP/Ambari/IBM BigInsights cluster, version 1.7 or later. Clients can be installed using Hortonwork's own packaging format: HDP Stack. This approach always works for Pivotal HD.
Ambari 1.6 and earlier
If you are deploying with Ambari 1.6 or earlier, don't use the provided Stacks, instead use the generic RPMs.
Ambari 1.7
If you are deploying with Ambari 1.7, take note of the requirement to perform some necessary restarts on Ambari before completing an installation.
Ambari 2.0
When adding a stack to Ambari 2.0 (any stack, not just WD Fusion client) there is a bug which causes the YARN parameter yarn.nodemanager.resource.memory-mb to reset to a default value for the YARN stack. This may result in the Java heap dropping from a manually-defined value, back to a low default value (2Gb). Note that this issue is fixed from Ambari 2.1.
Upgrading Ambari
When running Ambari prior to 2.0.1, we recommend that you remove and then reinstall the WD Fusion stack if you perform an update of Ambari. Prior to version 2.0.1, an upgraded Ambari refuses to restart the WD Fusion stack because the upgrade may wipe out the added services folder on the stack.
If you perform an Ambari upgrade and the Ambari server fails to restart , the workaround is to copy the WD Fusion service directory from the old to the new directory, so that it is picked up by the new version of Ambari, e.g.:
cp -R /var/lib/ambari-server/resources/stacks_25_08_15_21_06.old/HDP/2.2/services/FUSION /var/lib/ambari-server/resources/stacks/HDP/2.2/servicesAgain, this issue doesn't occur once Ambari 2.0.1 is installed.
HDP 2.3/Ambari 2.1.1 install
There's currently a problem that can block the installation of the WD Fusion client stack. If the installation of the client service gets stuck at the "Customize Service" step, you may need to use a workaround:
Make sure the service components are created and the configurations attached by making a GET call, e.g.
http://<ambari-server-host>:8080/api/v1/clusters/<cluster-name>/services/<service-name>curl -u <username>:<password> -H "X-Requested-By: ambari" http://<ambari-server-host>:8080/api/v1/clusters/<cluster-name>/services -d '{"ServiceInfo":{"service_name":"FUSION"}}'curl -u <username>:<password> -H "X-Requested-By: ambari" http://<ambari-server-host>:8080/api/v1/clusters/<cluster-name>/services/FUSION/components/FUSION_CLIENT -X POSTcurl -u <username>:<password> -H "X-Requested-By: ambari" http://<ambari-server-host>:8080/api/v1/clusters/<cluster-name>/hosts/curl -u <username>:<password> -H "X-Requested-By: ambari" http://<ambari-server-host>:8080/api/v1/clusters/<cluster-name>/hosts/<host-name>/host_components/FUSION_CLIENT -X POSTcurl -u <username>:<password> -H "X-Requested-By: ambari" http://<ambari-server-host>:8080/api/v1/clusters/<cluster-name>/services/FUSION/components/FUSION_CLIENT -X PUT -d '{"ServiceComponentInfo":{"state": "INSTALLED"}}'/var/lib/ambari-server/resources/stacks/HDP/<version-of-stack>/services./var/lib/ambari-server/resources/stacks/PHD/<version-of-stack>/services, or /var/lib/ambari-server/resources/stacks/<distribution>/<version-of-stack>/services.
service ambari-server restart
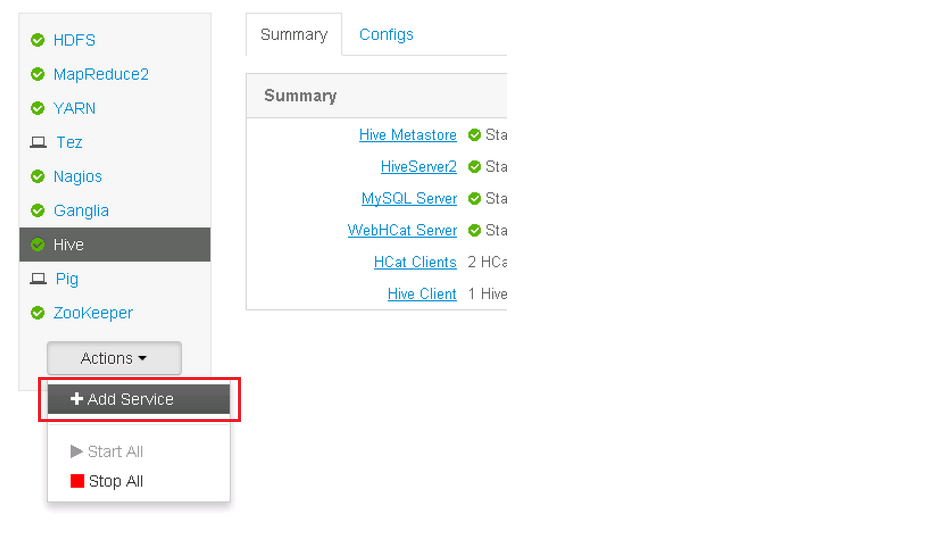
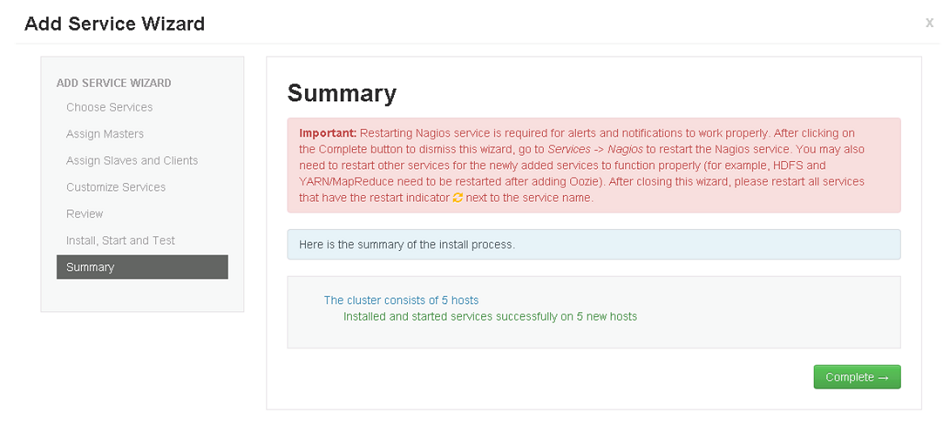
Add Service.

Scroll to the bottom of the list.
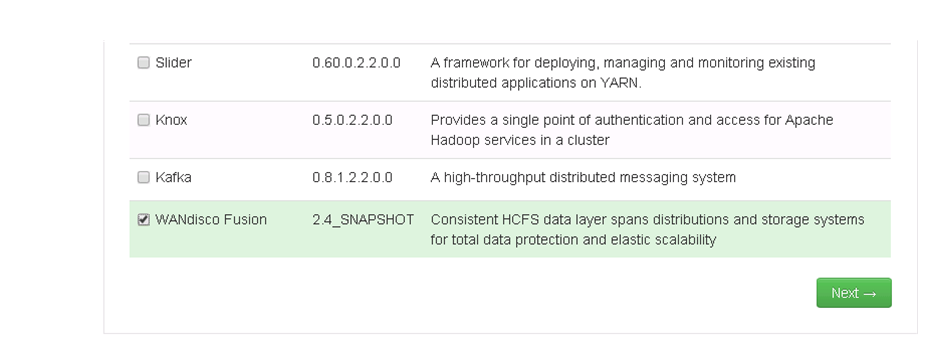
Tick the WANdisco Fusion service checkbox.
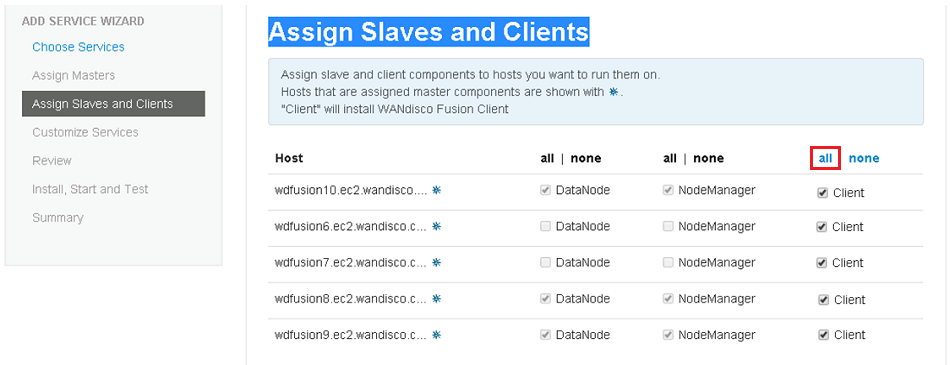
Assign Slaves and Clients. Add all the nodes as "Client"
Deploy.
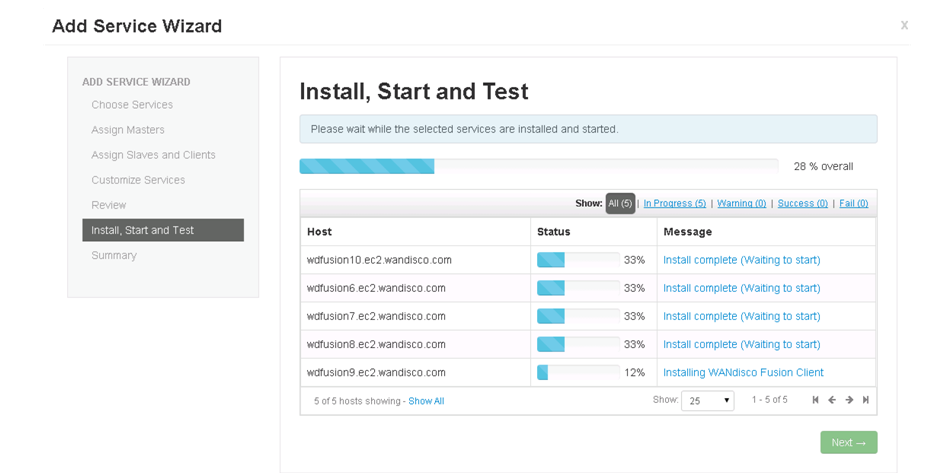
Install, start and test.
Review.
Known bug (AMBARI-9022) Installation of Services can remove Kerberos settings
During the installation of services, via stacks, it is possible that Kerberos configuration can be lost. This has been seen to occur on Kerberized HDP2.2 clusters when installing Kafka or Oozie. Kerberos configuration in the core-site.xml file was removed during the installation which resulted in all HDFS / Yarn instances being unable to restart.
You will need to reapply your Kerberos settings in Ambari, etc.
Kerberos re-enabled
When we use the "Deploy Stack" button it can on rare occasions fail. If it does you can recover the situation with the following procedure, which involves removing the stack, then adding it again using Ambari's "Add New Service" wizard.
curl -u admin:admin -X PUT -d '{"RequestInfo":{"context":"Stop Service"},"Body":{"ServiceInfo":{"state":"INSTALLED"}}}' http://<manager_hostname>:<manager_port>/api/v1/clusters/<cluster_name>/services/FUSION -H "X-Requested-By: admin"
curl -u admin:admin -X DELETE http://<manager_hostname>:<manager_port>/api/v1/clusters/<cluster_name>//services/FUSION -H "X-Requested-By: admin"yum erase <the client>
rm -rf /opt/wandisco/fusion/client/ambari-server restartOn MapR clusters, you need to copy WD Fusion configuration onto all other nodes in the cluster:
/opt/mapr/hadoop/<hadoop-version>/etc/hadoop.core-site.xml and yarn-site.xml files to the same location on all other nodes in the cluster.Follow these steps on the client to configure impersonation without enabling cluster security.
The following steps will ensure that MapR will have the necessary permissions on your Hadoop cluster:
core-site.xml file in a suitable editor.<property>
<name>hadoop.proxyuser.mapr.hosts</name>
<value>*</value>
</property>
<property>
<name>hadoop.proxyuser.mapr.groups</name>
<value>*</value>
</property>
Note: The wildcard asterisk * lets the "mapr" user connect from any host and impersonate any user in any group.
core-site.xml file.export MAPR_IMPERSONATION_ENABLED=true
/opt/mapr/conf/proxy/ that has the name of the mapr superuser. The default file name would be mapr. To verify the superuser name, check the mapr.daemon.user= line in the /opt/mapr/conf/daemon.conf file on a MapR cluster server.If you are removing WD Fusion, maybe as part of a reinstallation, you should remove the client packages as well. Ambari never deletes any services from the stack it only disables them. If you remove the WD Fusion service from your stack, remember to also delete fusion-client.repo.
[WANdisco-fusion-client]
name=WANdisco Fusion Client repo
baseurl=file:///opt/wandisco/fusion/client/packages
gpgcheck=0
For instructions for the cleanup of Stack, see Host Cleanup for Ambari and Stack
The following section is used when preparing to install WD Fusion on system that already has an earlier version of WD Fusion installed. Before you install an updated version of WD Fusion you need to ensure that components and configurartion for an earlier installation have been removed. Go through the following steps before installing a new version of WD Fusion:
Curl -su <user>:<password> -H "X-Requested-By: ambari" http://<ambari-server>:<ambari-port>/api/v1/clusters/<cluster>/services/FUSION -X DELETEyum remove fusion-hdp-x.x.x-client
There's currently no uninstall function for our installer, so the system will have to be cleaned up manually. If you used the unified installer then use the following steps:
yum remove -y "fusion-*"
rm -rf /opt/wandisco/ /etc/wandisco/ /var/run/fusion/ /var/log/fusion/
yum remove -y fusion*client*.rpm
For a complete uninstallation, remove the following properties from the core-site.xml:
org.apache.hadoop.hdfs.DistributedFileSystem).Reinstalling fusion server only
If you reinstall the fusion-server without also reinstalling the fusion-ui-server, then you should restart the fusion-ui-server service to ensure the correct function of some parts of the UI. If the service is not restarted then you may find that the dashboard graphs stop working properly, along with the UI's Stop/start controls. e.g. run:
[root@redhat6 init.d]# service fusion-ui-server restart
The "Silent" installation tools are still under development, although, with a bit of scripting, it should now be possible to automate WD Fusion node installation. The following section looks at the provided tools, in the form of a number of scripts, which automate different parts of the installation process.
The silent installation process supports two levels:
Use the following command for an unattended installation where an administrator will complete the configuration steps using the browser UI.
sudo FUSIONUI_USER=x FUSIONUI_GROUP=y FUSIONUI_FUSION_BACKEND_CHOICE=z ./fusion-ui-server_rpm_installer.shThere are a number of properties that need to be set up before the installer can be run:
Check FUSIONUI_USER is in FUSIONUI_GROUP
Perform a check of your chosen user to verify that they are in the group that you select.
> groups hdfs
hdfs : hdfs hadoopYou don't need to enter the full package name.
You no longer need to enter the entire string, only up to the colon, e.g., enter "cdh-5.2.0" instead of
"cdh-5.2.0:2.5.0-cdh5.2.0"
This mode only automates the initial command line installation step, the configuration steps still need to be handled manually in the browser steps.
sudo FUSIONUI_USER=hdfs FUSIONUI_GROUP=hadoop FUSIONUI_FUSION_BACKEND_CHOICE=hdp-2.3.0 ./fusion-ui-server_rpm_installer.shThis mode is closer to a full "Silent" installation as it handles the configuration steps as well as the installation.
Properties that need to be set:
Cluster Manager Variables are deprecated
The cluster manager variables are mostly redundant as they generally get set in different processes though they currently remain in the installer code.
FUSIONUI_MANAGER_TYPE
FUSIONUI_MANAGER_HOSTNAME
FUSIONUI_MANAGER_PORT
Follow these points when updating the silent_installer_properties file.
induction.skip=true".induction.skip=false" and provide both "induction.remote.node" and "induction.remote.port" settings for an existing node. The port in question would be for the fusion-server (usually 8082)
.existing.zone.domain and existing.zone.port are provided this is considered to be an Existing Zone installation. The port in question here is the fusion-ui-server port (usually 8083). In this case, some settings will be taken from the existing server including the license. Otherwise, this is the New Zone installation mode.
In this mode license.file.path must point to a valid license key file on the server.If this part of the installation fails it is possible to re-run the silent_installer part of the installation by running:
/opt/wandisco/fusion-ui-server/scripts/silent_installer_full_install.sh /path/to/silent_installer.propertiesThis procedure is useful for UI-only installatons:
sudo yum erase -y fusion-ui-server
sudo rm -rf /opt/wandisco/fusion-ui-server /etc/wandisco/fusion/uisudo yum erase -y "fusion-*-server"
sudo rm -rf /opt/wandisco/fusion-ui-server /etc/wandisco/fusion/uiFor every package of WD Fusion there's both an env.sh and a .properties file. The env.sh sets environment variables that complete the initial command step of an installation. The env.sh also points to a properties file that is used to automate the browser-based portion of the installer. The properties files for the different installation types are provided below:
Before you begin an installation to an S3 cluster make sure that you have the following directories created and suitably permissioned. Examples:
${hadoop.tmp.dir}/s3
and
/tmp/hadoop-${user.name}
You can deploy to Amazon S3 using either the:
Make sure that you read and understand the following known issues, taking action if they impact your deployment requirements
core-site.xml with the following property:
<property>
    <name>dfs.client.read.prefetch.size</name>
    <value>9223372036854775807</value>
</property>
<property>
     <name>fs.fusion.push.threshold</name>
     <value>0</value>
</property>By default, EMR has a configuration in hadoop-env.sh that OnOutOfMemoryError it runs a "kill -9 <pid>" command. WDDOutputStream is supposed to handle this Error by flushing its buffer and clearing space for more writing. (Configurable via HADOOP_CLIENT_OPTS in hadoop-env.sh; which sets client-side heap and just needs to be commented out)
core-site.xml with the following property:
<property>
     <name>fs.fusion.push.threshold</name>
     <value>0</value>
</property>You can complete an Amazon S3/EMRFS installation using the Silent Installation procedure, putting the necessary configuration in the silent_installer.properties as described in the previous section.
Environment Variables Required for S3 deployments:
silent_installer.properties File additional settings or specific required values listed here:
s3.installation.mode=true
s3.bucket.name
kerberos.enabled=false (or unspecified)
As an example (as root), running on the installer moved to /tmp.
# If necessary download the latest installer and make the script executable
 chmod +x /tmp/installer.sh
# You can reference an original path to the license directly in the silent properties but note the requirement for being in a location that is (or can be made) readable for the $FUSIONUI_USER
# The following is partly for convenience in the rest of the script
cp /path/to/valid/license.key /tmp/license.key

# Create a file to encapsulate the required environmental variables (example is for emr-4.0.0):
cat <<EOF> /tmp/s3_env.sh
export FUSIONUI_MANAGER_TYPE=UNMANAGED_EMR
export FUSIONUI_INTERNALLY_MANAGED_USERNAME=admin
export FUSIONUI_FUSION_BACKEND_CHOICE=emr-4.0.0':'2.6.0-amzn-0
export FUSIONUI_USER=hdfs
export FUSIONUI_GROUP=hdfs
export SILENT_PROPERTIES_PATH=/tmp/s3_silent.properties
export FUSIONUI_INTERNALLY_MANAGED_PASSWORD=admin
EOF

 # Create a silent installer properties file - this must be in a location that is (or can be made) readable for the $FUSIONUI_USER:
cat <<EOF > /tmp/s3_silent.properties
existing.zone.domain=
existing.zone.port=
license.file.path=/tmp/license.key
server.java.heap.max=4
ihc.server.java.heap.max=4
server.latitude=54
server.longitude=-1
fusion.domain=my.s3bucket.fusion.host.name
fusion.server.dcone.port=6444
fusion.server.zone.name=twilight
s3.installation.mode=true
s3.bucket.name=mybucket
induction.skip=false
induction.remote.node=my.other.fusion.host.name
induction.remote.port=8082
EOF

# If necessary, (when $FUSIONUI_GROUP is not the same as $FUSIONUI_USER and the group is not already created) create the $FUSIONUI_GROUP (the group that our various servers will be running as):
[[ "$FUSIONUI_GROUP" = "$FUSIONUI_USER" ]] || groupadd hadoop

#If necessary, create the $FUSIONUI_USER (the user that our various servers will be running as):
useradd hdfs

# if [[ "$FUSIONUI_GROUP" = "$FUSIONUI_USER" ]]; then
  useradd $FUSIONUI_USER
else
  useradd -g $FUSIONUI_GROUP $FUSIONUI_USER
fi

# silent properties and the license key *must* be accessible to the created user as the silent installer is run by that user
chown hdfs:hdfs $FUSIONUI_USER:$FUSIONUI_GROUP /tmp/s3_silent.properties /tmp/license.key

# Give s3_env.sh executable permissions and run the script to populate the environment
. /tmp/s3_env.sh

# If you want to make any final checks of the environment variables, the following command can help - sorted to make it easier to find variables!
env | sort

# Run installer:
/tmp/installer.sh
You can set up WD Fusion on an S3-based cluster deployment, using the installer script.
Follow this section to complete the installation by configuring WD Fusion on an S3-based cluster deployment, using the browser-based graphical user installer.
Open a web browser and point it at the provided URL. e.g
http://<YOUR-SERVER-ADDRESS>.com:8083/Welcome screen.
Environmental checks.
On clicking validate the installer will run through a series of checks of your system's hardware and software setup and warn you if any of WD Fusion's prerequisites are not going to be met.
Example check results.
Address any failures before you continue the installation. Warnings may be ignored for the purposes of completing the installation, especially if the installation is only for evaluation purposes and not for production. However, when installing for production, you should address all warnings, or at least take note of them and exercise due care if you continue the installation without resolving and revalidating.
Upload your license file.
Verify license and agree to subscription agreement.
Click on the I agree to the EULA to continue, then click Next Step.
Screen 4 - Server settings
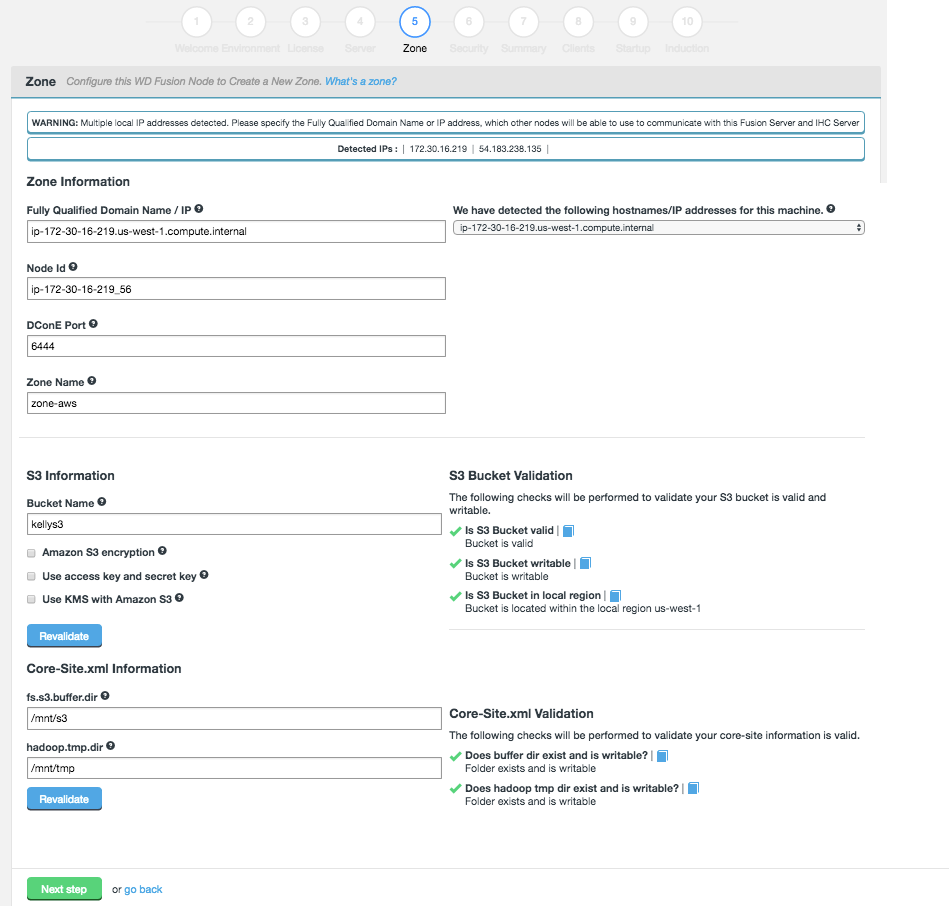
S3 Install
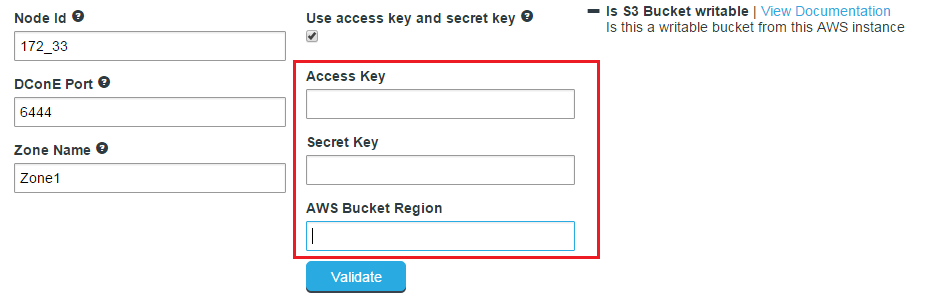
keys and Bucket
"fs.s3.awsAccessKeyId"
"fs.s3.awsSecretAccessKey"
Read Amazon's documentation about Getting your Acess Key ID and Secret Access Key.

KMS Key ID
This option must be selected if you are deploying your S3 bucket with AWS Key Management Service. Enter your KMS Key ID. This is a unique identifier of the key. This can be an ARN, an alias, or a globally unique identifier. The ID will be added to the JSON string used in the EMR cluster configuration.
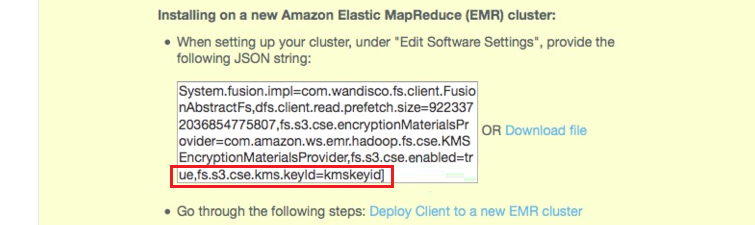
KMS ID Key reference
The following checks are made during installation to confirm that the zone has a working S3 bucket.
The following checks ensure that the cluster zone has the required temporary filespace:

S3 Install details in the summary
Click Next Step if you are sure that everything has been entered correctly.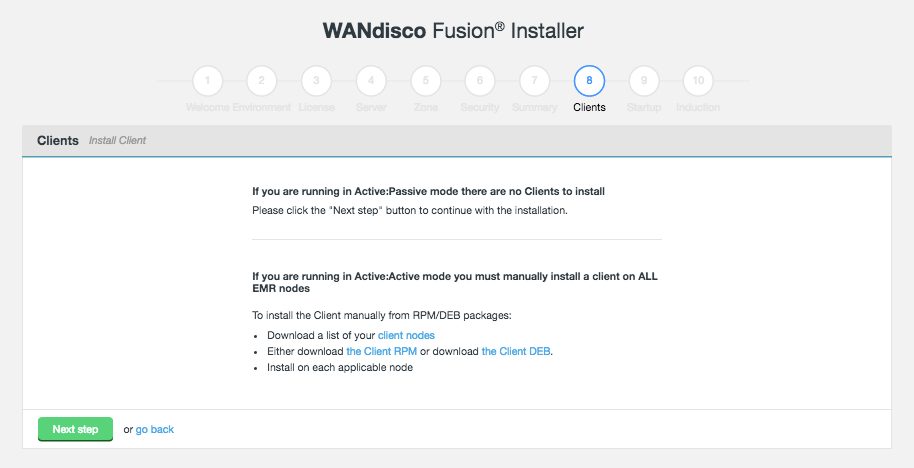
S3/EMR Install
This step first asks you to confirm whether the node that you are installing will participate in Active-Active replication.If you are running in Active:Active mode you must manually install a client on ALL EMR nodes
The installer covers two methods:
These instructions apply during the set up of WD Fusion on a new AWS EMR cluster. This is the recommended approach, even if you already have an EMR cluster set up.
S3 Install
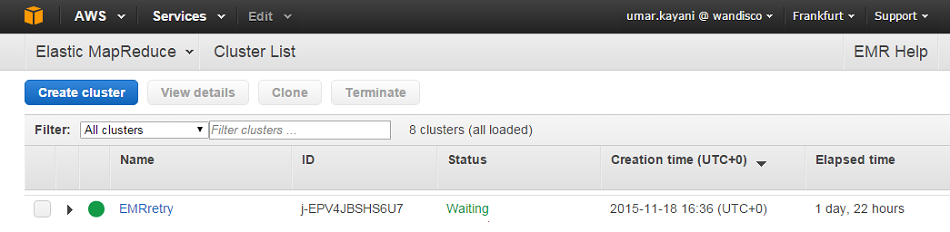
S3 New EMR cluster
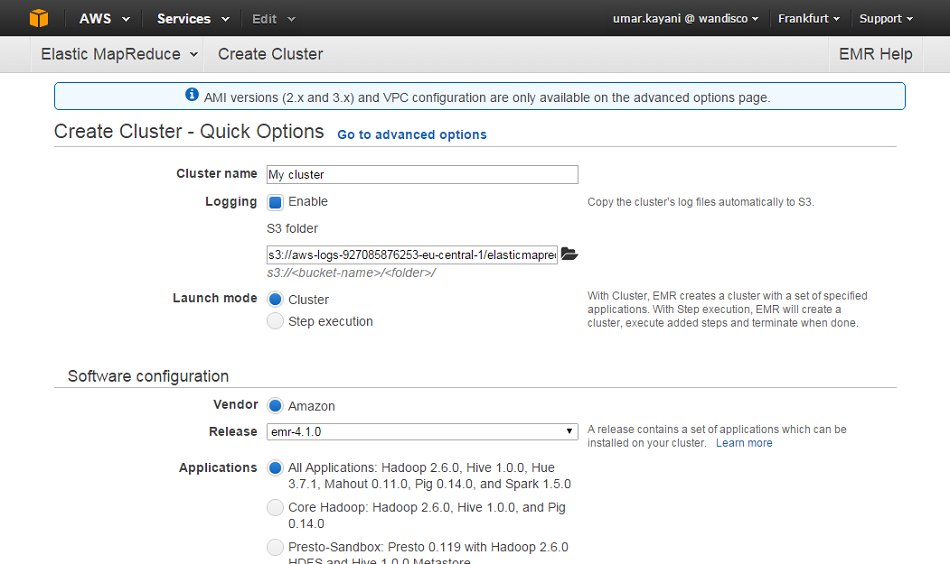
S3 Install
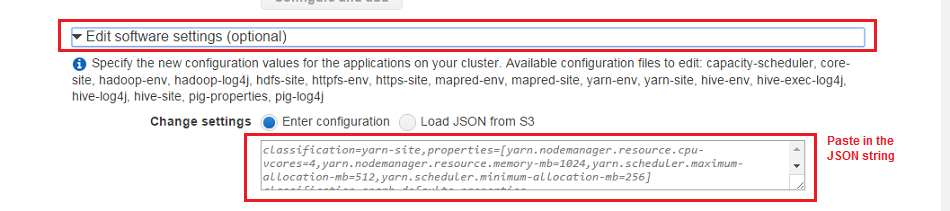
Enter the JSON string provided in the installer screen.
Copy the JSON string, provided by the installer. e.g.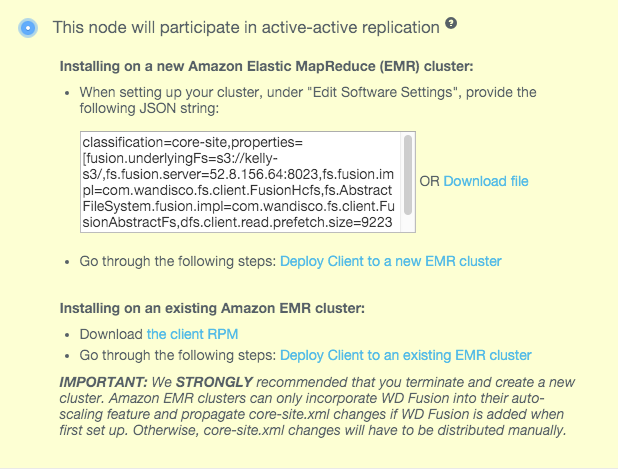
JSON
classification=core-site,properties=[fusion.underlyingFs=s3://example-s3/,fs.fusion.server=52.8.156.64:8023,fs.fusion.impl=com.wandisco.fs.client.FusionHcfs,fs.AbstractFileSystem.fusion.impl=com.wandisco.fs.client.FusionAbstractFs,dfs.client.read.prefetch.size=9223372036854775807]
The JSON String contains the necessary WD Fusion parameters that the client will need:
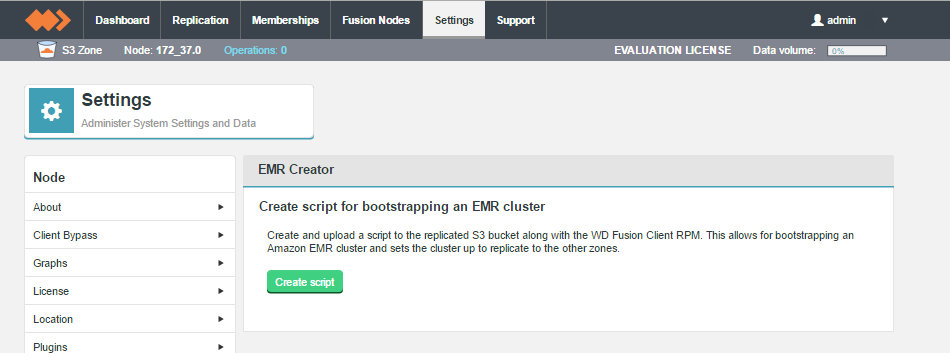
EMR Settings
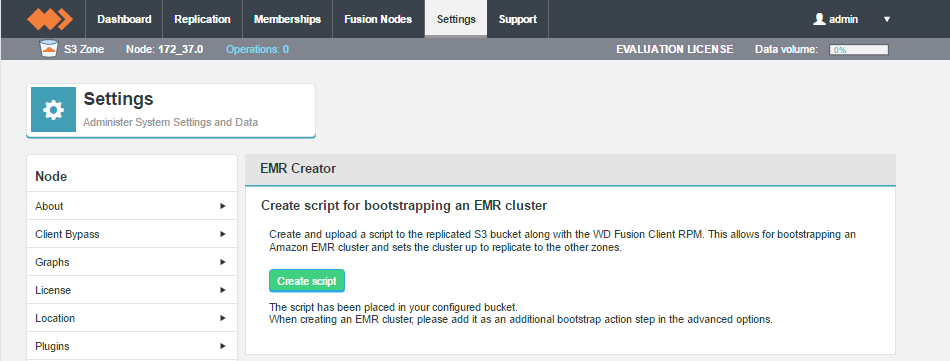
Create and place the script file
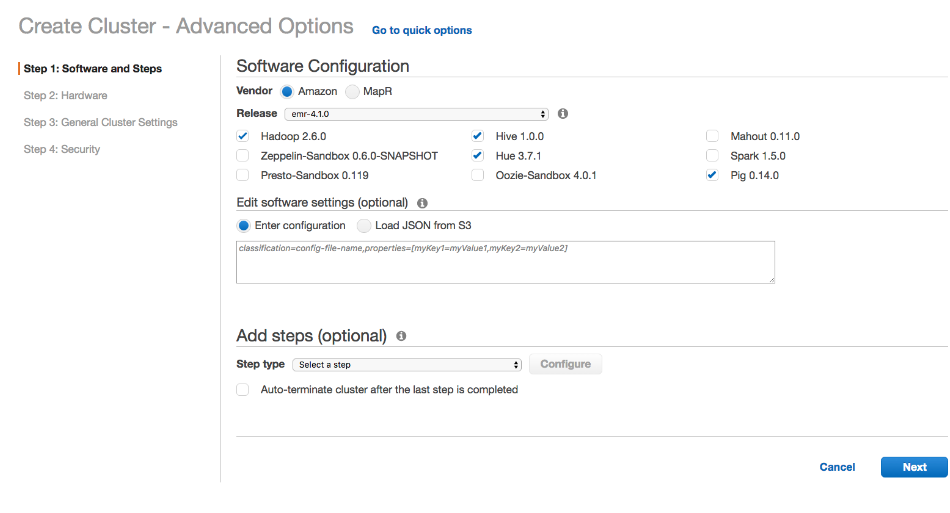
Cluster setup
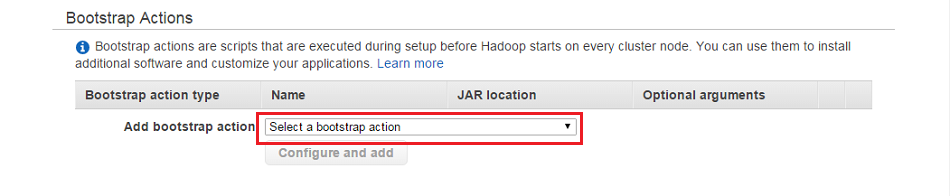
Bootstrap Actions
S3 Install

S3 Install
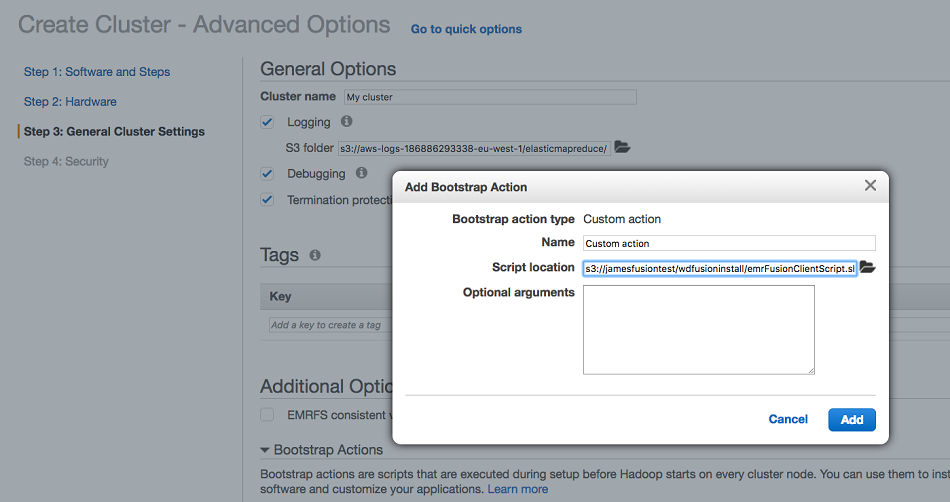
Confirm action

Confirm action

Create cluster
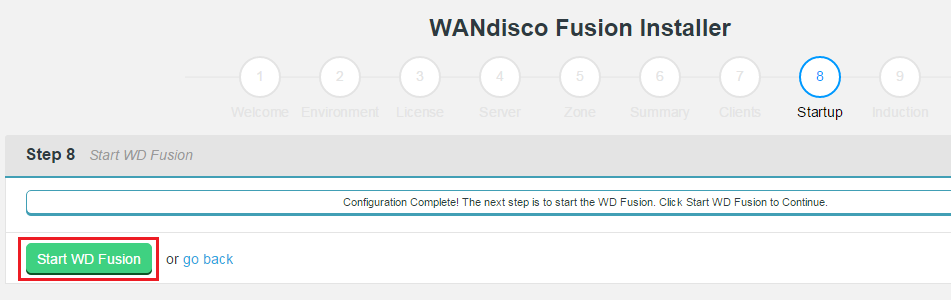
Deploy server
We strongly recommend that you terminate your existing cluster and use the previous step for installing into a new cluster.
No autoscalingInstall the fusion client (the one for EMR) on each node and after scaling, modify the core-site.xml file with the following:
<property>
  <name>fusion.underlyingFs</name>
  <value>s3://YOUR-S3-URL/</value>
</property>
<property>
  <name>fs.fusion.server</name>
  <value>IP-HOSTNAME:8023</value>
</property>
<property>
  <name>fs.fusion.impl</name>
  <value>com.wandisco.fs.client.FusionHcfs</value>
</property>
<property>
  <name>fs.AbstractFileSystem.fusion.impl</name>
  <value>com.wandisco.fs.client.FusionAbstractFs</value>
</property>In WD Fusion 2.6.2 or 2.6.3, the first release supporting S3, there was a problem transferring very large files that needed to be worked around. If you are using this release in conjuction with Amazon's S3 storage then you need to make the following changes:
core-site.xml with the following property:
<property>
    <name>dfs.client.read.prefetch.size</name>
    <value>9223372036854775807</value>
</property>
<property>
     <name>fs.fusion.push.threshold</name>
     <value>0</value>
</property>
This second parameter "fs.fusion.push.threshold" becomes optional from version 2.6.3, onwards. Although optional, we still recommend that you use the "0" Setting. This property sets the threshold for when a client sends a push request to the WD Fusion server. As the push feature is not supported for S3 storage disabling it (setting it to "0") may remove some performance cost.
Take note that the Amazon DynamoDB NoSQL database holds important metadata about the state of the content that would be managed by EMR and Fusion in S3. Deleting or modifying this content on any level except the EMR filesystem libraries (e.g. by manually deleting bucket content) will result in that metadata becoming out of sync with the S3 content.
This can be resolved by either using the emrfs CLI tool "sync" command, or by deleting the DynamoDB table used by EMRFS. See AWS's documentation about EMRFS CLI Reference.
This is a manual workaround that should only be used when strictly necessary. Ideally, when using the EMRFS variant of Fusion to replicate with S3, you should not modify S3 content unless doing so via an EMR cluster.
This section covers the launch of WANdisco Fusion for S3, using Amazon's Cloud Formation Template. What this will do is automatically provision the Amazon cluster, attaching Fusion to an on-premises cluster.
There are a few things that you need to already have before you start this procedure:
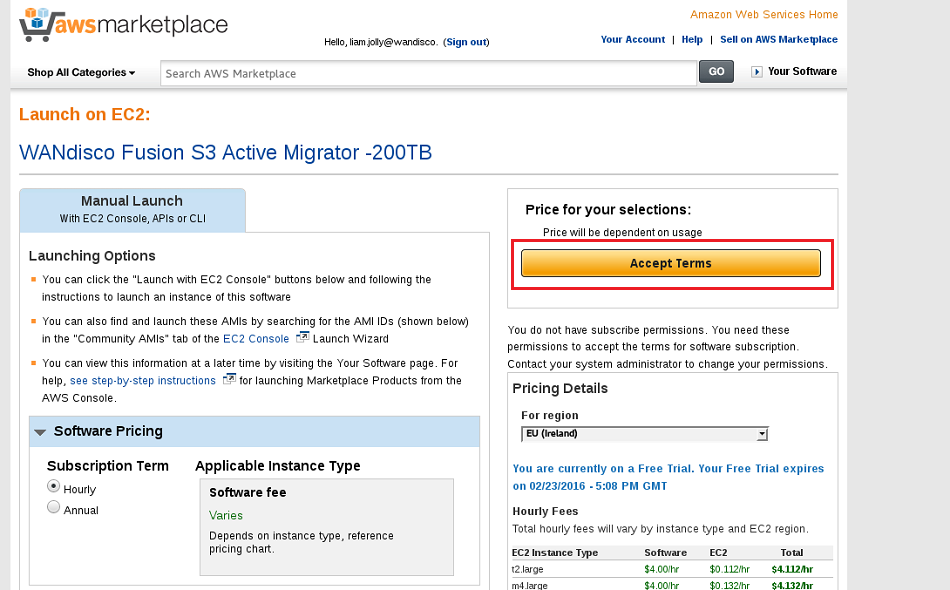
You must accept the terms for your specific version of Fusion
If you try to start a CFT without first clicking the Accept Terms button you will get an error and the CFT will fail. If this happens, go to the Amazon Marketplace, search for the Fusion download screen that correspond with the version that you are deploying, run through the screen until you have clicked the Accept Terms button. You can then successfully run the CFT.
Here are a list of Identify and Access Mangement (IAM) roles that are required to be setup for a user to install Fusion on AWS without having used our CFT.
Within our CFT we create rules for S3 for validation of S3 buckets and also rules to allow modification of dynamoDB. You can use AWS managed policies to quickly get the permissions you require, though these permissions are very broad and may provide more access than is desired.
The 3 you need are:
The following example procedure would let you install WD Fusion without using our Cloud Formation Template (CFT) and would support the use of Multi-Factor Authentication (MFA).
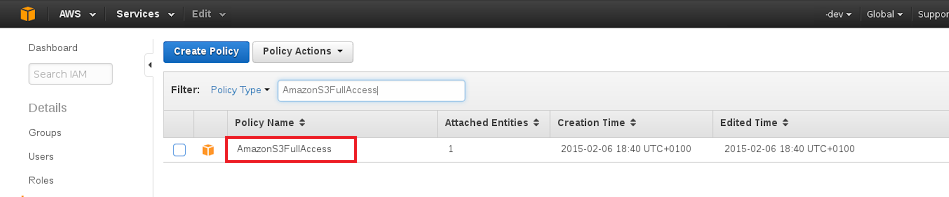 Services > IAM > Policies > Create Policy.
{
  "Version": "2012-10-17",
  "Statement": [
    {
      "Sid": "Stmt1474466892000",
      "Effect": "Allow",
      "Action": [
        "dynamodb:*"
      ],
      "Resource": [
        "arn:aws:dynamodb:*:*:table/EmrFSMetadata"
      ]
    },
    {
      "Sid": "Stmt1474467044000",
      "Effect": "Allow",
      "Action": [
        "ec2:CreateTags",
        "ec2:DescribeHosts",
        "ec2:DescribeInstances",
        "ec2:DescribeTags"
      ],
      "Resource": [
        "*"
      ]
    },
    {
      "Sid": "Stmt1474467091000",
      "Effect": "Allow",
      "Action": [
        "s3:ListAllMyBuckets"
      ],
      "Resource": [
        "*"
      ]
    },
    {
      "Sid": "Stmt1474467124000",
      "Effect": "Allow",
      "Action": [
        "s3:GetBucketLocation",
        "s3:ListBucket",
        "s3:ListBucketMultipartUploads"
      ],
      "Resource": [
        "arn:aws:s3:::<insert bucket name>"
      ]
    },
    {
      "Sid": "Stmt1474467159000",
      "Effect": "Allow",
      "Action": [
        "s3:DeleteObject",
        "s3:GetBucketLocation",
        "s3:GetObject",
        "s3:PutObject"
      ],

      "Resource": [
        "arn:aws:s3:::<insert bucket name>/*"
      ]
    }
  ]
}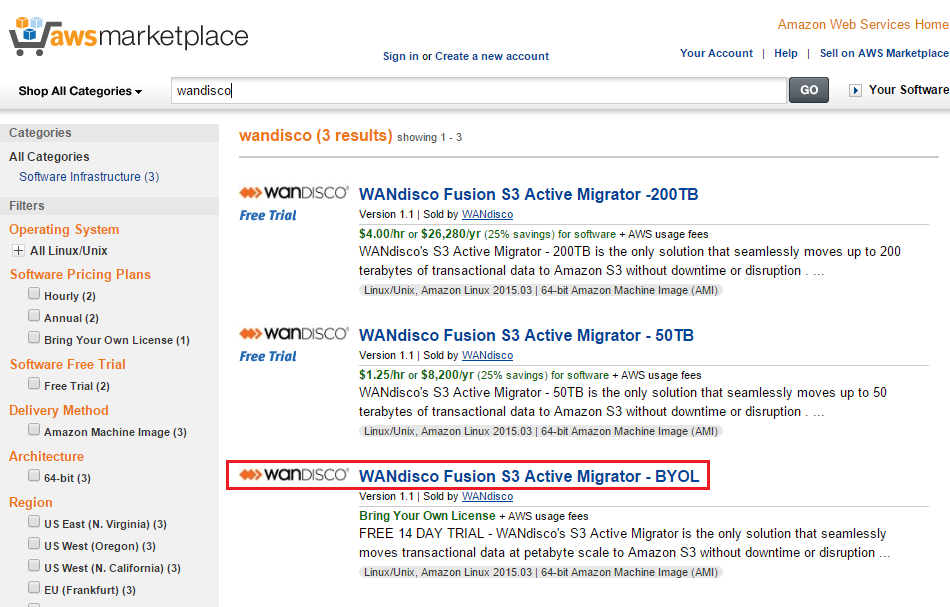
LocalFS figure 25.
Ensure that you download the appropriate version The BYOL (Bring Your Own License) version requires that you purchase a license, seperately, from WANdisco. You can get set up immediately with a trial license, but you may prefer to run with one of the versions which come with built-in license, based on usage; 200TB or 50TB. Each version has its own download page and distinct Cloud Formation Template, so make sure that you get the one that you need.
https://s3.amazonaws.com/wandisco-public-files/Fusion-Cluster.template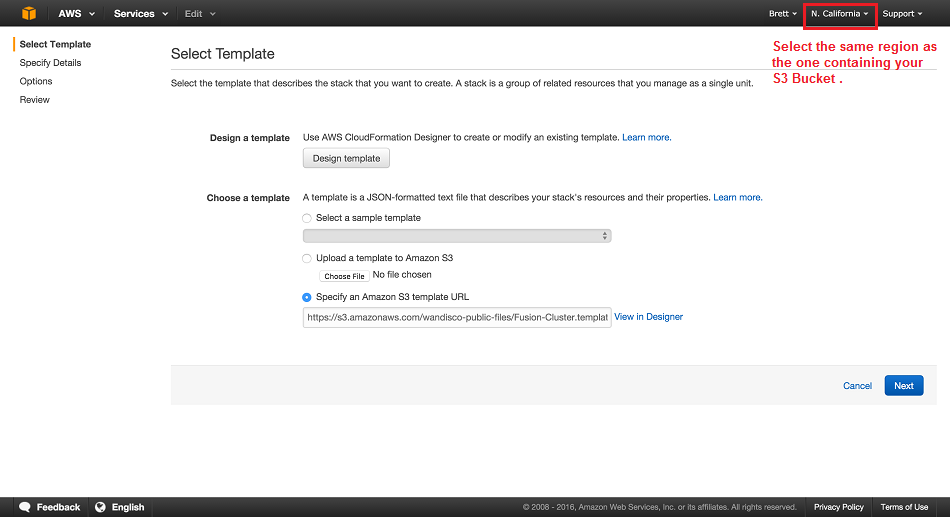
Amazon CFT Screen 1.
Ensure that you select the right Region (top-right on the Amazon screen). This must be set to the same region that hosts your S3 Bucket. Click Next to move to the next step.
Amazon CFT Screen 2 - AWS Parameters
Enter the following details:
The * noted at the end of some field names indicate a required field that must be completed.
The next block of configuration is specific to the WD Fusion product:

Amazon CFT Screen 3 - WD Fusion Parameters
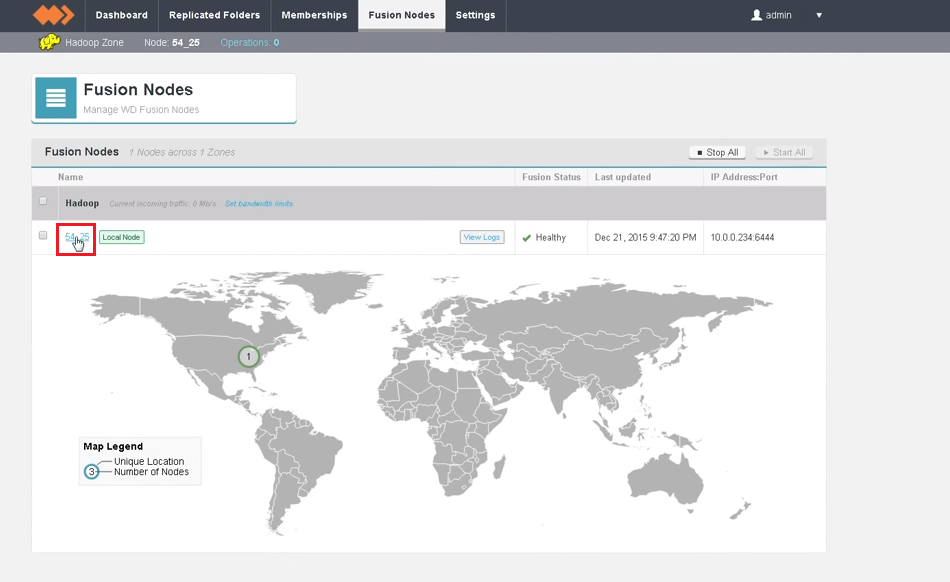
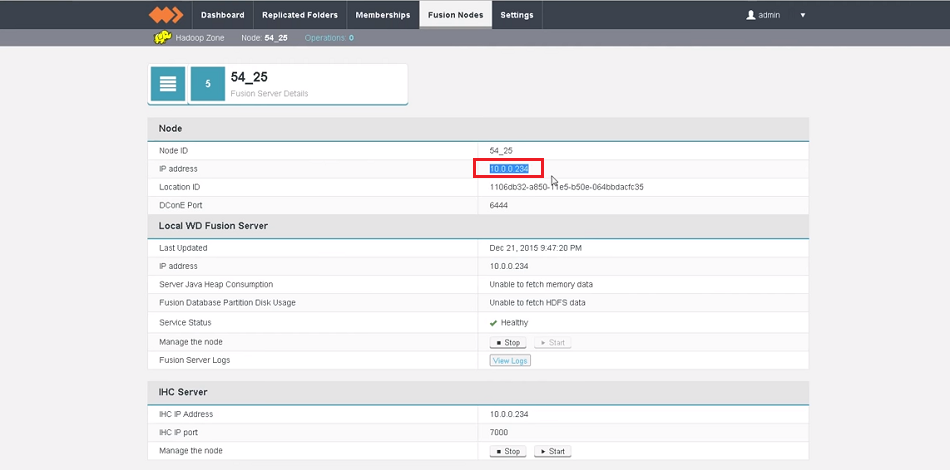
The * noted at the end of some field names indicate a required field that must be completed.
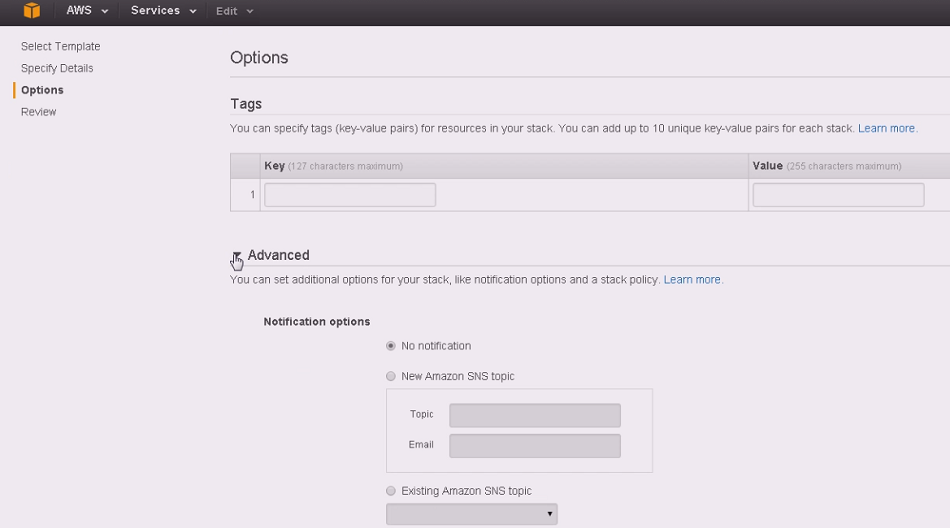

LocalFS figure 35.
Click Next.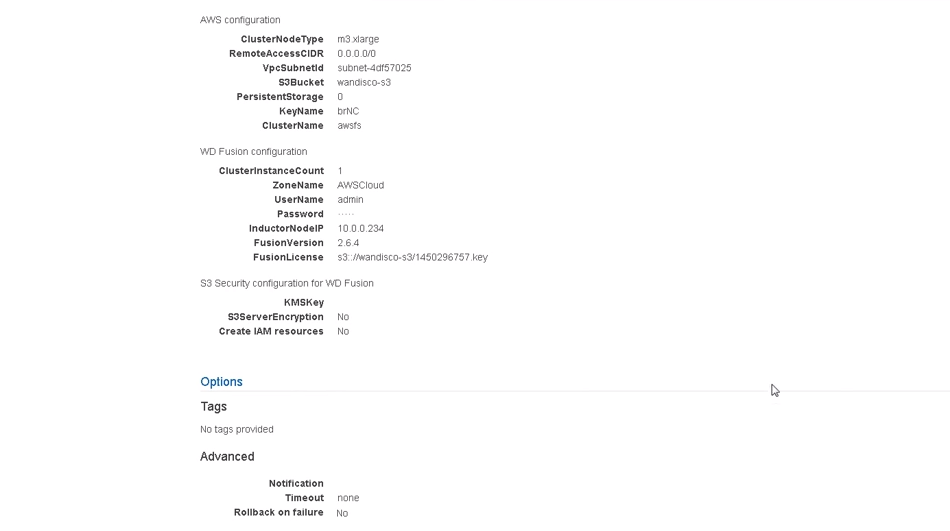

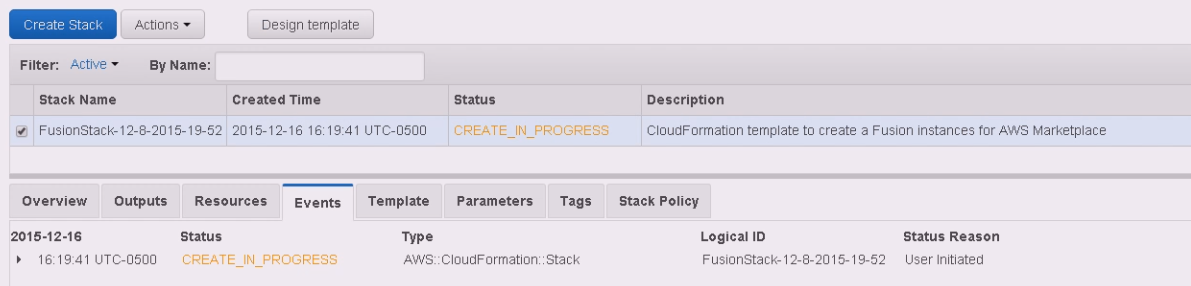 This template will create your set number of WD Fusion servers, pre-install them to the point where they're ready to be inducted into on premises cluster.
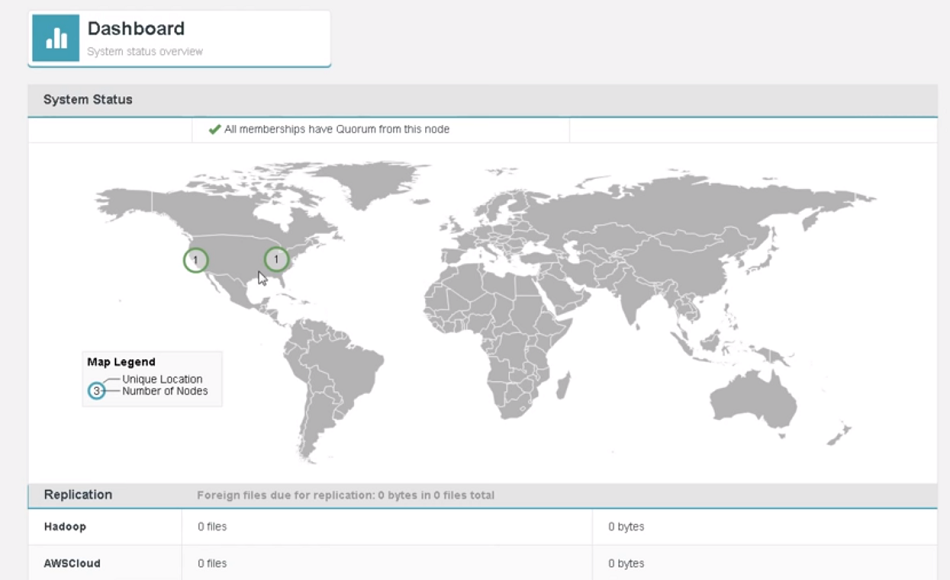
WD Fusion normally uses the authentication built into your cluster's management layer, i.e. the Cloudera Manager username and password are required to login to WD Fusion. However, in Cloud-based deployments, such as Amazon's S3, there is no management layer. In this situation, WD Fusion adds a local user to WD Fusion's ui.properties file. In this scenario, if you need to reset the internal password for any reason follow these instructions:
JAVA_HOME/bin/java" -cp APPLICATION_ROOT/fusion-ui-server.jar com.wandisco.nonstopui.authn.ResetPasswordRunner -p NEW_PASSWORD -f PATH_TO_UI_PROPERTIES_FILEservice fusion-ui-server startIf you fail to provide these arguments the reset password runner will prompt you.
Note that if you reset your password you will also need to update it on your Amazon IAMs.
You can remove the WD Fusion deployment simply by removing the stack. See Delete Stack.
This section will run you through an installation of WANdisco's Fusion to enable you to replicate on-premises data over to a Microsoft Azure object (blob) store.
This procedure assumes that you have already created all the key components for a deployment using a Custom Azure template. You will first need to create a virtual network, create a storage account, then start completing a template for a HDInsight cluster:
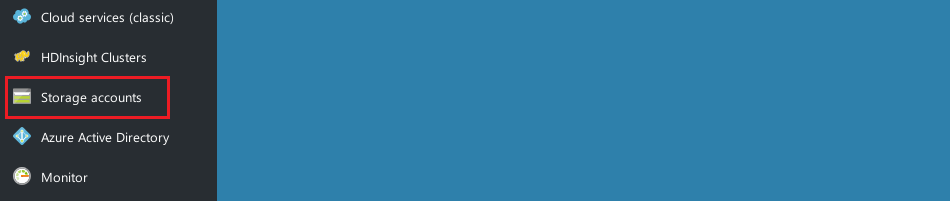
MS Azure - WD Fusion Parameters 01
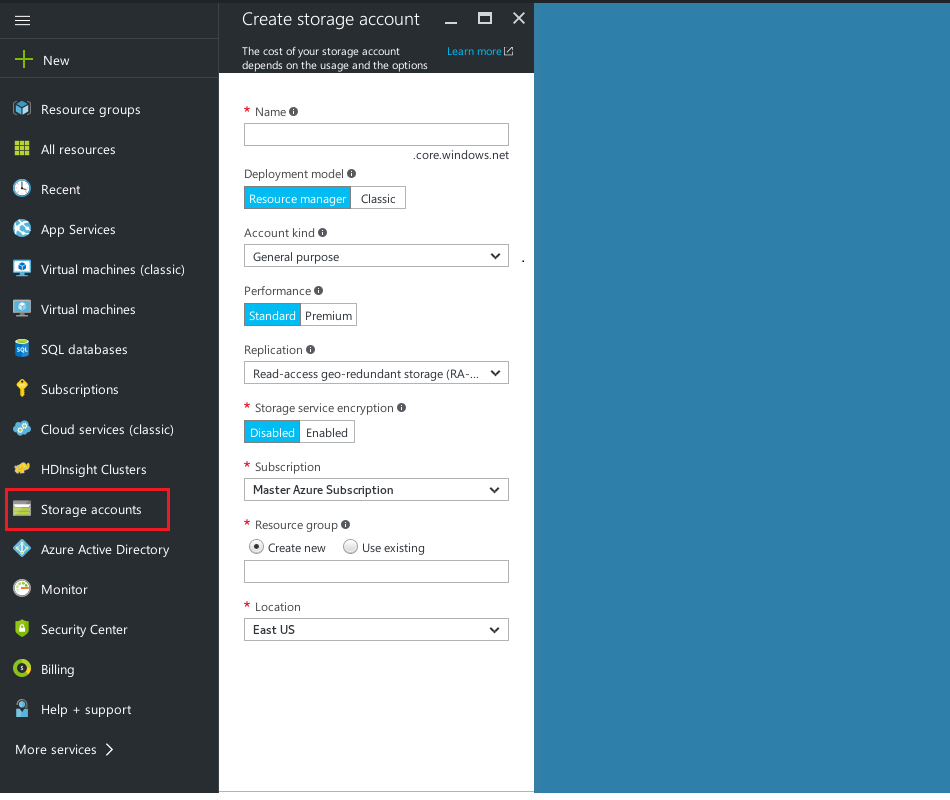
MS Azure - WD Fusion Parameters 02

MS Azure - WD Fusion Parameters 03

MS Azure - WD Fusion Parameters 03
Click to open up the Azure portal with the template already downloaded and in place.
- Azure portal
This template can be fetched from the cloud-templates repo on gerrit, link here:
https://wandiscopubfiles.blob.core.windows.net/wandiscopubfiles/edgeNodeTemplate.json

MS Azure - WD Fusion Parameters 03
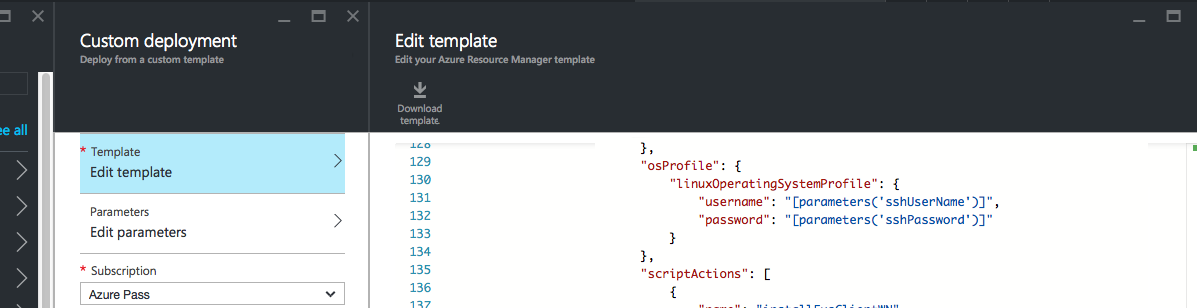
MS Azure - WD Fusion Parameters 03
It is strongly recommended that you select the option to Create New for resource group. If you use existing it is harder to clean up unless you specifically made a resource group to which you will deploy.
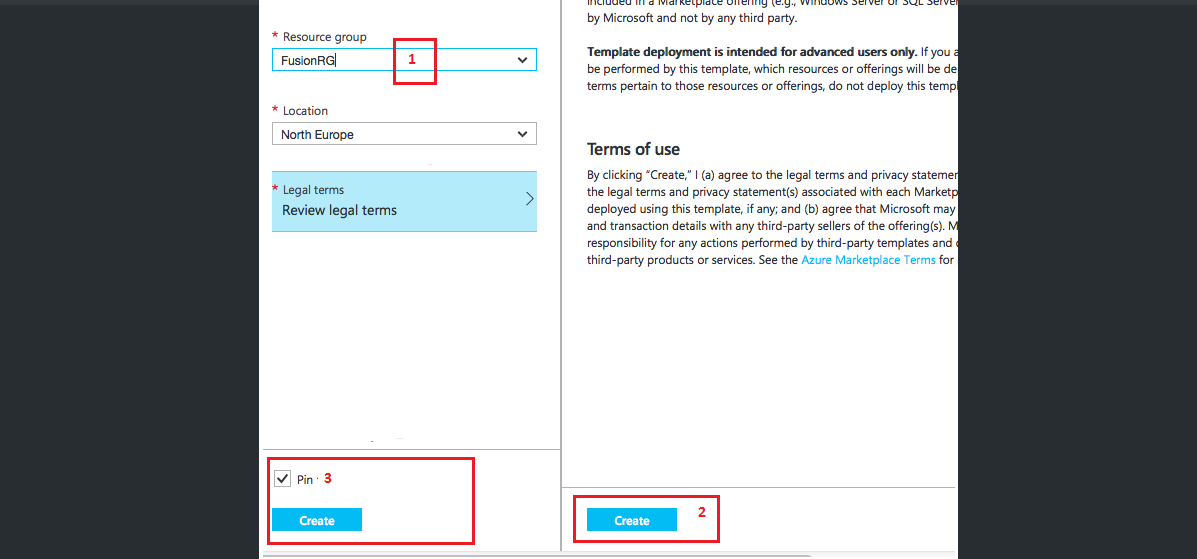
MS Azure - WD Fusion Parameters 03
Once the machine comes up you will need to click on the vm in order to get its public IP address. Tip: It's easier to copy if you click on the blue IP address and copy the IP from the screen that then appears.
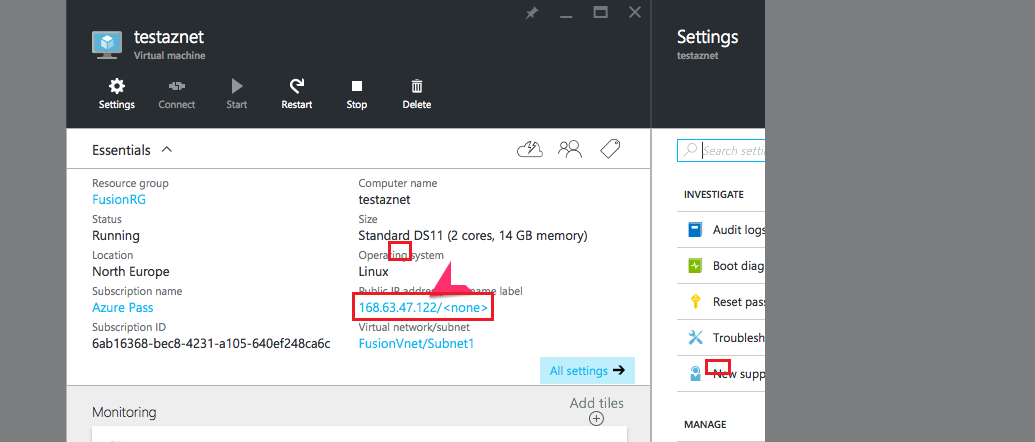
MS Azure - WD Fusion Parameters 03
In this next stage, we'll install WD Fusion
chmod +x fusion-ui-server_hdi_deb_installer.sh
sudo ./fusion-ui-server_hdi_deb_installer.sh
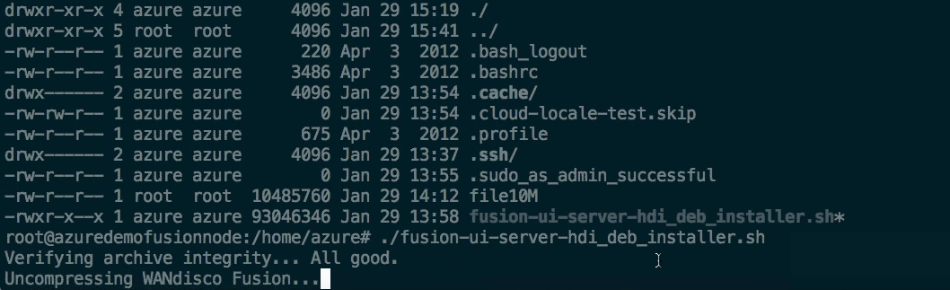
MS Azure - WD Fusion Installation 01
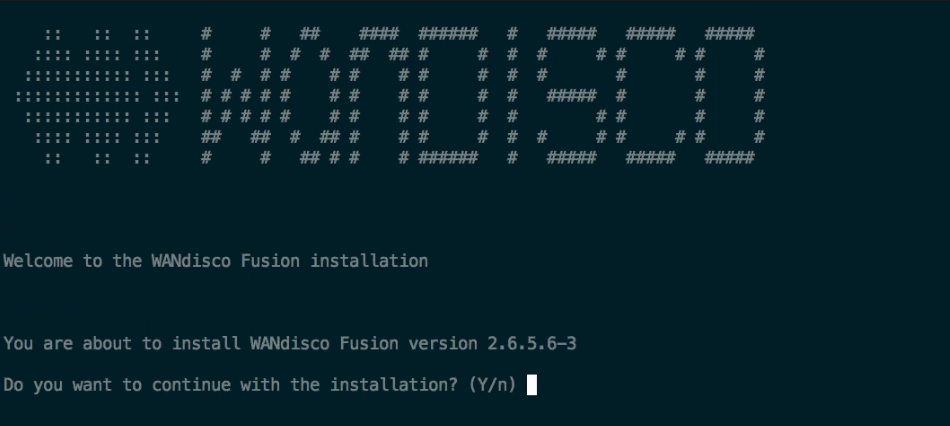
MS Azure - WD Fusion Installation 01
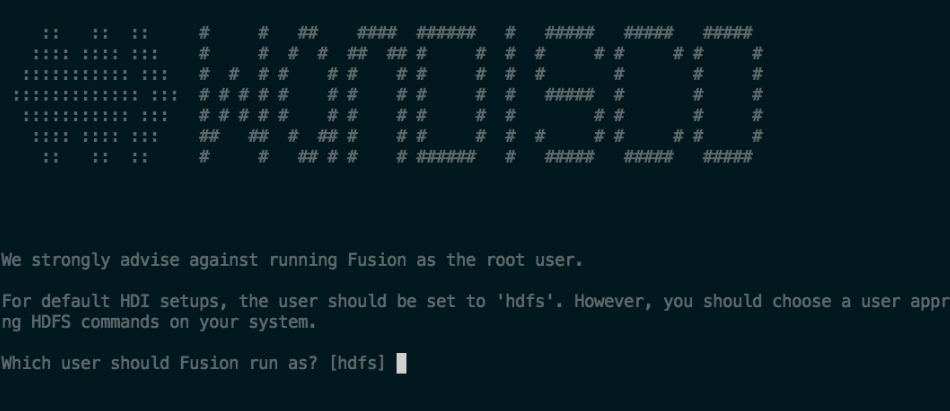
MS Azure - WD Fusion Installation 01
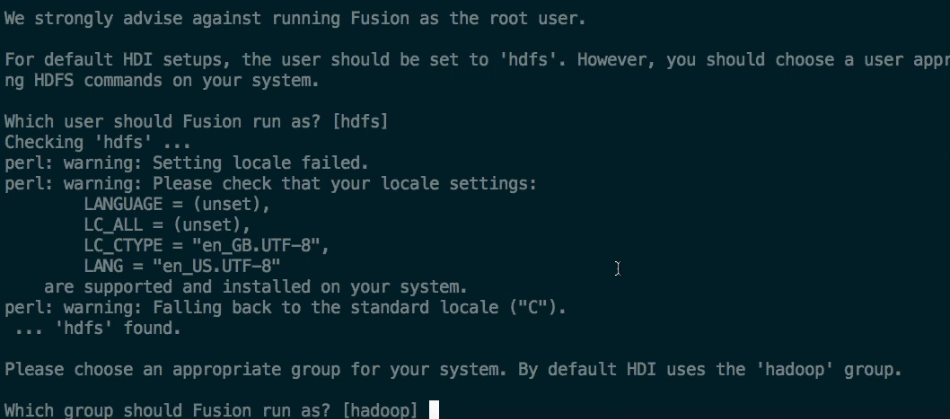
MS Azure - WD Fusion Installation 01
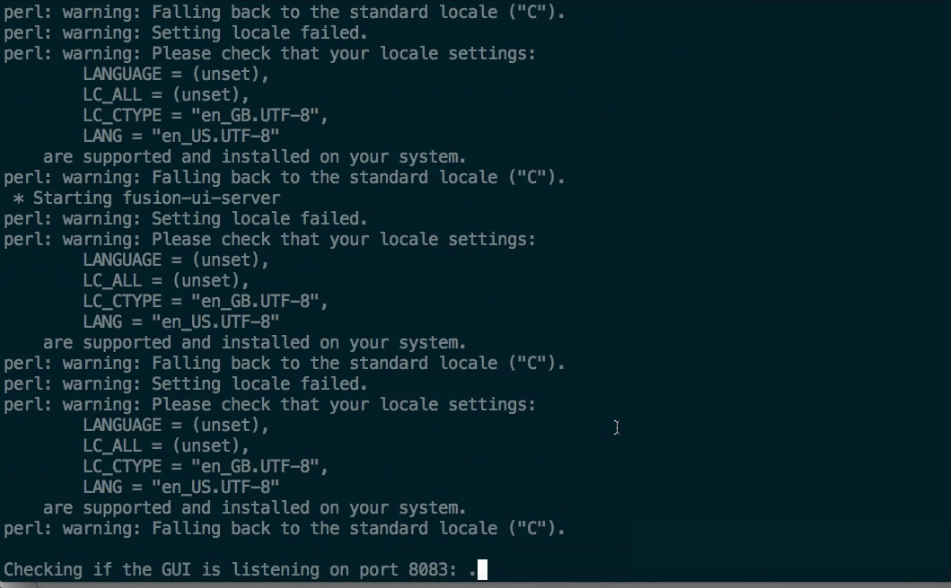
MS Azure - WD Fusion Installation 01
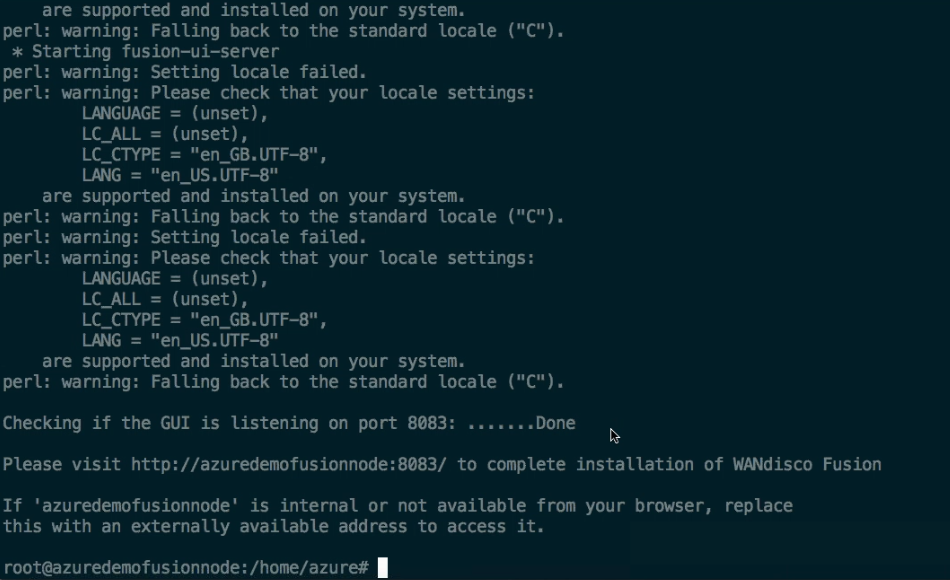
MS Azure - WD Fusion Installation 01
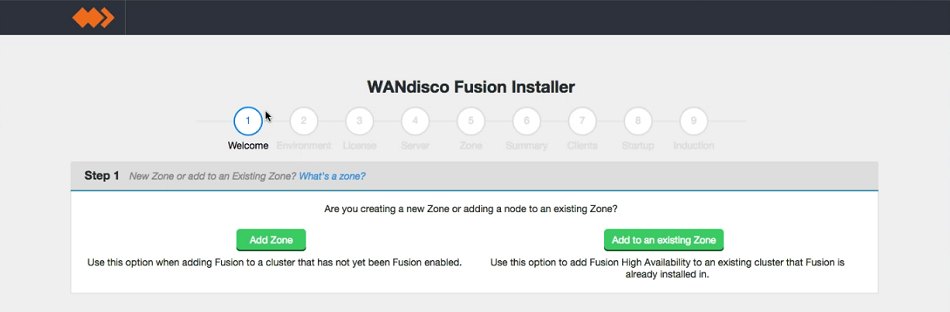
MS Azure - WD Fusion Installation 01
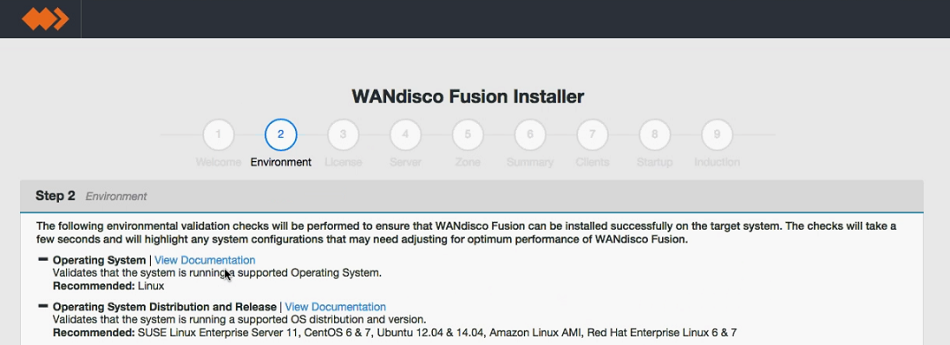
MS Azure - WD Fusion Installation 01
On clicking validate the installer will run through a series of checks of your system's hardware and software setup and warn you if any of WD Fusion's prerequisites are missing.
MS Azure - WD Fusion Installation 01
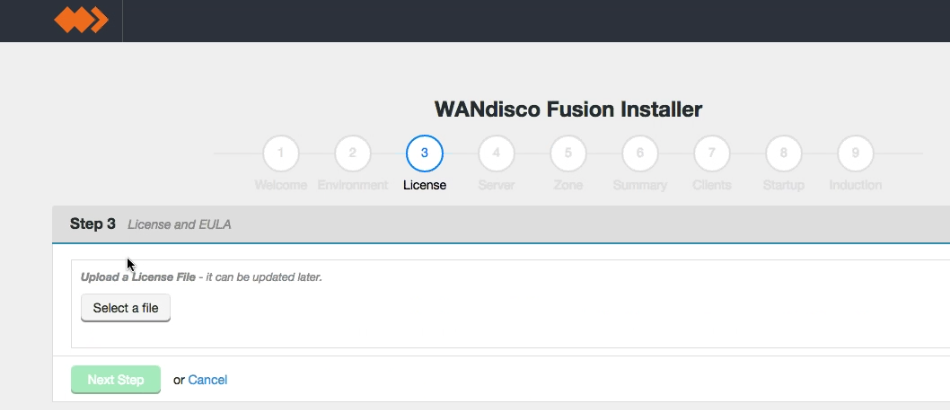
MS Azure - WD Fusion Installation 01
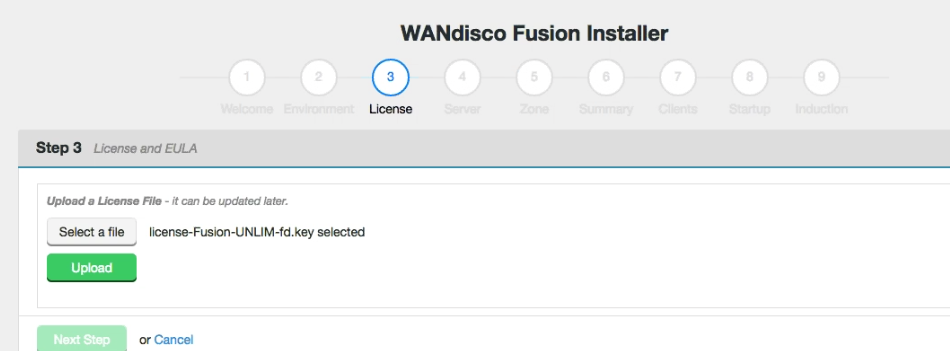
MS Azure - WD Fusion Installation 01
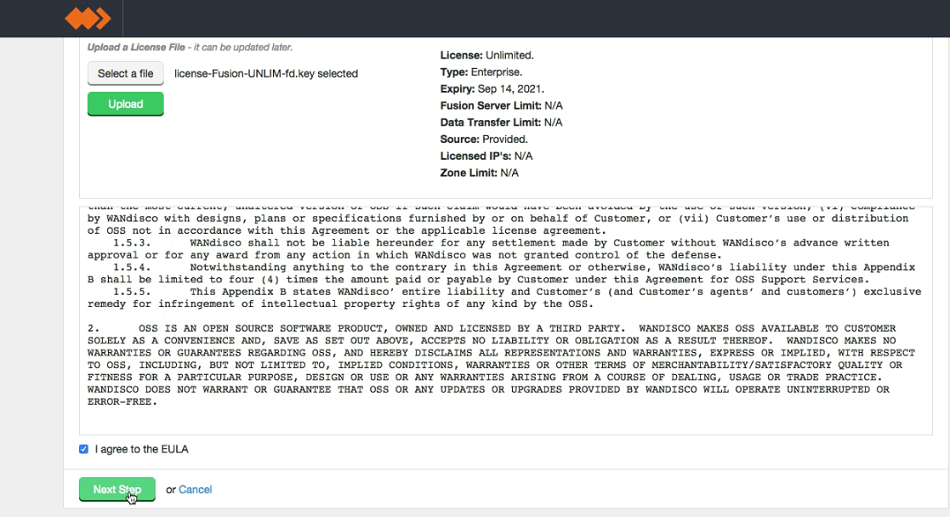
MS Azure - WD Fusion Installation 01
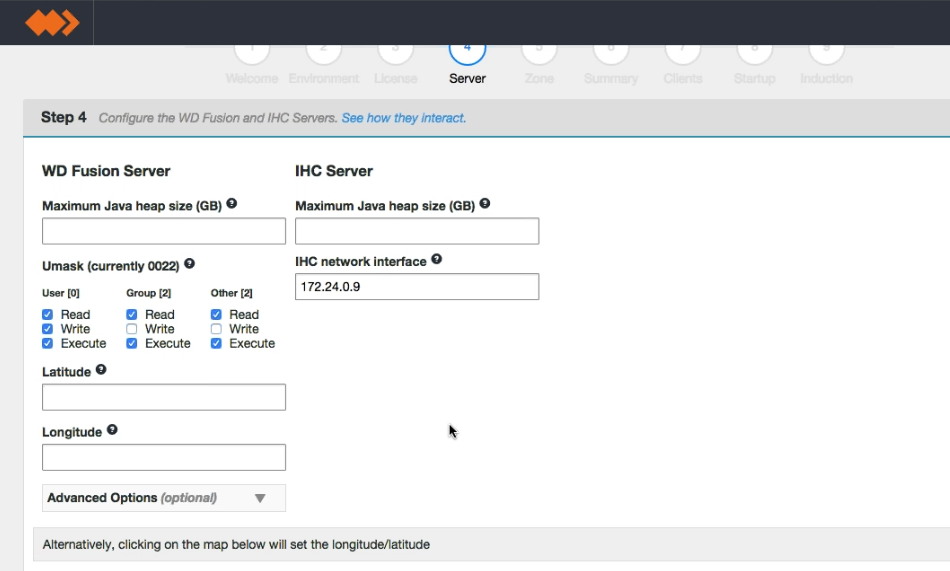
MS Azure - WD Fusion Installation 01
Recommendation
For the purposes of our example installation, we've entered 2GB. We recommend that you allocate 70-80% of the server's available RAM.
Read more about Server hardware requirements.
IHC Settings
Once all settings have been entered, click Next step.
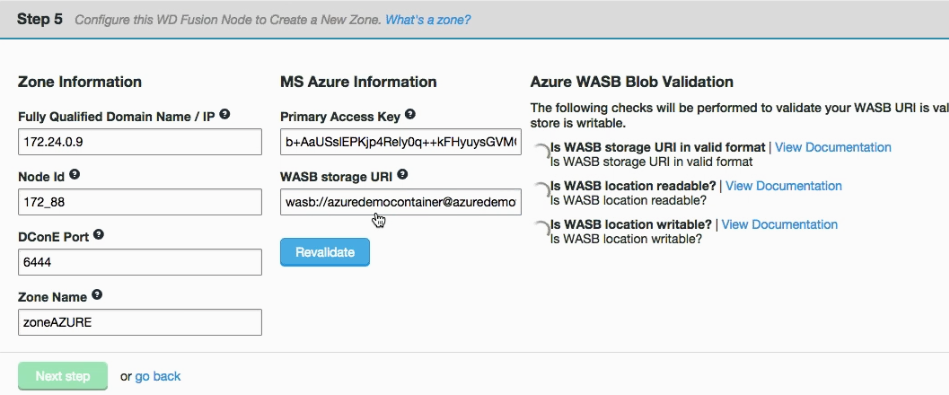
MS Azure - WD Fusion Installation 01
wasb://
wasb[s]://<containername>@<accountname>.blob.core.windows.net
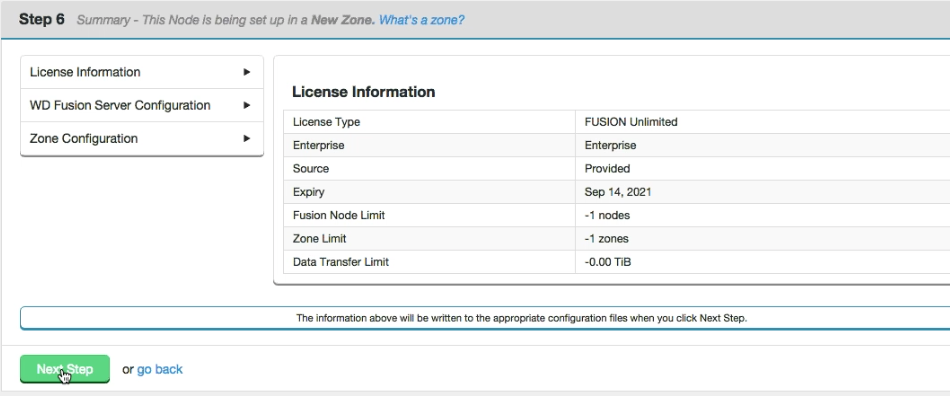
MS Azure - WD Fusion Installation 01
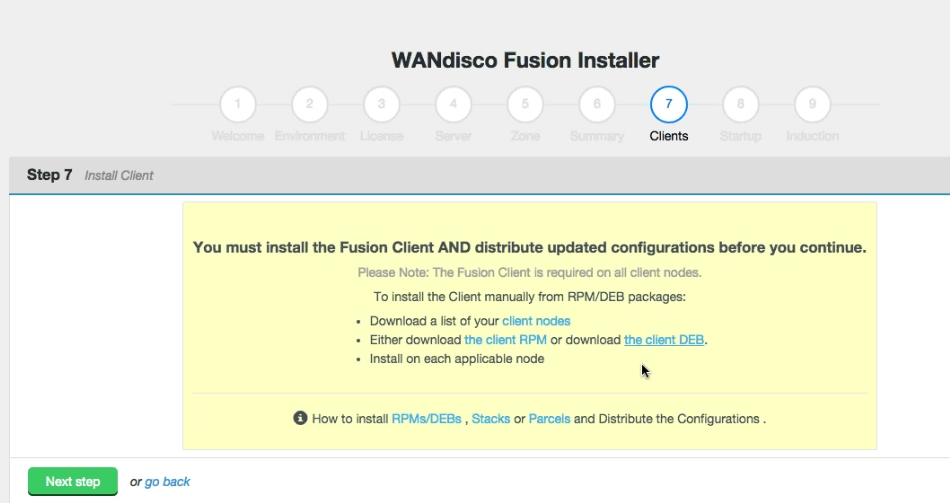
MS Azure - WD Fusion Installation 01
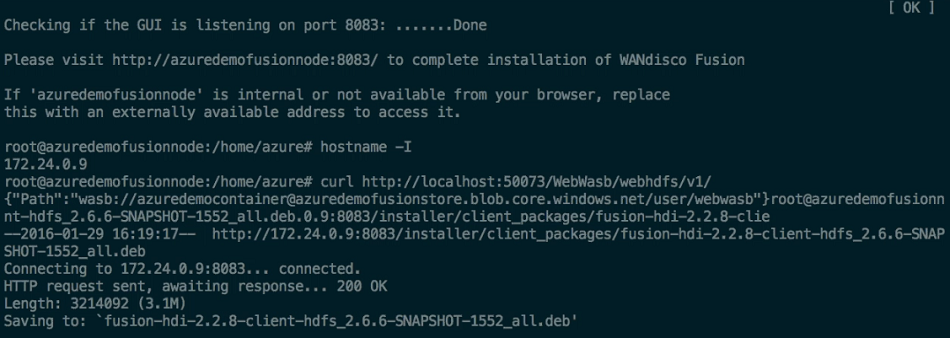
MS Azure - WD Fusion Installation 01

MS Azure - WD Fusion Installation 01
e.g.dpkg -i fusion-hdi-x.x.x-client-hdfs.deb

MS Azure - WD Fusion Installation 01
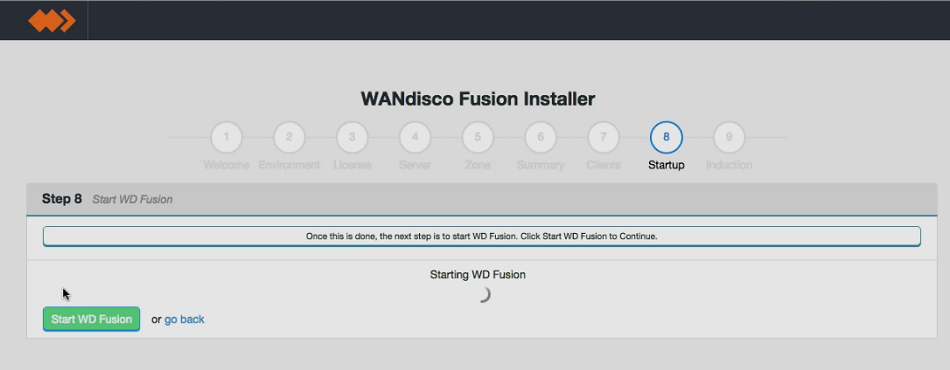
MS Azure - WD Fusion Installation 01
What is induction?
Multiple instances of WD Fusion join together to form a replication network or ecosystem. Induction is the process used to connect each new node to an existing set of nodes.
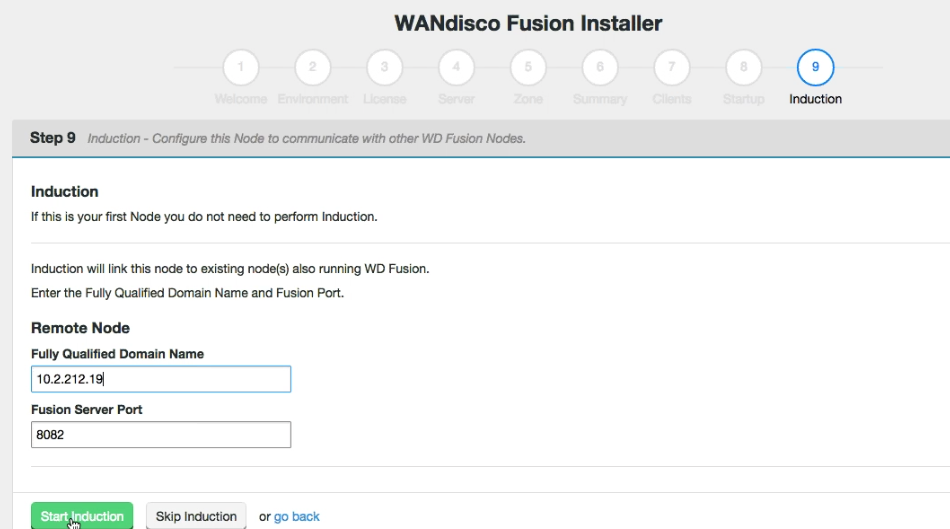
MS Azure - WD Fusion Installation 01
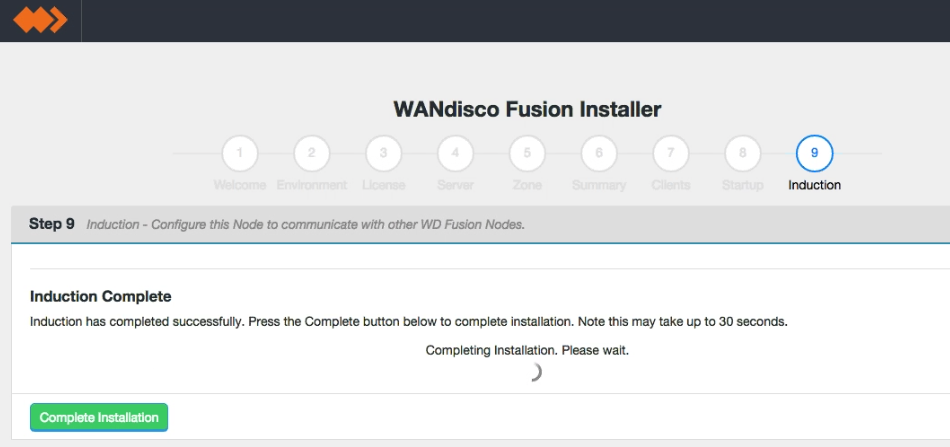
MS Azure - WD Fusion Installation 01
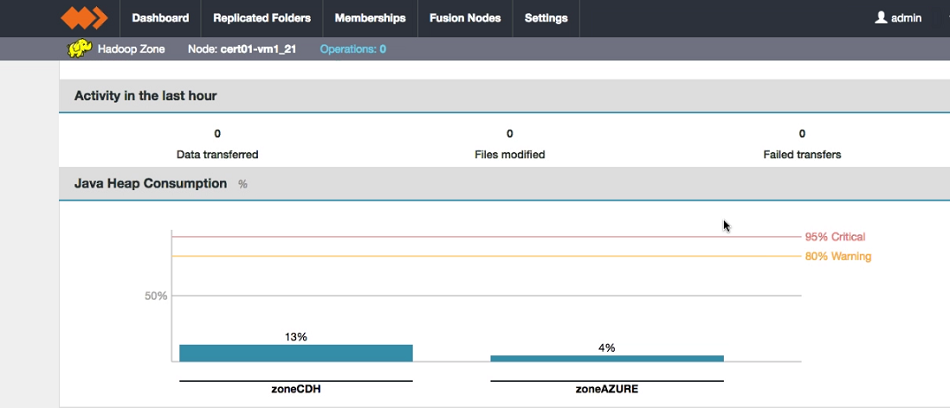
MS Azure - WD Fusion Installation 01
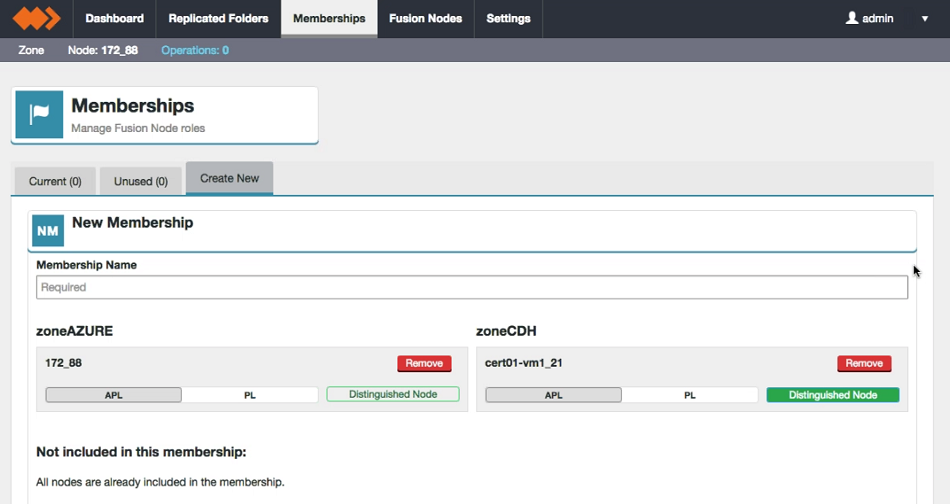
MS Azure - WD Fusion Installation 01
In this example we make the on-premises CDH server the Distinguished Node, as we'll be copying data to the cloud, in an Active-Passive configuration. Click Create.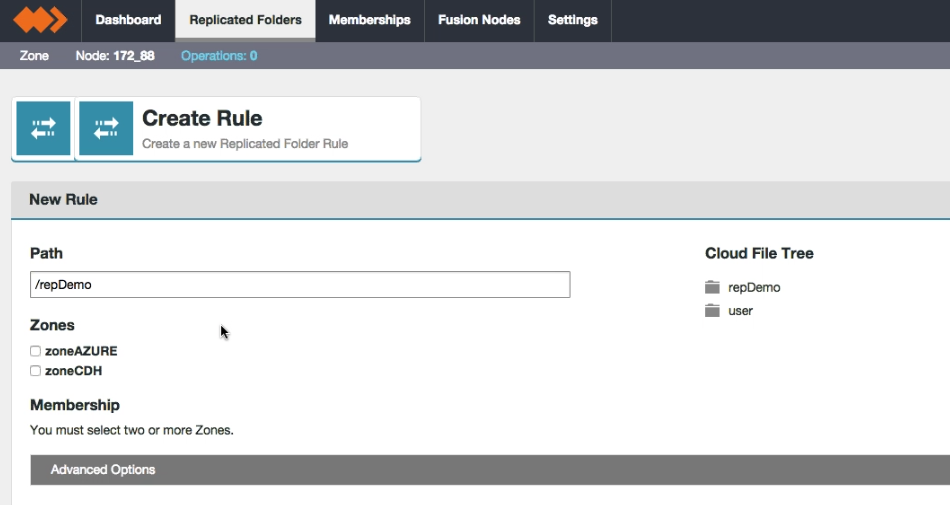
MS Azure - WD Fusion Installation 01
This section will run you through an installation of WANdisco's Fusion to enable you to replicate on-premises data over to Google's Cloud platform.
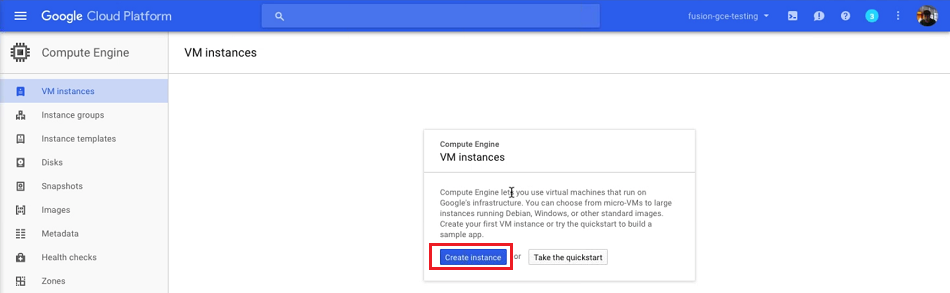
Google Compute - WD Fusion Installation 01
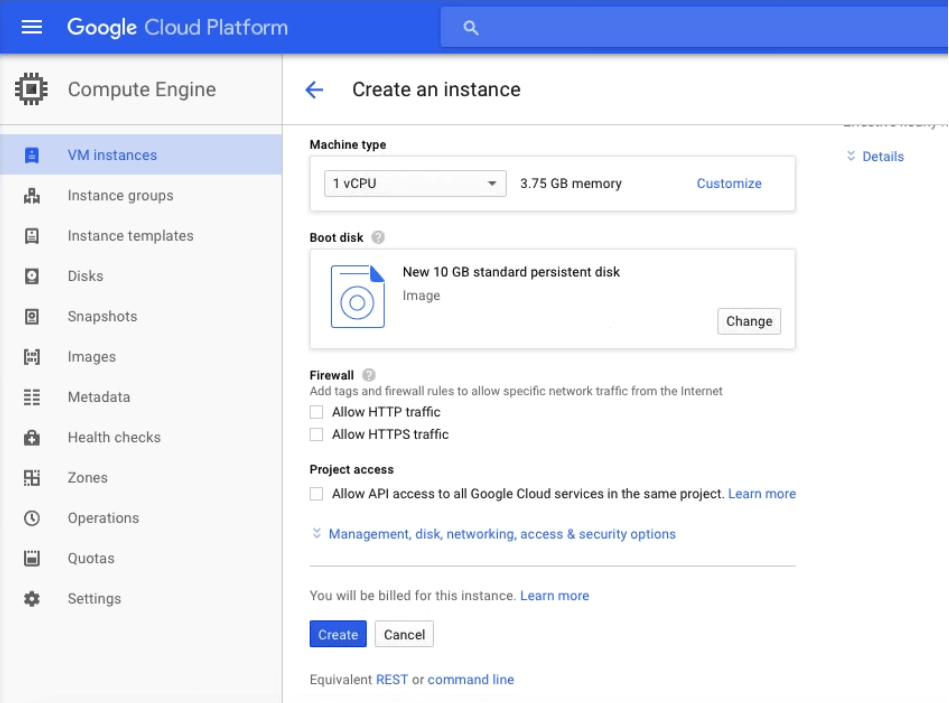
Google Compute - WD Fusion Installation 01
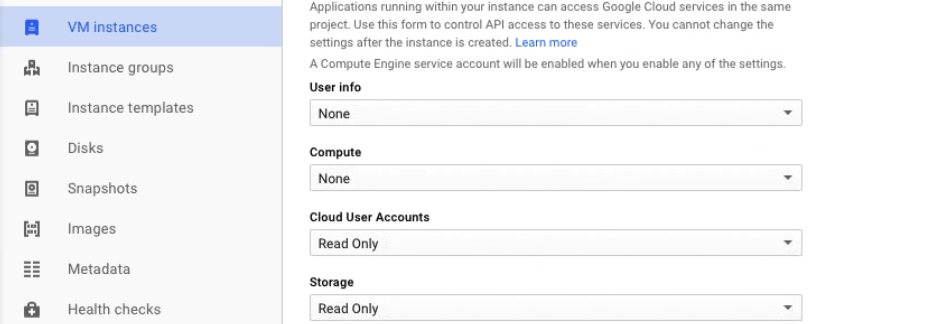
Google Compute - WD Fusion Installation 01

Google Compute - WD Fusion Installation 01
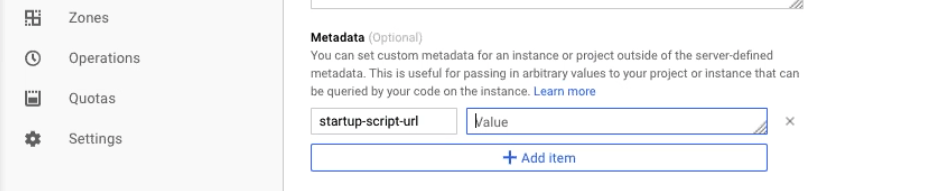
Google Compute - WD Fusion Installation 01
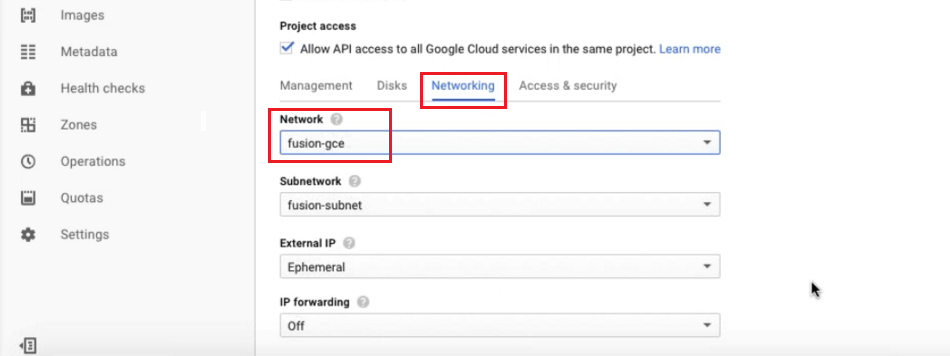
Google Compute - WD Fusion Installation 01
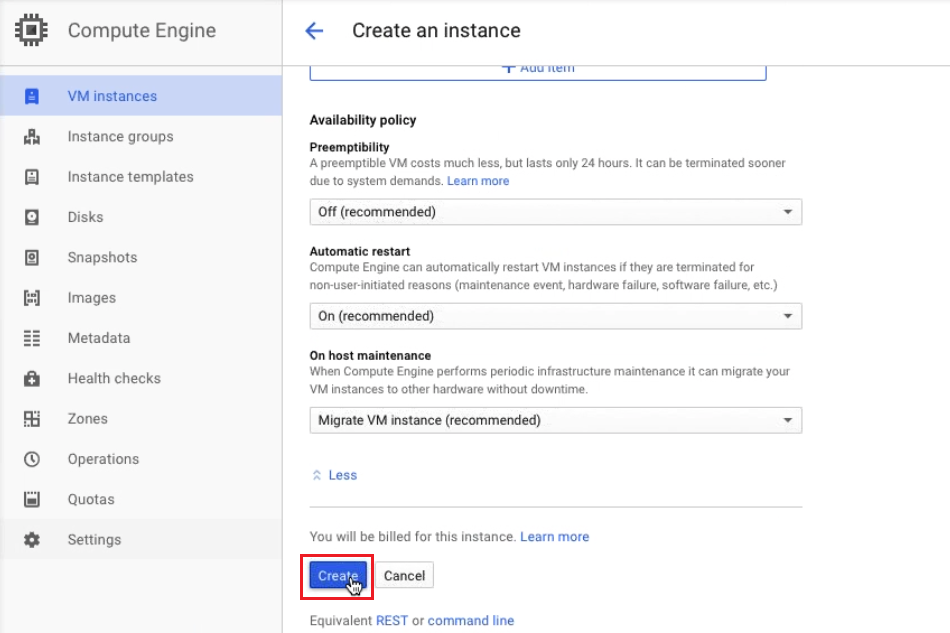
Google Compute - WD Fusion Installation 01
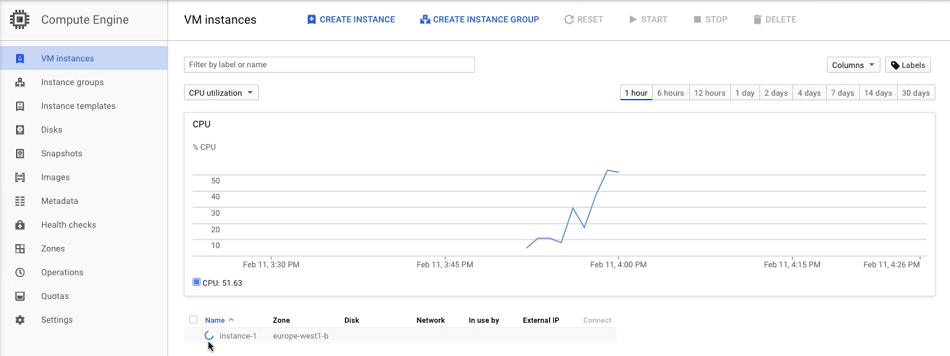
Google Compute - WD Fusion Installation 01

Google Compute - WD Fusion Installation 01
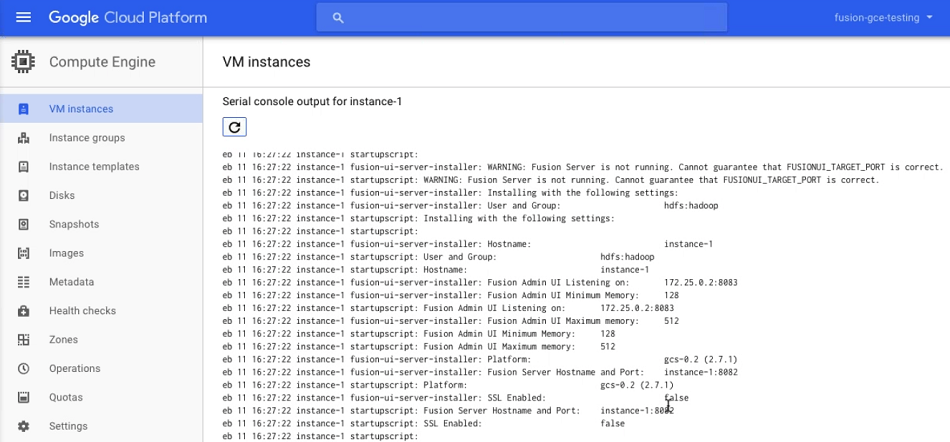
Google Compute - WD Fusion Installation 01
172.25.0.x.
Google Compute - WD Fusion Installation 01
WD Fusion is now installed. Next, we'll complete the basic configuration steps using the web UI.
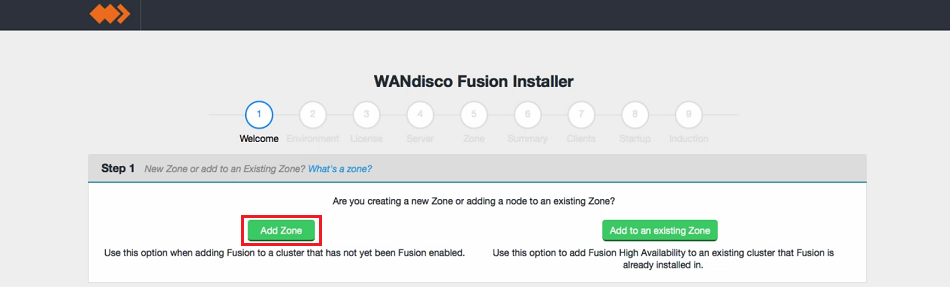
Google Compute - WD Fusion Installation 01
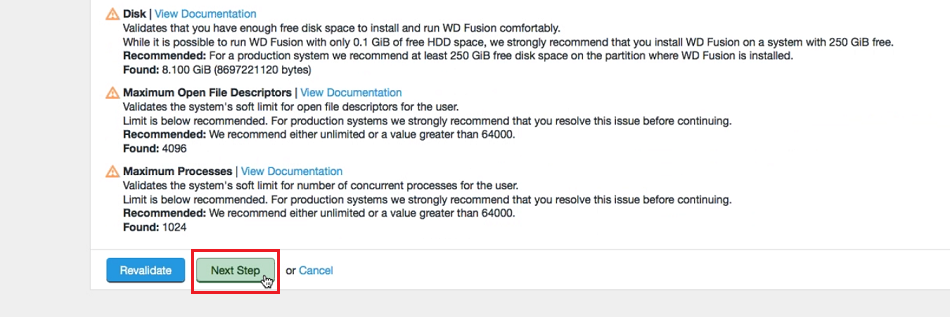
Google Compute - WD Fusion Installation 01
On clicking Validate, any element that fails the check should be addressed before you continue the installation.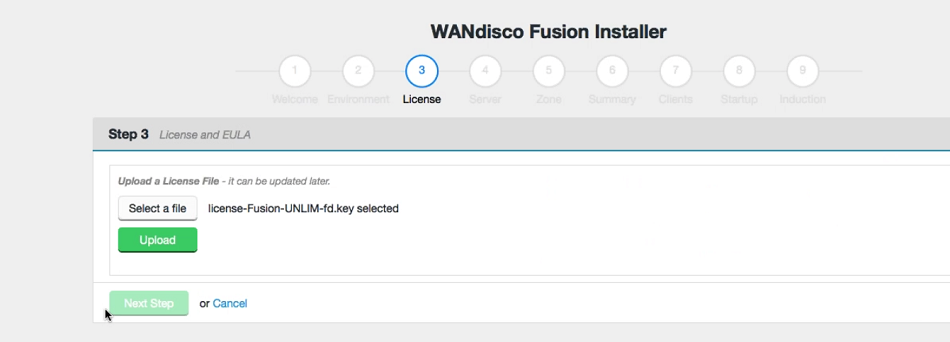
Google Compute - WD Fusion Installation 01
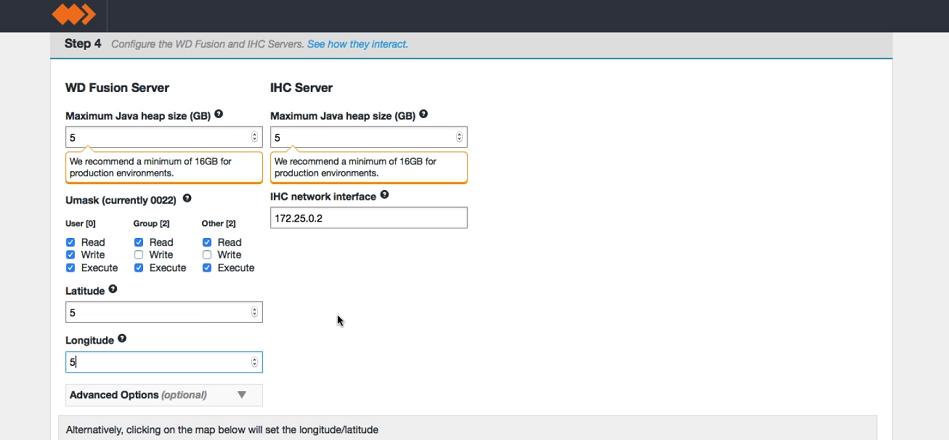
Google Compute - WD Fusion Installation 01
Recommendation
We recommend that you allocate 70-80% of the server's available RAM.
Read more about Server hardware requirements.
Once all settings have been entered, click Next step.
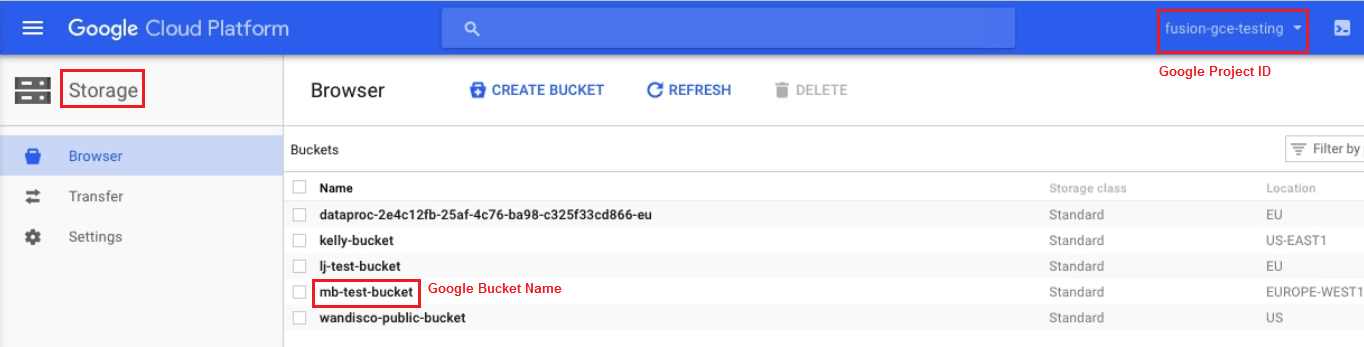
Google Compute - Get the name of your bucket
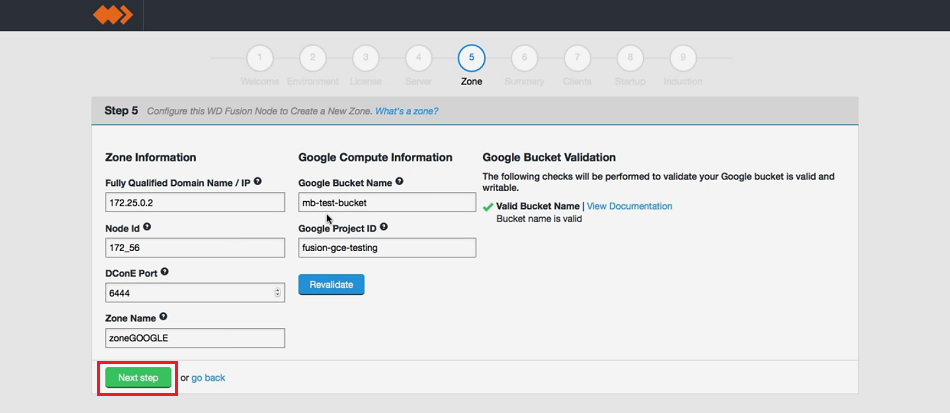
Entry fields for zone properties
Entry fields for Google's platform information.
The following validation is completed against the settings:
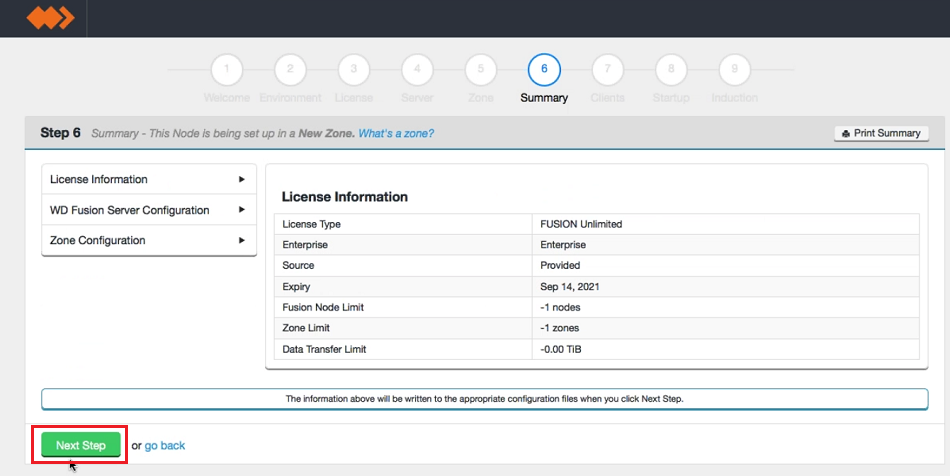
Google Compute - WD Fusion Installation 01
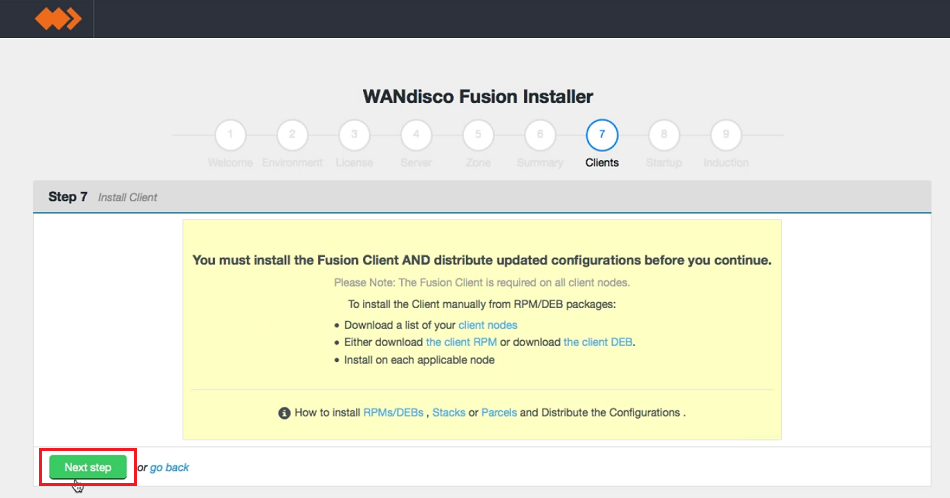
Google Compute - WD Fusion Installation 01
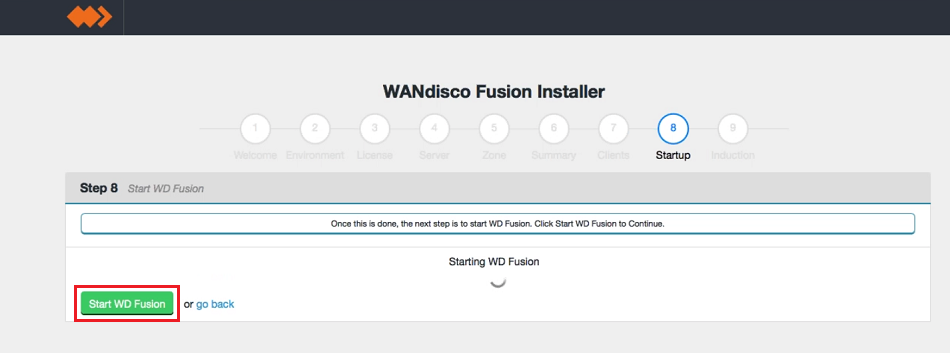
Google Compute - WD Fusion Installation 01
For this first node you will miss this step out, click Skip Induction.For all the following node installations you will provide the FQDN or IP address and port of this first node. (In fact, you can complete induction by referring to any node that has itself completed induction.)
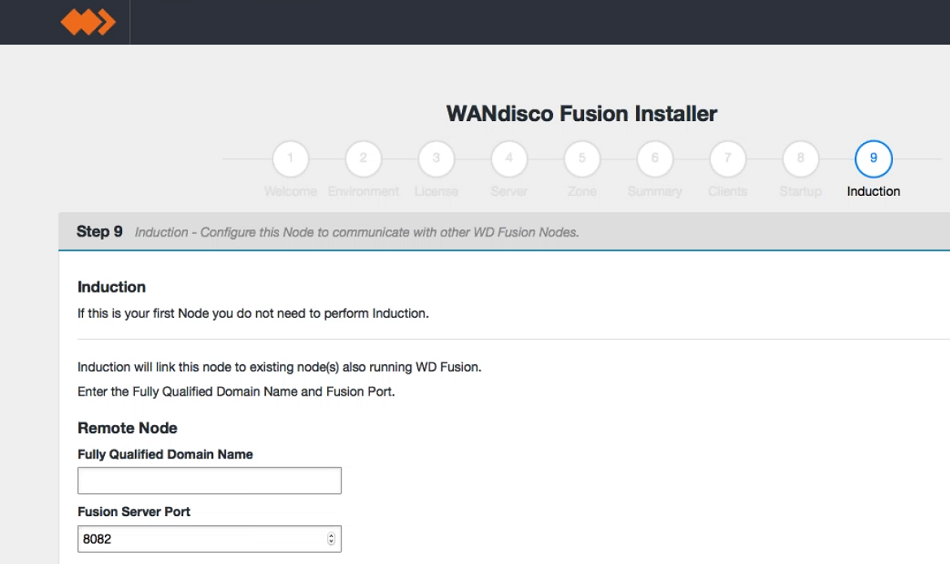
Google Compute - WD Fusion Installation 01
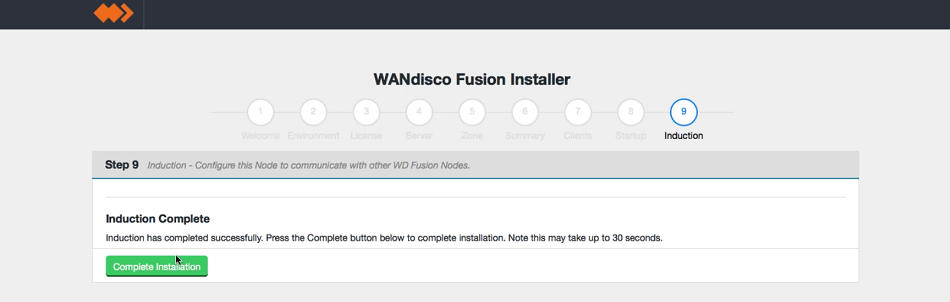
Google Compute - WD Fusion Installation 01
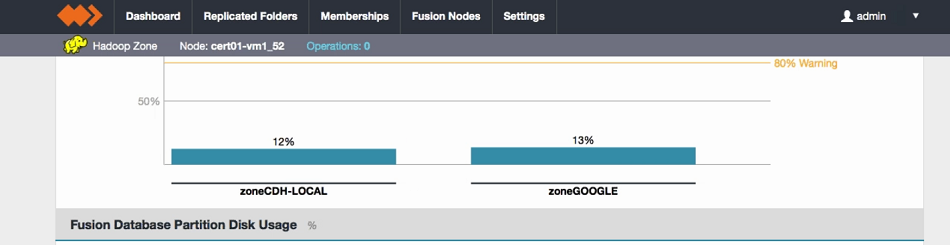
Google Compute - WD Fusion Installation 01
It's now time to demonstrate data replication between the on-premises cluster and the Google bucket storage. First we need to perform a synchronization to ensure that the data stored in both zones is in exactly the same state.
You can synchronize data in both directions:
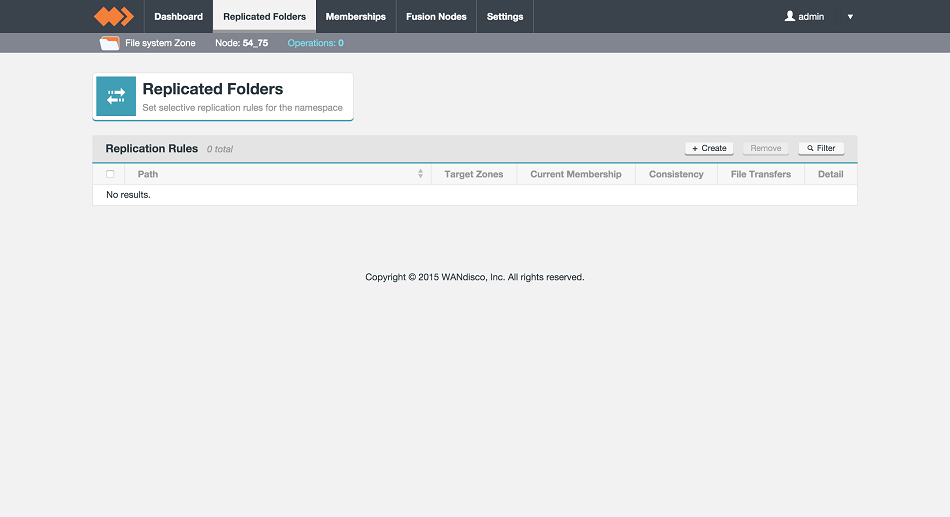
Google Cloud - Fusion installation figure 09.
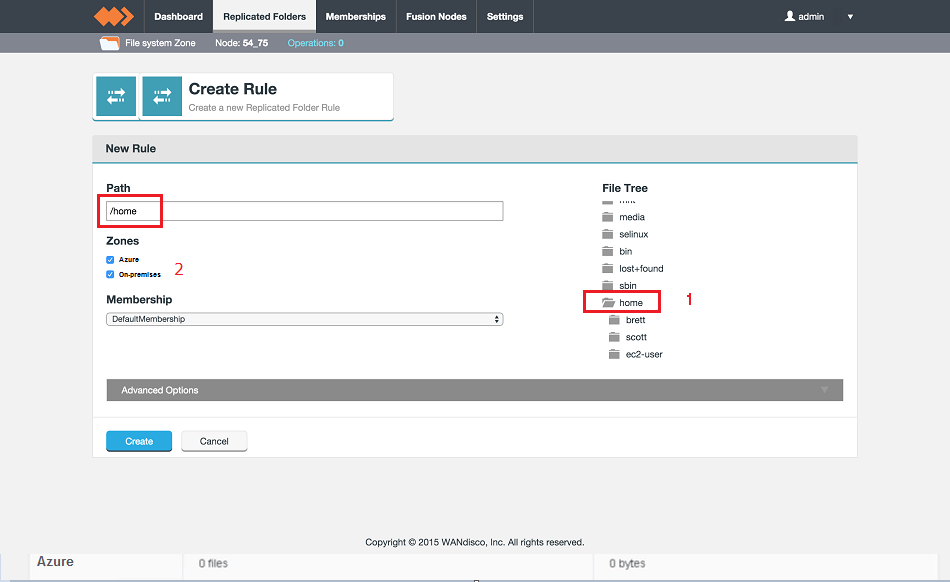
Google Cloud - Fusion installation figure 10.
Navigate the HDFS File Tree (1), on the right-hand side of the New Rule panel to select your target folder, created in the previous step. The selected folder will appear in the Path entry field. You can, instead, type or copy in the full path to the folder in the Path directory.
Next, select both zones from the Zones list (2). You can leave the default membership in place. This will replicate data between the two zones.
More about Membership
Read about Membership in the WD Fusion User Guide - 4. Managing Replication.
Click Create to continue.
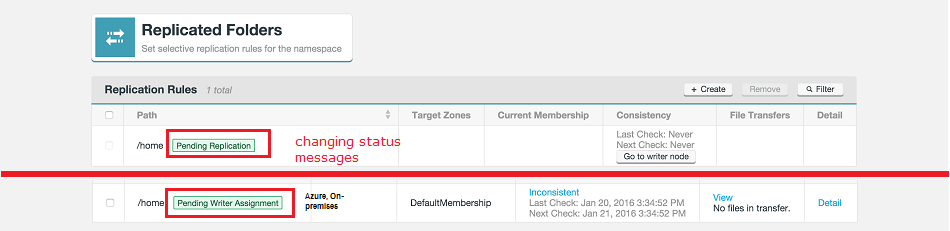
Google Cloud - Fusion installation figure 11.
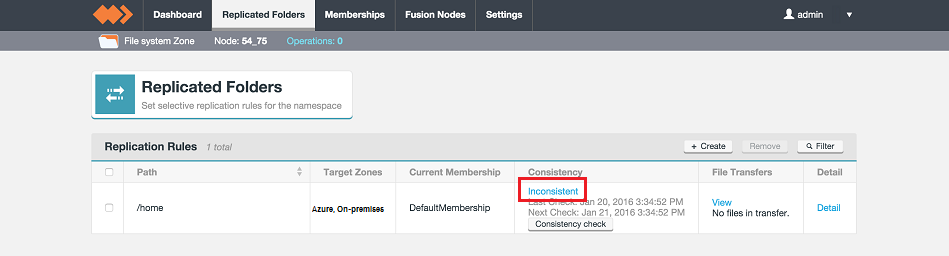
Google Cloud - Fusion installation figure 12.
The consistency report will show you the number of inconsistencies that need correction. We will use bulk resolve to do the first replication.
See the Appendix for more information on improving performance of your first synch and resolving individual inconsistencies if you have a small number of files that might conflict between zones - Running initial repairs in parallel
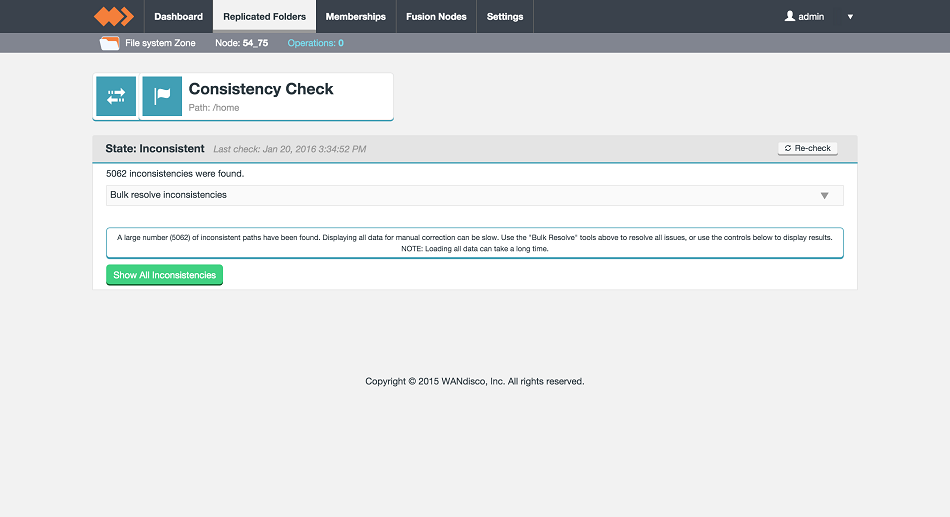
Google Cloud - Fusion installation figure 13.
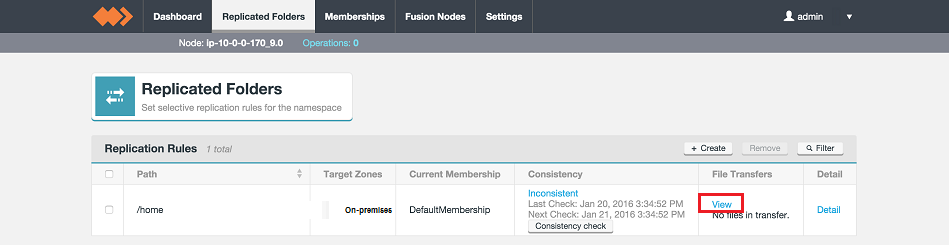
Google Cloud - Fusion installation figure 14.
By checking off the boxes for each status type, you can report on files that are:
No transfers in progress?
You may not see files in progress if they are very small, as they tend to clear before the UI polls for in-flight transfers.
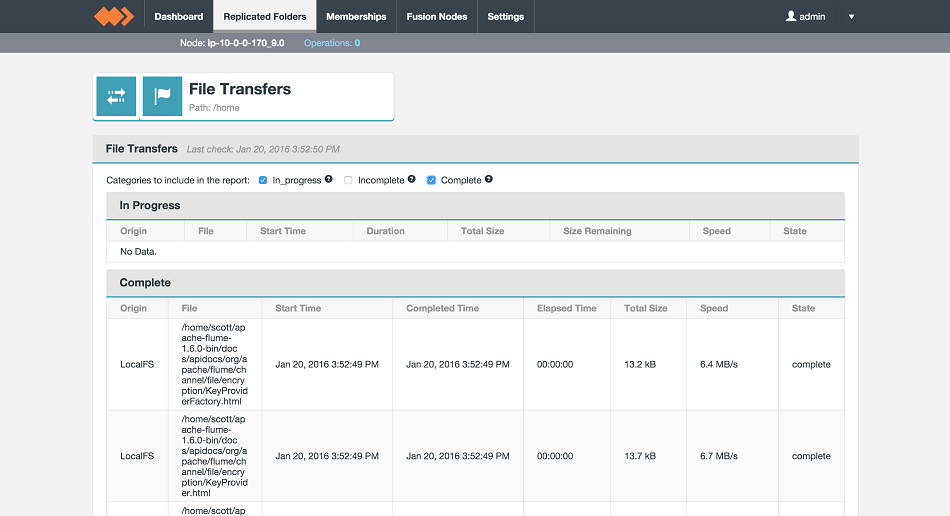
Google Cloud - Fusion installation figure 15.