Install WD Fusion in your data center
Contact WANdisco for a download link and evaluation license for the WANdisco Fusion File System. Once you receive the download link, copy the installer to the on-premises Linux machine that will be the Fusion Server.
For more information about the requirements for the WD Fusion server machine, see Deployment checklist
- Open a terminal session on your first installation server. Copy the WD Fusion installer script into a suitable directory.
- Make the script executable, e.g.
chmod +x fusion-ui-serverlocalfs_rpm_installer_x.x.x.x_xx.sh - Execute the file with root permissions, e.g.
sudo ./fusion-ui-serverlocalfs_rpm_installer_x.x.x.x_xx.sh - The installer will now start. You will be asked if you wish to continue with the installation. Enter Y to continue.

LocalFS figure 1.
- The installer performs some basic checks and lets you modify the Java heap settings. The heap settings apply only to the WD Fusion UI.
The default values should be fine for evaluation although you should review your system resource requirements for production. Enter Y to continue.INFO: Using the following Memory settings for the WANDISCO Fusion Admin UI process: INFO: -Xms128m -Xmx512m Do you want to use these settings for the installation? (Y/n) y
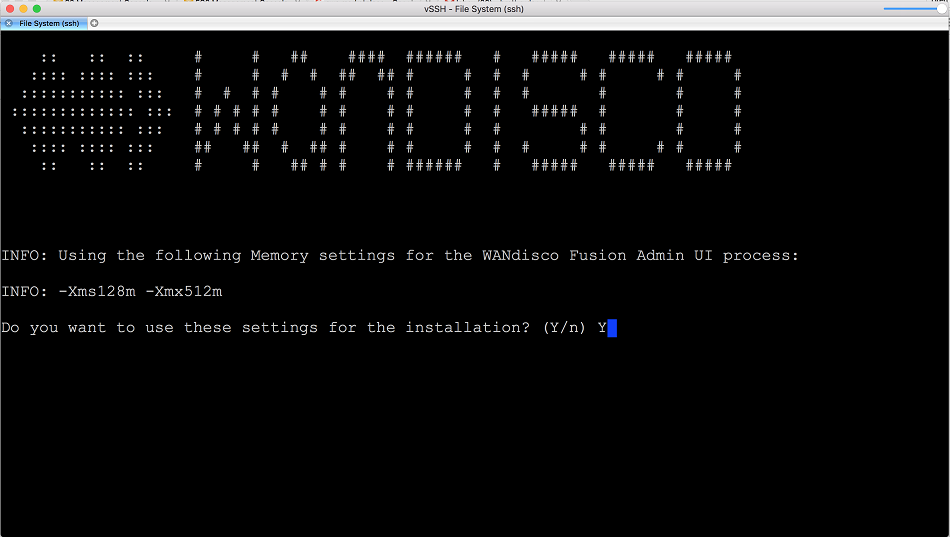
LocalFS figure 2.
- Select the localfs platform and then enter a username and password that you will use to login to the WD Fusion web UI.
Which port should the UI Server listen on [8083]:
 Please specify the appropriate platform from the list below:

 [0] localfs-2.7.0

 Which Fusion platform do you wish to use? 0
 You chose localfs-2.7.0:2.7.0
 Please provide an admin username for the Fusion web ui: admin
 Please provide an admin password for the Fusion web ui: ************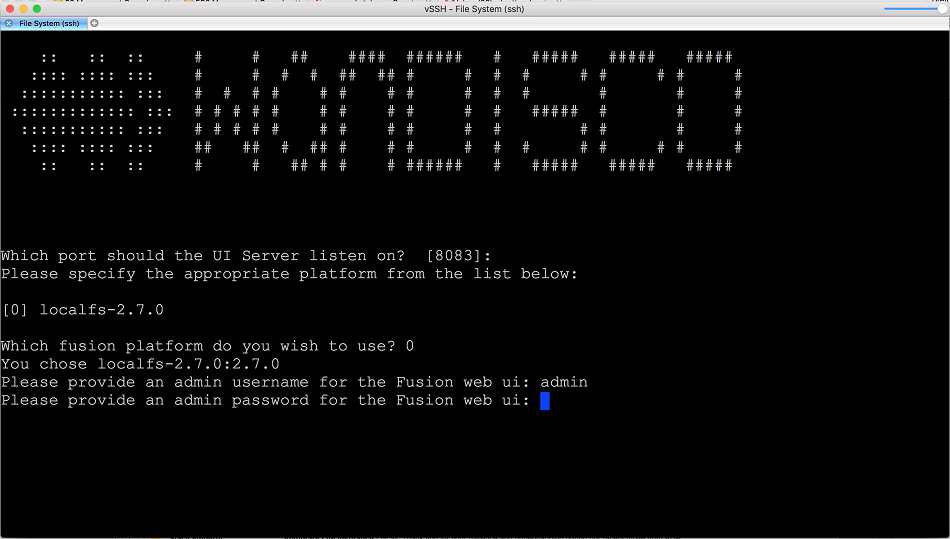
LocalFS figure 3.
- Provide a system user account for running WD Fusion. Following the on-screen instructions, you should set up an account called 'fusion' when running the default LocalFS setup.
Click Enter to accept 'fusion' or enter another suitable system account.We strongly advise against running Fusion as the root user. For default LOCALFS setups, the user should be set to 'fusion'. However, you should choose a user appropriate for running HDFS commands on your system. Which user should fusion run as? [fusion] fusion - Now choose a suitable group, again 'fusion' is the default.
Please choose an appropriate group for your system. By default LOCALFS uses the 'fusion' group.

 Which group should Fusion run as? [fusion] fusion
Root user
You will receive a warning against using "root" for running WD Fusion. Using system root to run applications is not recommended, although it may be permitted for an evaluation, and its use would ensure that WD Fusion has full access to system data. - You will get a summary of the all the configuration that you have so far entered. Give it a check before you continue.
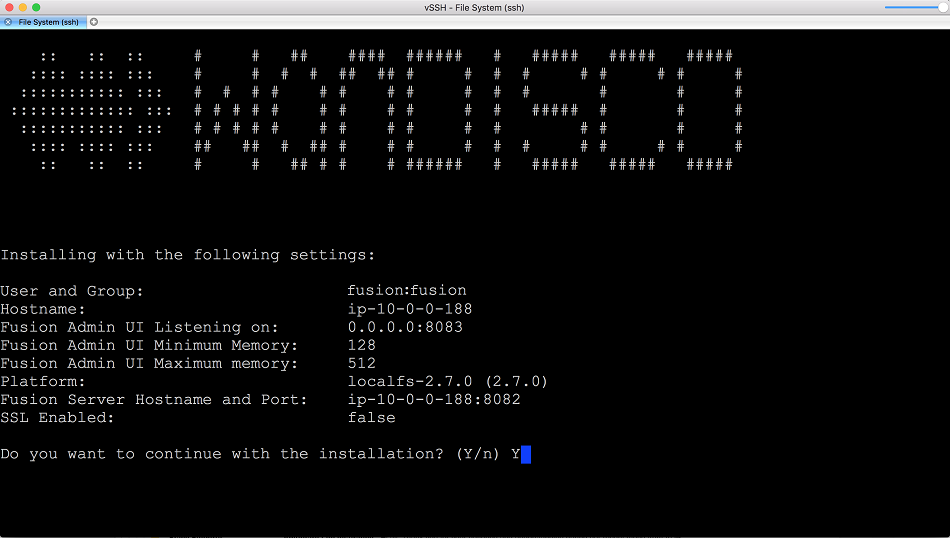
LocalFS figure 6.
- The installation process will complete. The final configuration steps will not be done over the web UI. Follow the on-screen instructions for where to point your browser, i.e. http://your-server-IP:8083/
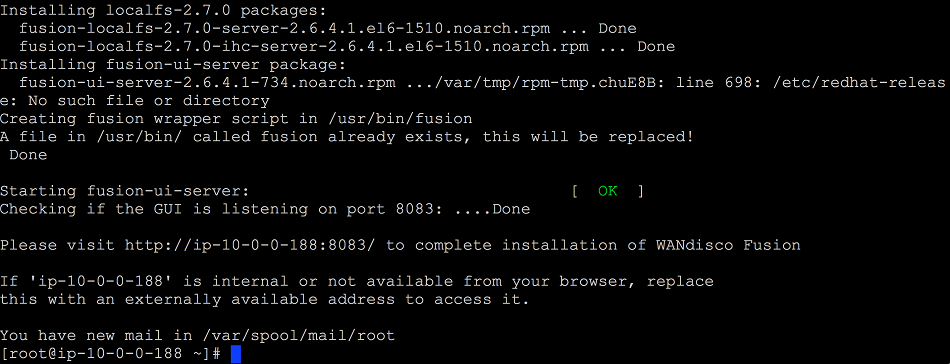
LocalFS figure 7.
Configuration
WD Fusion is now installed. Next, we'll complete the basic configuration steps using the web UI.
- In the first "Welcome" screen you're asked to choose between Create a new Zone and Add to an existing Zone.
Make your selection as follows: Add Zone
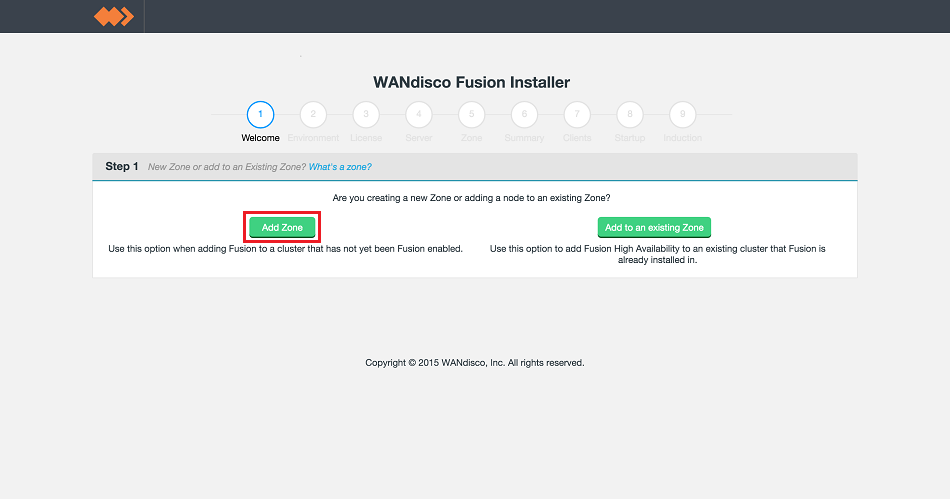
LocalFS figure 8.
- Run through the installer's detailed environment checks. For more details about exactly what is checked in this stage, see Environmental Checks in the User Guide's Appendix.
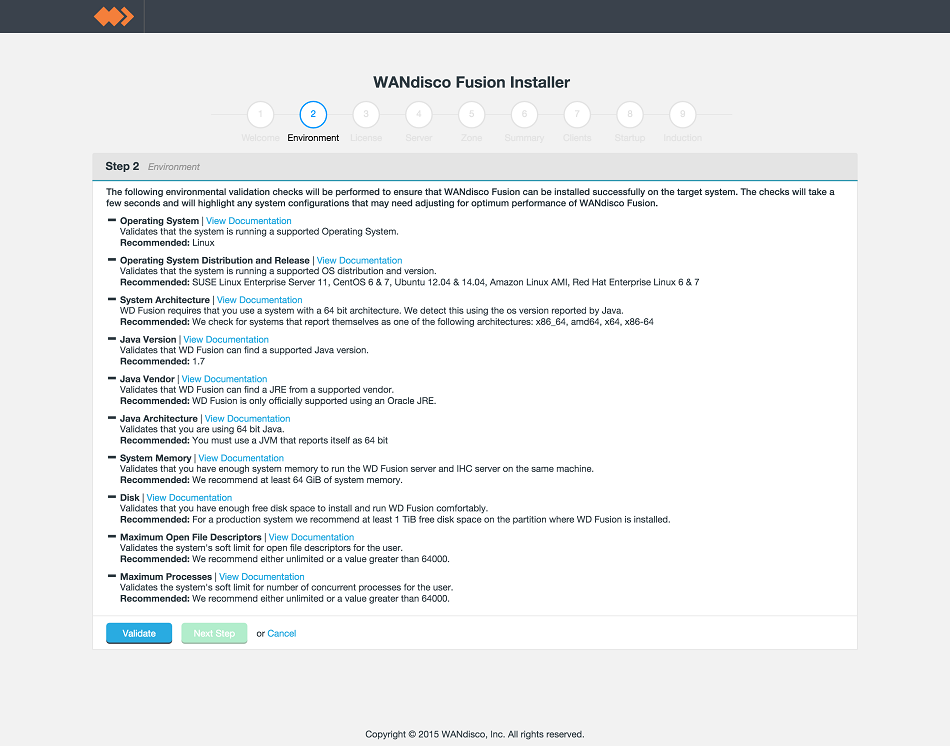
LocalFS figure 9.
- On clicking Validate, any element that fails the check should be addressed before you continue the installation.
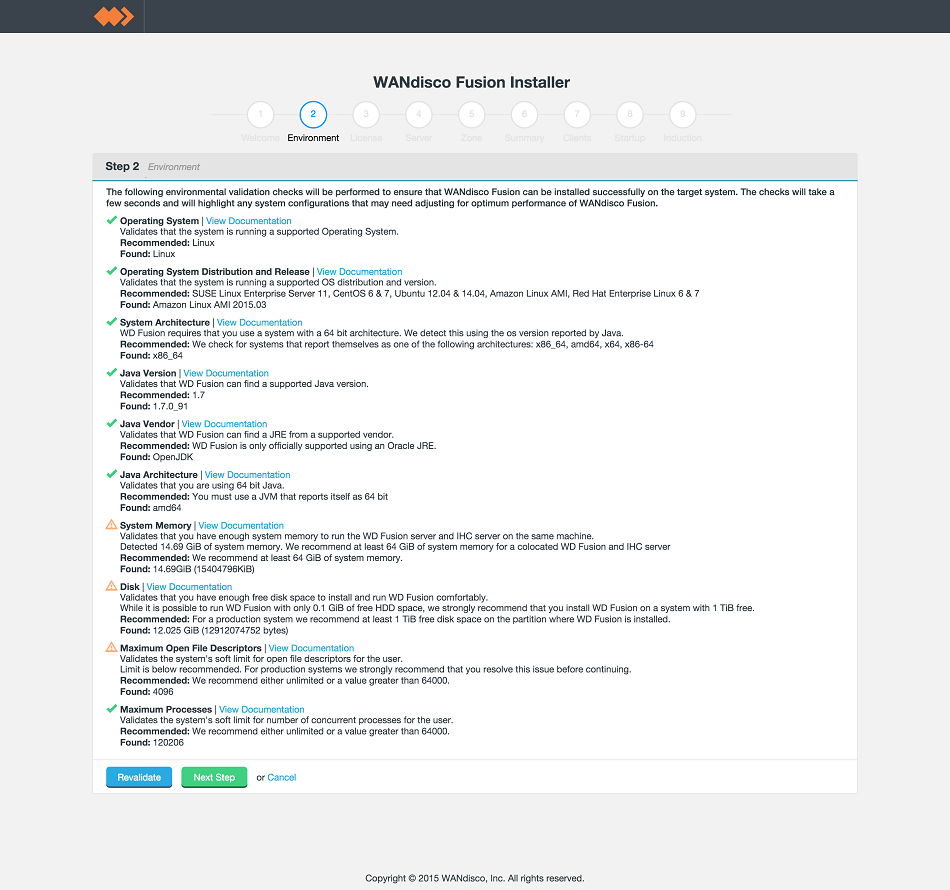
LocalFS figure 10.
Warnings may be ignored for the purposes of completing the installation, especially if the installation is only for evaluation purposes and not for production. However, when installing for production, you should also address all warnings, or, at least take note of them and exercise due care if you continue the installation without resolving and revalidating. Click Next Step to continue.
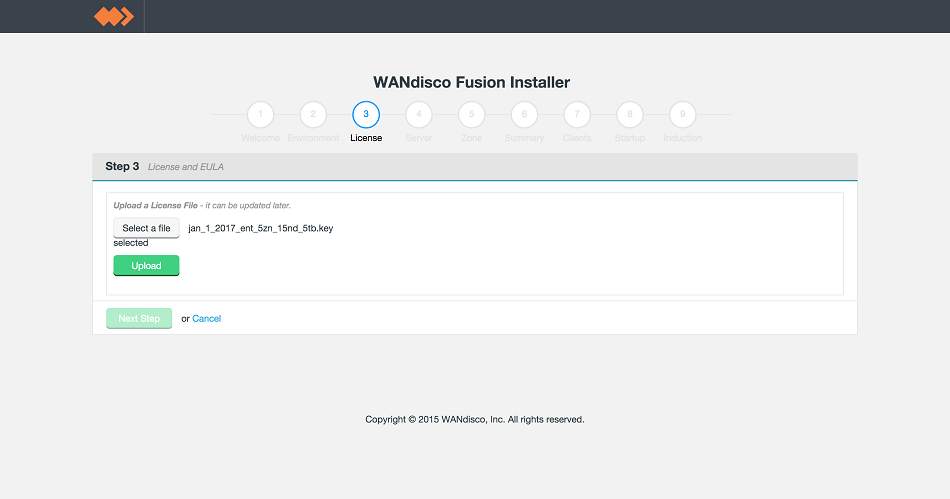
- Click on Select file and then navigate to the license file provided by WANdisco.
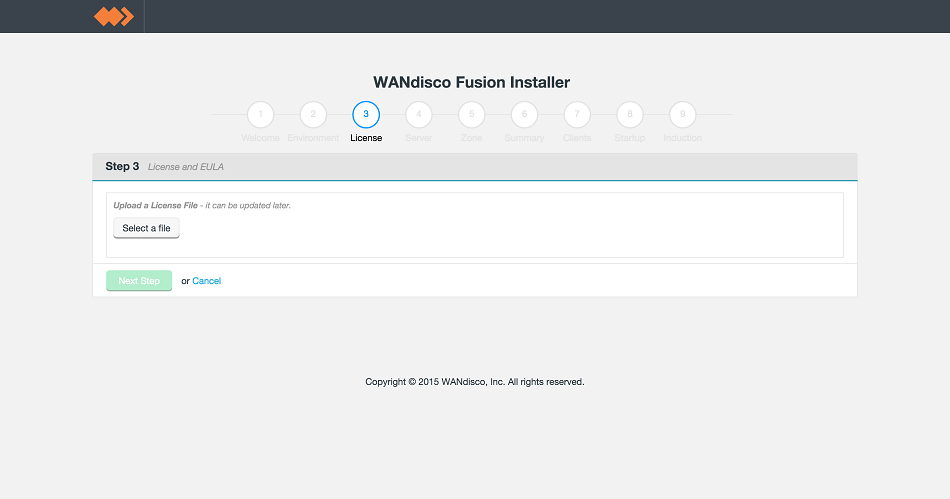
LocalFS figure 11.
- Click on Upload to validate the license file.
LocalFS figure 12.
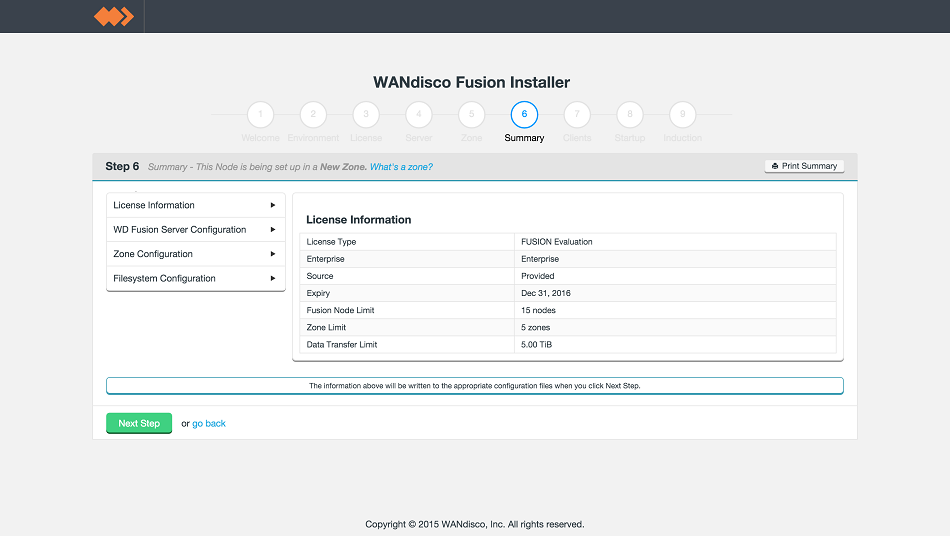
- Providing the license file is validated successfully, you will see a summary of what features are provided under the license.
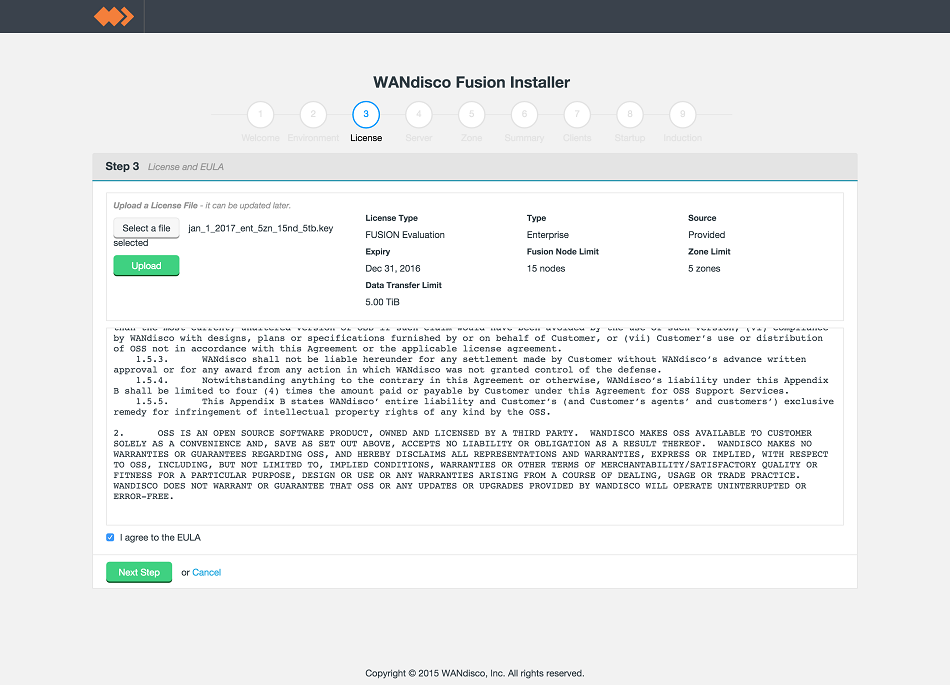
LocalFS figure 13.
Click on the I agree to the EULA to continue, then click Next Step.
- Enter settings for the WD Fusion server.
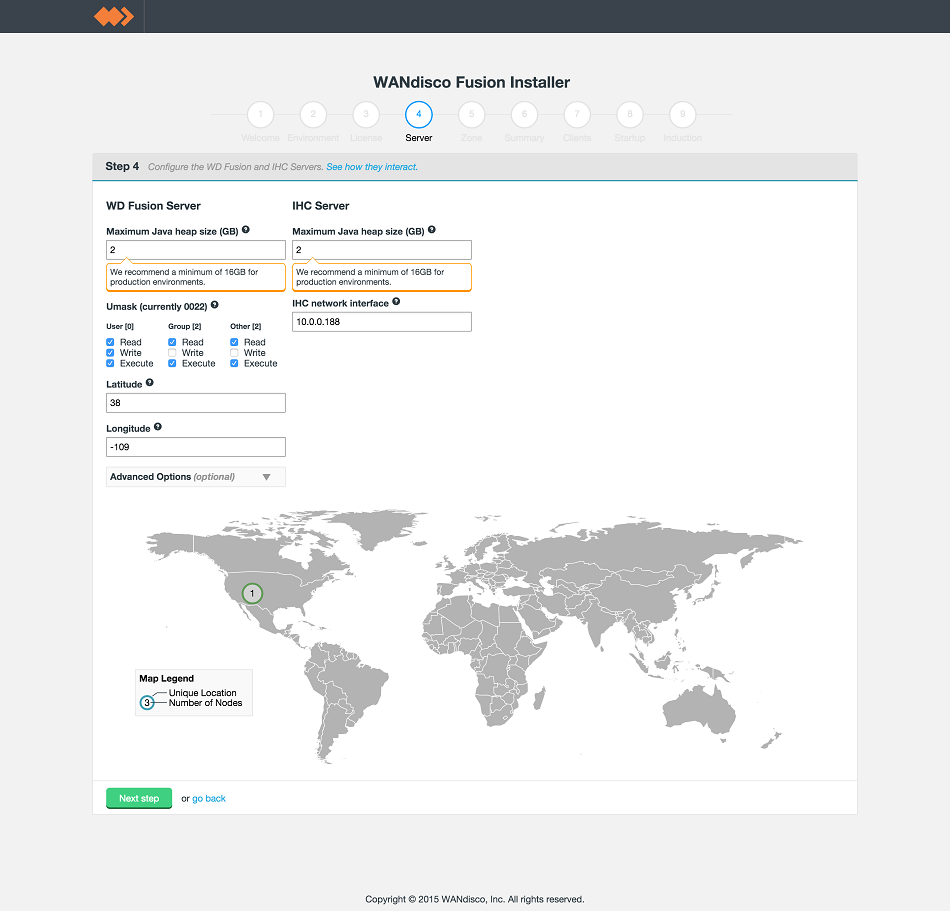
LocalFS figure 14 - Server settings
WD Fusion Server
- Fusion Server Max Memory (GB)
- Enter the maximum Java Heap value for the WD Fusion server. We recommend that for production you should top out with at least 16GB.
Recommendation
For the purposes of our example installation, we've entered 2GB. We recommend that you allocate 70-80% of the server's available RAM.
Read more about Server hardware requirements. - Umask (currently 022)
- Set the default permissions applied to newly created files. The value 022 results in default directory permissions 755 and default file permissions 644. This ensures that the installation will be able to start up/restart.
- Latitude
- The north-south coordinate angle for the installation's geographical location.
- Longitude
- The east-west coordinate angle for the installation's geographical location. The latitude and longitude is used to place the WD Fusion server on a global map to aid coordination in a far-flung cluster.
IHC Server
- Maximum Java heap size (GB)
- Enter the maximum Java Heap value for the WD Inter-Hadoop Communication server. We recommend that for production you should top out with at least 16GB.
- IHC Network Interface
- The address on which the IHC (Inter-Hadoop Connect) server will be located on.
Once all settings have been entered, click Next step.
- Next, you will enter the settings for your new Zone.
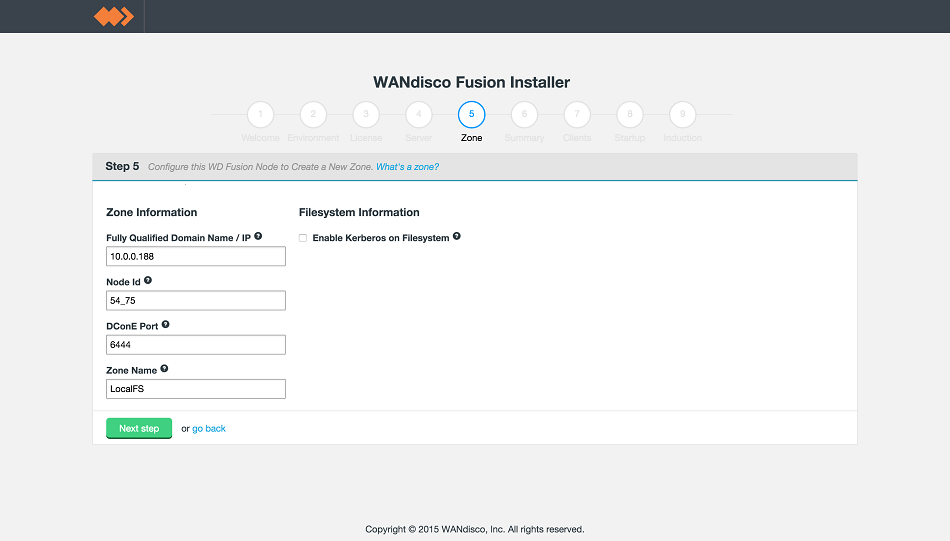
LocalFS figure 15.
Zone Information
Entry fields for zone properties
- Fully Qualified Domain Name
- Full hostname for the server.
- Node ID
- A unique identifier that will be used by WD Fusion UI to identify the server.
- DConE Port
- TCP port used by WD Fusion for replicated traffic.
- Zone Name
- Name used to identify the zone in which the server operates.
Filesystem Information
This quickstart guide doesn't cover the use of Kerberos. You can find information about deploying into a kerberized environment in the WD Fusion User Guide: Admin Guide - Setting up Kerberos
- Review the summary. Click Next Step to continue.
LocalFS figure 16.
- In the next step you must complete the installation of the WD Fusion client package on all the existing HDFS client machines in the cluster. The WD Fusion client is required to support data WD Fusion's replication across the Hadoop ecosystem.
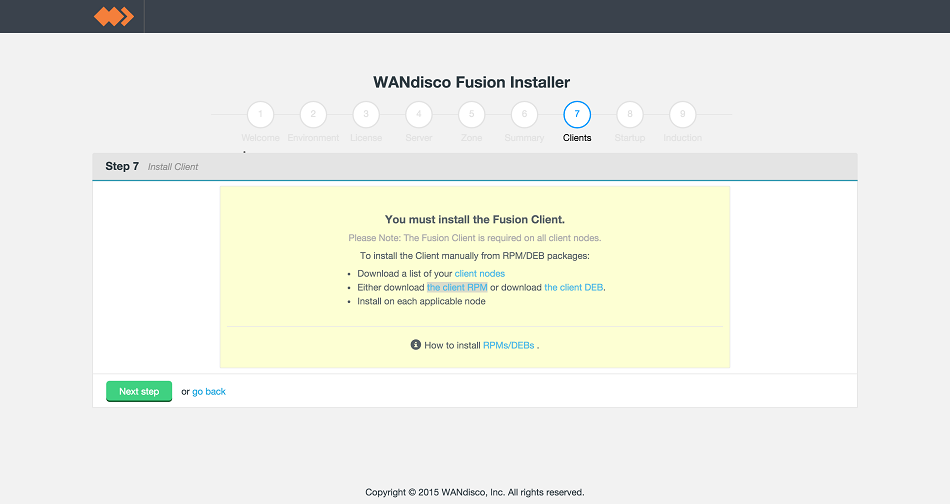
LocalFS figure 17.
In this case, download the client RMP file. Leave your browser session running while you do this, we've not finished with it yet.
- For localFS deployments, download the client RPM manually onto each client system, in the screenshot we use
wgetto copy the file into place.
LocalFS figure 18.
- Ensure that the client install file has suitable permissions to run. Then use your package manager to install the client.
yum install -y fusion-localfs-2.7.0-client-localfs-2.6.4.1.e16-1510.noarch.rpm
LocalFS figure 19.
- Once the client has successfully installed you will see a verification message.
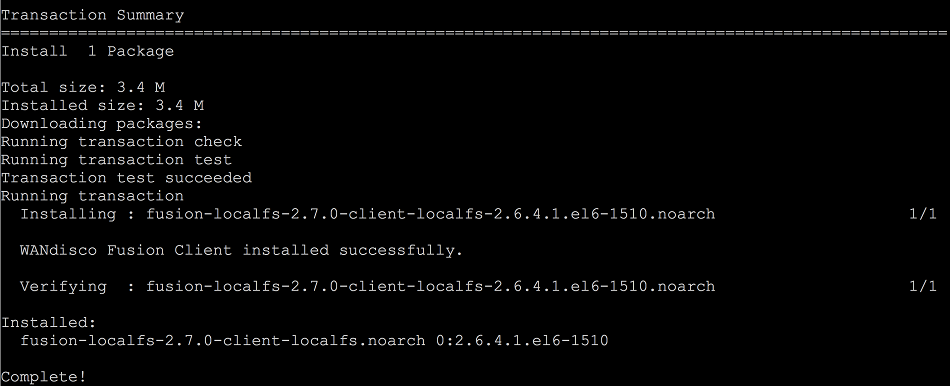
LocalFS figure 20.
- It's now time to return to the browser session and startup WDFusion UI for the first time. Click Start WD Fusion.
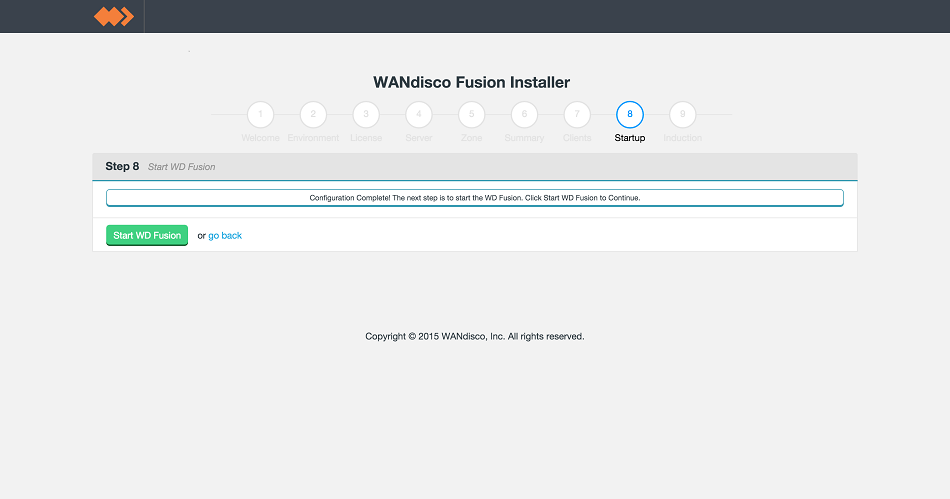
LocalFS figure 21.
- Once started we now complete the final step of installer's configuration, Induction.

LocalFS figure 22.
For this first node you will miss this step out. For all the following node installations you will provide the FQDN or IP address and port of this first node. (In fact, you can complete induction by referring to any node that has itself completed induction.)
What is induction?
Multiple instances of WD Fusion join together to form a replication network or ecosystem. Induction is the process used to connect each new node to an existing set of nodes. - Login to WD Fusion UI using the admin username and password that you provided during the installation. See step 6.
LocalFS figure 23.
- The installation of your first node is now complete. You can find more information about working with the WD Fusion UI in the Admin section of this guide.
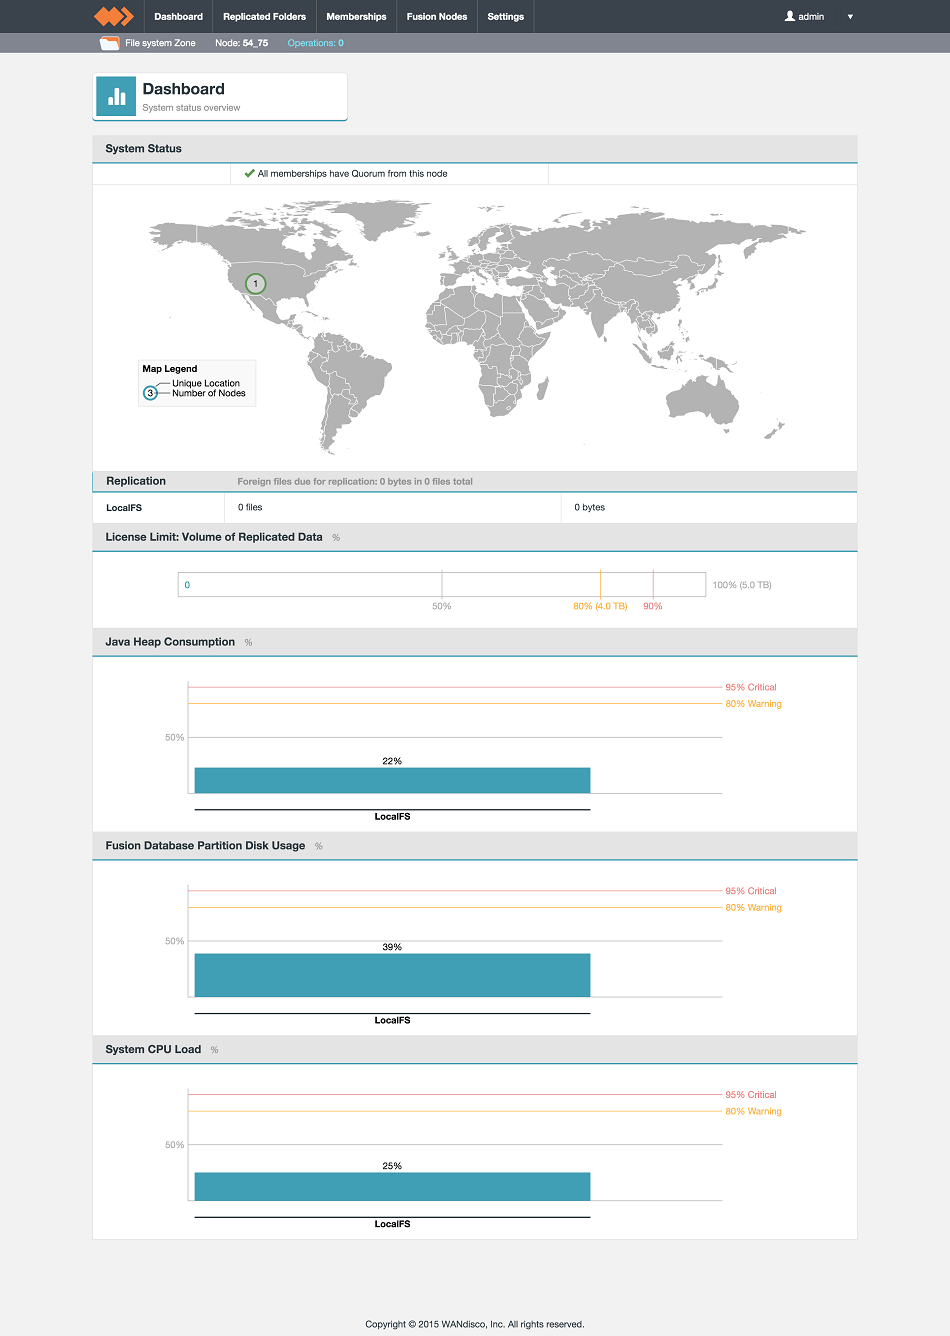
LocalFS figure 24.