1 Introduction
1.1 Requirements for using the plug-in
1.2 Password Control
1.3 Download the plug-in
2. Using the Plug-in
2.2 LDAP Properties For Subversion
3. Example setup
WANdisco offers the LDAP/NIS plug-in as a free, unsupported plug-in that allows you to automatically synchronize user properties (user id, password) from an LDAP/NIS database.
You must have a production license. User passwords must be stored as plain text in the LDAP server
WANdisco's products do not handle user authentication, although you can configure them to periodically connect with the LDAP/NIS database server to pull user information. You can also use the admin console to select any new users that appeared during the synchronization with LDAP/NIS.
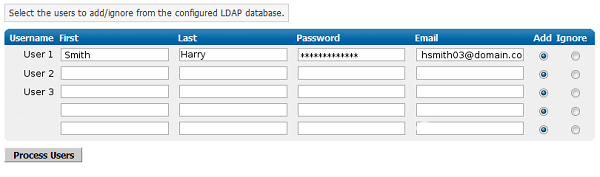
You will need to querying LDAP according to the WANdisco user fields;
Username,First,Last,Email,Add,Ignore
To make full use of the LDAP integration you must set your WANdisco product to control the Subversion password. You must be running WANdisco (Access Control or MuliSite) on the same server as Subversion.
Is WANdisco Controlling the Password File?
During setup, you enter settings that relate to your Subversion.
There's a checkbox that relates to "Manage Password File:" (see below)
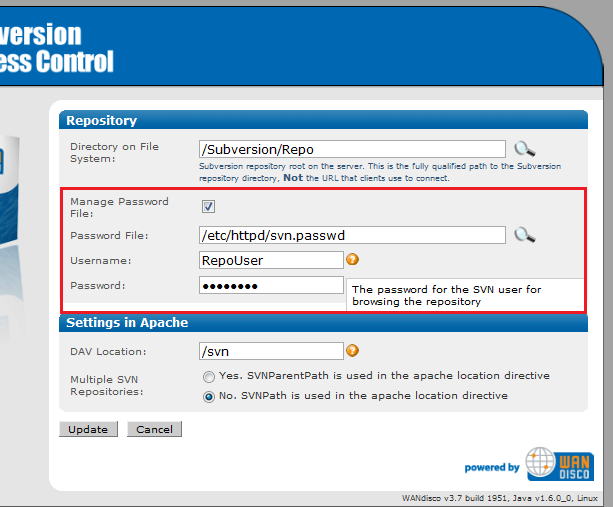
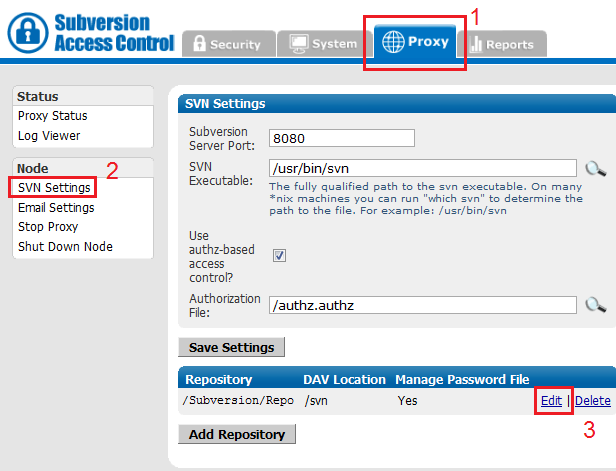
You can update your these settings after setup by going to the Proxy tab(1) and clicking on SVN settings(2), then editing the Repository settings(3).
http://wandisco.com/php/support_downloads.php?fdetail=ldap_nis.jar.
You only need to do this at one site. As with any users in WANdisco, WANdisco replicates any users imported with this plug-in to other sites.
Refer also to the Basic Example at the end of this document.
perl svnreplicator
You can then add the new users to WANdisco's user database if:
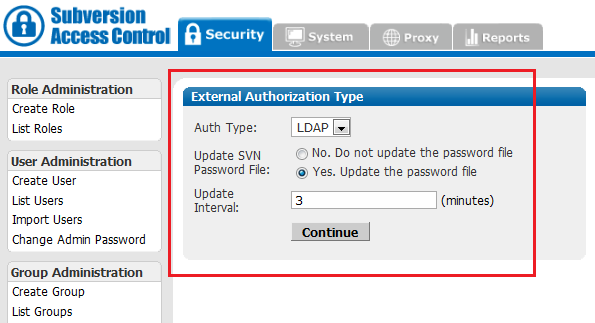
When you've finished, click Continue. You can edit these settings later by clicking Change Type.
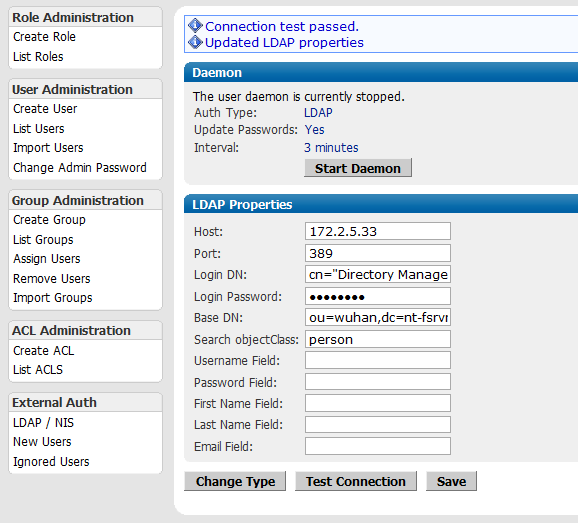
Test Connection This button lets you confirm that you can connect to your LDAP server with the details you've entered.
Save Click this to store your LDAP settings before closing the screen.
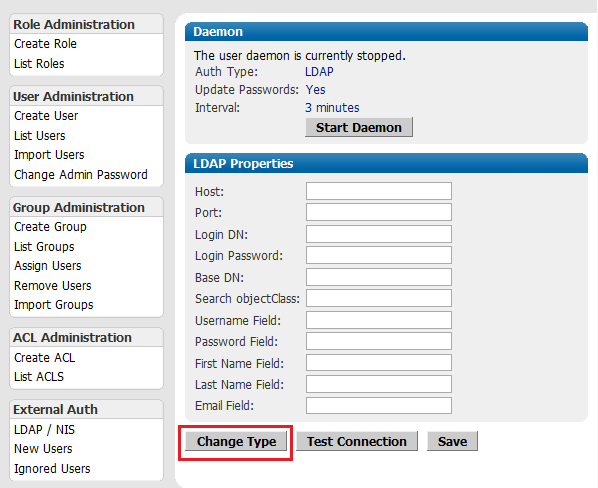
To set up integration with LDAP, you must specify the following properties. An asterisk (*) indicates the field is mandatory.
cn=Manager,dc=example,dc=com
cn=Manager,dc=example,dc=com
WANdisco does not support customer integration of LDAP / NIS databases. Customers are responsible for their own integration.
Store the password in clear text on LDAP server as required by Subversion only if the Update Passwords flag is set and auto-update of $SVNROOT/conf/passwd is turned on.
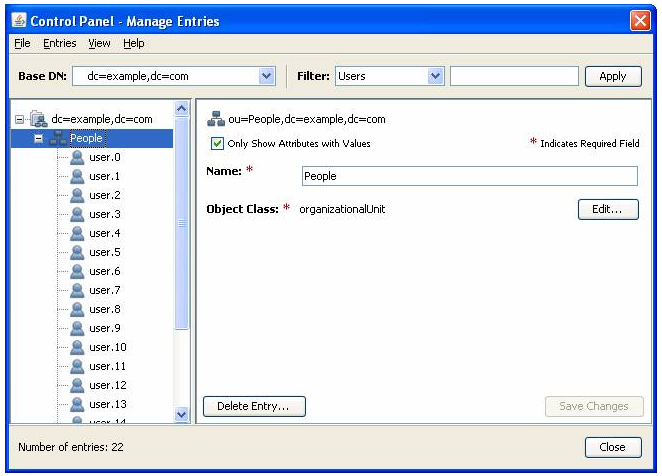
1. A basic example of how to use the plug-in is illustrated in the following screen shots.
First, use an LDAP browser to see the directory structure of your LDAP server.
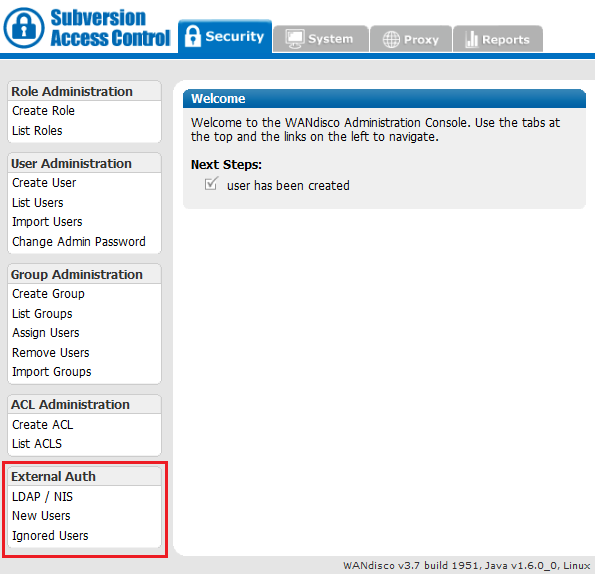
2. Configure the daemon process that connects to the LDAP server. Choose an interval for the initial data retrieval that suits your platform requirements. Go to the Security tab and click LDAP/NIS.
3. Fill in the LDAP / NIS properties according to your directory structure.
4. Click Save to store your entries. Click Start Daemon. When the daemon is started it will check for new users, and then check at whatever interval you specified in the setup. If you ever want to trigger a check, stop, then restart the daemon. Click New Users. The page shows all the users retrieved from your LDAP server. Check the Add radio button next to each name you wish to add. Click Process Users.
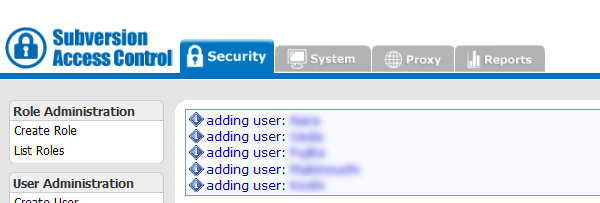
5. Access Control will confirm what action has been taken, as illustration below.
6. Verify the users were added. Click List Users.
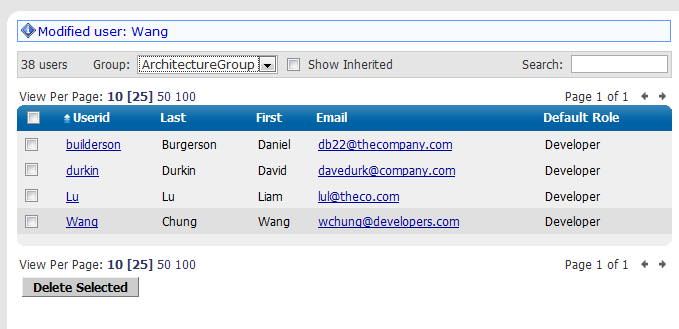
7. The LDAP integration is complete. You may want to modify the daemon process interval, in accordance with your system administration schedule.
To set up integration with LDAP, you must specify the following properties. An asterisk (*) indicates the field is mandatory.
Version 2.0 - © 2009 WANdisco - December 2009